Usage Instructions
In the following document, we’ll describe the step by step instructions to set up a working sample in the formsflow.ai solution.
Table of Contents
The following instructions can be followed to use formsflow.ai solution after the successful healthcheck of all formsflow.ai services.
Designer Steps
- Log in to http://localhost:3000 (forms-flow-web) with valid user credentials for the designer.
- After the log in is successful, you will be redirected to http://localhost:3000/form where
you
can
Create/View/Edit/Delete a form. - To create a form click on Create Form Button, you can use the Drag-and-drop forms-builder to create a new form.
- Once the form creation is completed click on Save & Preview Button, you can also modify the form by clicking on Edit Button else click on the Next Button to proceed further at this point.
- At this stage form designing is completed, you can click on the EDIT
Button and associate a suitable workflow as per the business
requirement.
Workflows that are marked as [Internal] should not be associated with a form.
- After the workflow association is completed click on the Next Button to preview and confirm.
- You can click on the EDIT Button and select
publish the form for clientsto send it for client usage. - Click on SAVE Button to complete the design part.
- Form designing is successfully completed, you can now Log out and go to Client Steps
Client Steps
- Log in to http://localhost:3000 (forms-flow-web) with valid user credentials for the client.
- After the Log in is successful you will be redirected to http://localhost:3000/form where
you
can
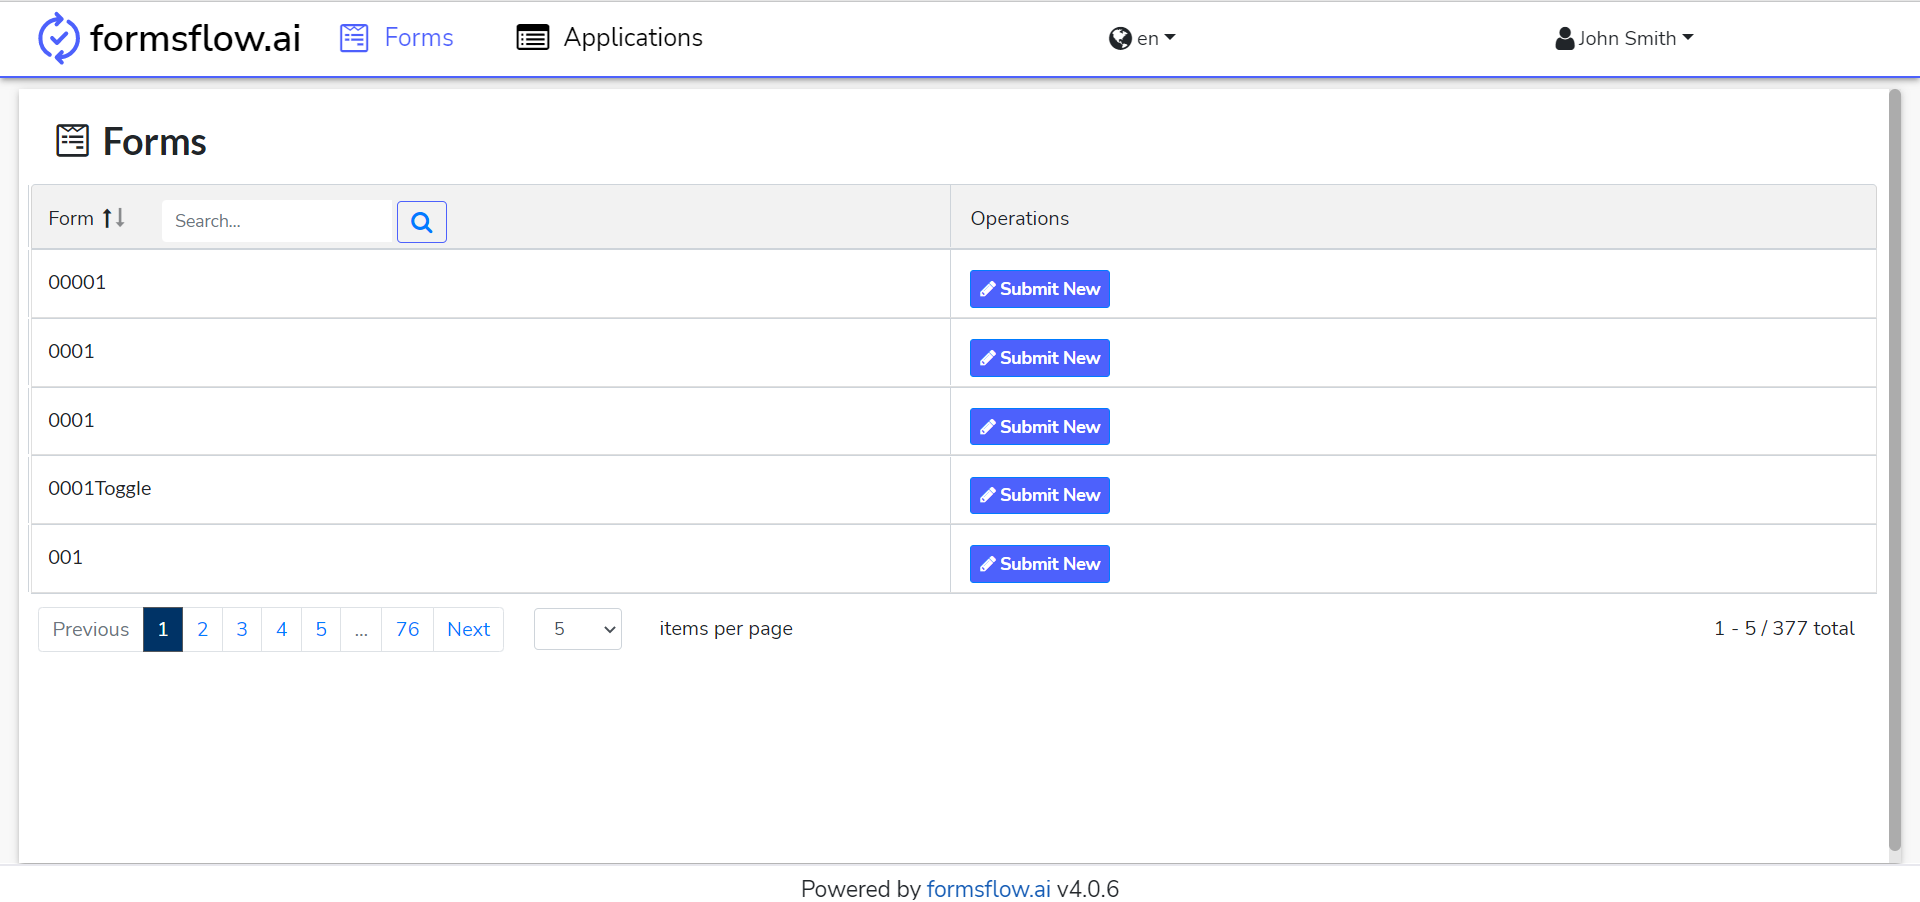
View and Submit a form. - Click on Submit New Button to fill a form and submit it.
- Fill in the details and submit the form, You can repeat this action as per your requirement.
- If you had associated a workflow with the form then the workflow will be started.
- This action is completed, you can now Log out and go to Reviewer Steps if you have a user review mentioned in your workflow.
Reviewer Steps
- Log in to http://localhost:3000 (forms-flow-web) with valid user credentials for the reviewer.
- After successful Log in, you will be redirected to http://localhost:3000/task where
you
can navigate to the
Tasks tabto see the tasks pending to be reviewed. - You can click on a task item to review the task and take an action. There are options to Filter Tasks and sort by Created Date to easily search for the task you want.
- On selecting a task item there are options to modify the Assignee/ Groups / Due Date / FollowUp Date.
- Also, you can view the Form/ History / Diagram
- You can navigate to the Applications tab to view form submissions.
- You can view the submissions against a form by clicking on View Submissions Button
- You can also submit a new form using STEP 2 from the Forms Tab.
- You can navigate to the Dashboards tab to see the analytics
of
our solution
- You can navigate to the Metrics tab to see an overview of the total form submissions and associated application status to indicate which stage of workflow it is now.
- You can navigate to the Insights tab to see a wonderful dashboard created in the formsflow.ai analytics server.
- Reviewer action is completed.
Clerk & Approver are part of the main group Reviewer, so the steps are similar to Reviewer Steps.
Usage Instructions with examples
The following instructions are using an example from the form.io -
Freedom of Information and Protection of Privacy.
Designer Steps
- Log in to http://localhost:3000 (forms-flow-web) with valid user credentials for the designer.
- After the log in is successful you will be redirected to http://localhost:3000/form where
you
can
Create / View / Edit / Deletea form.
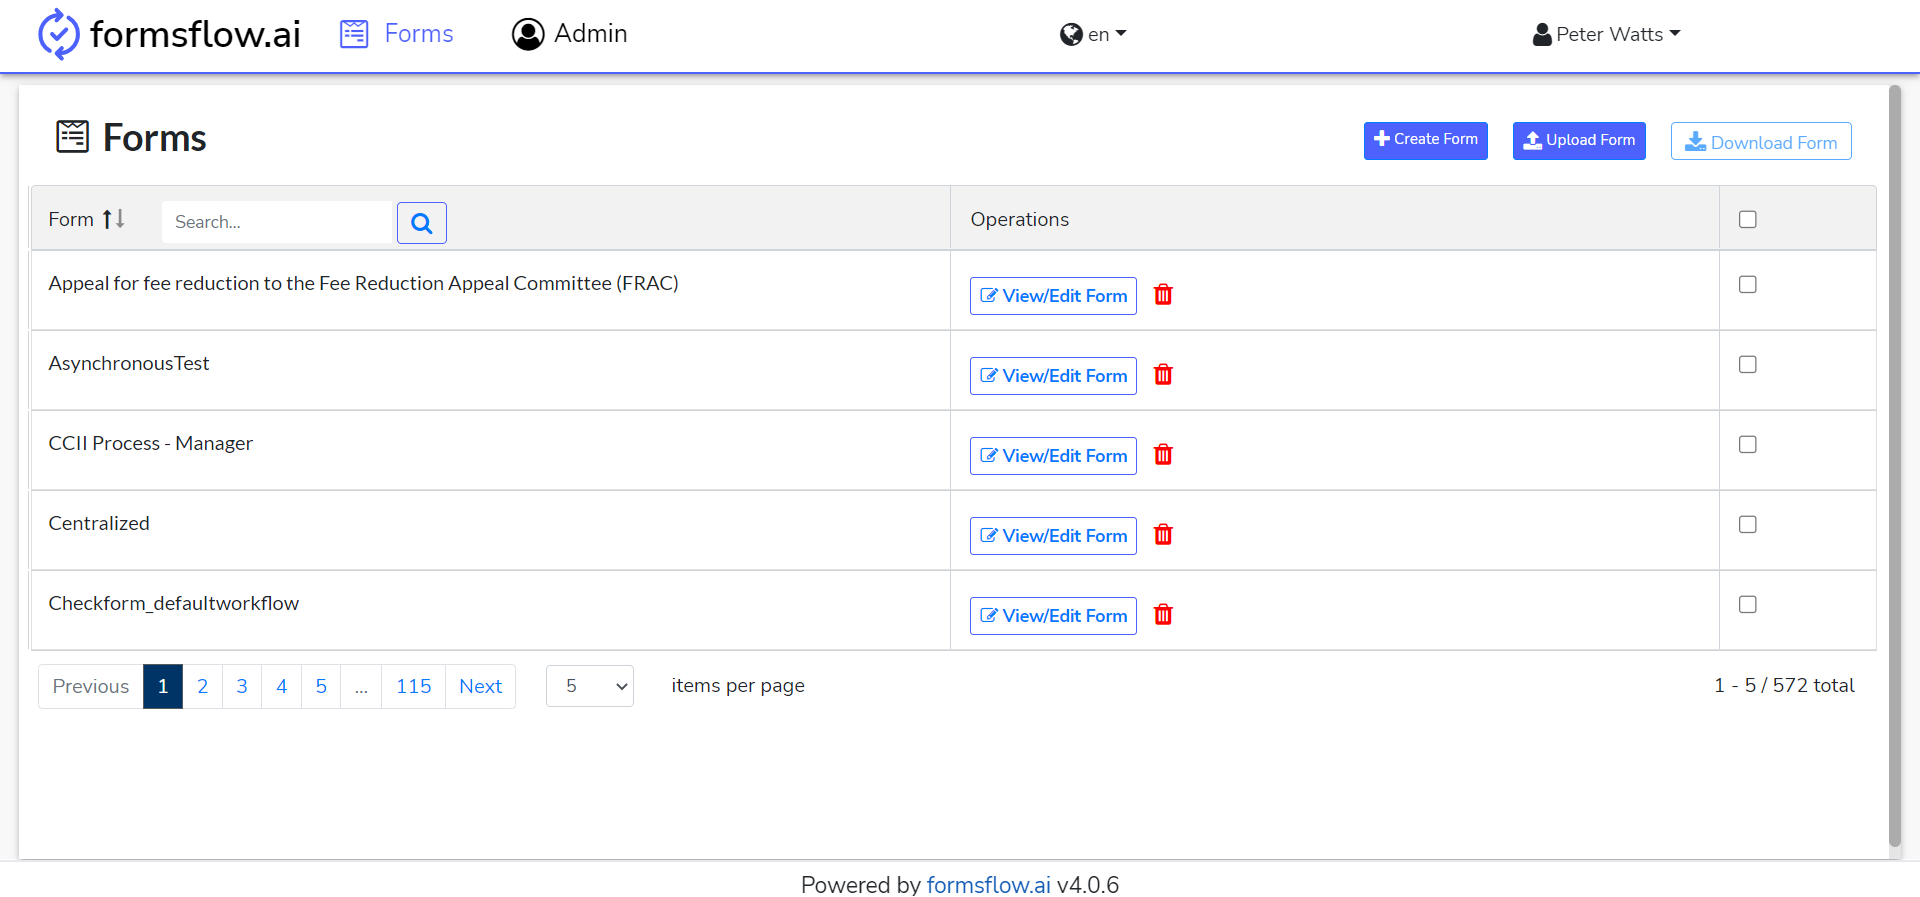
- Select the
Freedom of Information and Protection of Privacyform by clicking on it. - You can modify the form by clicking on the View/Edit Form button or continue by clicking the Next button.
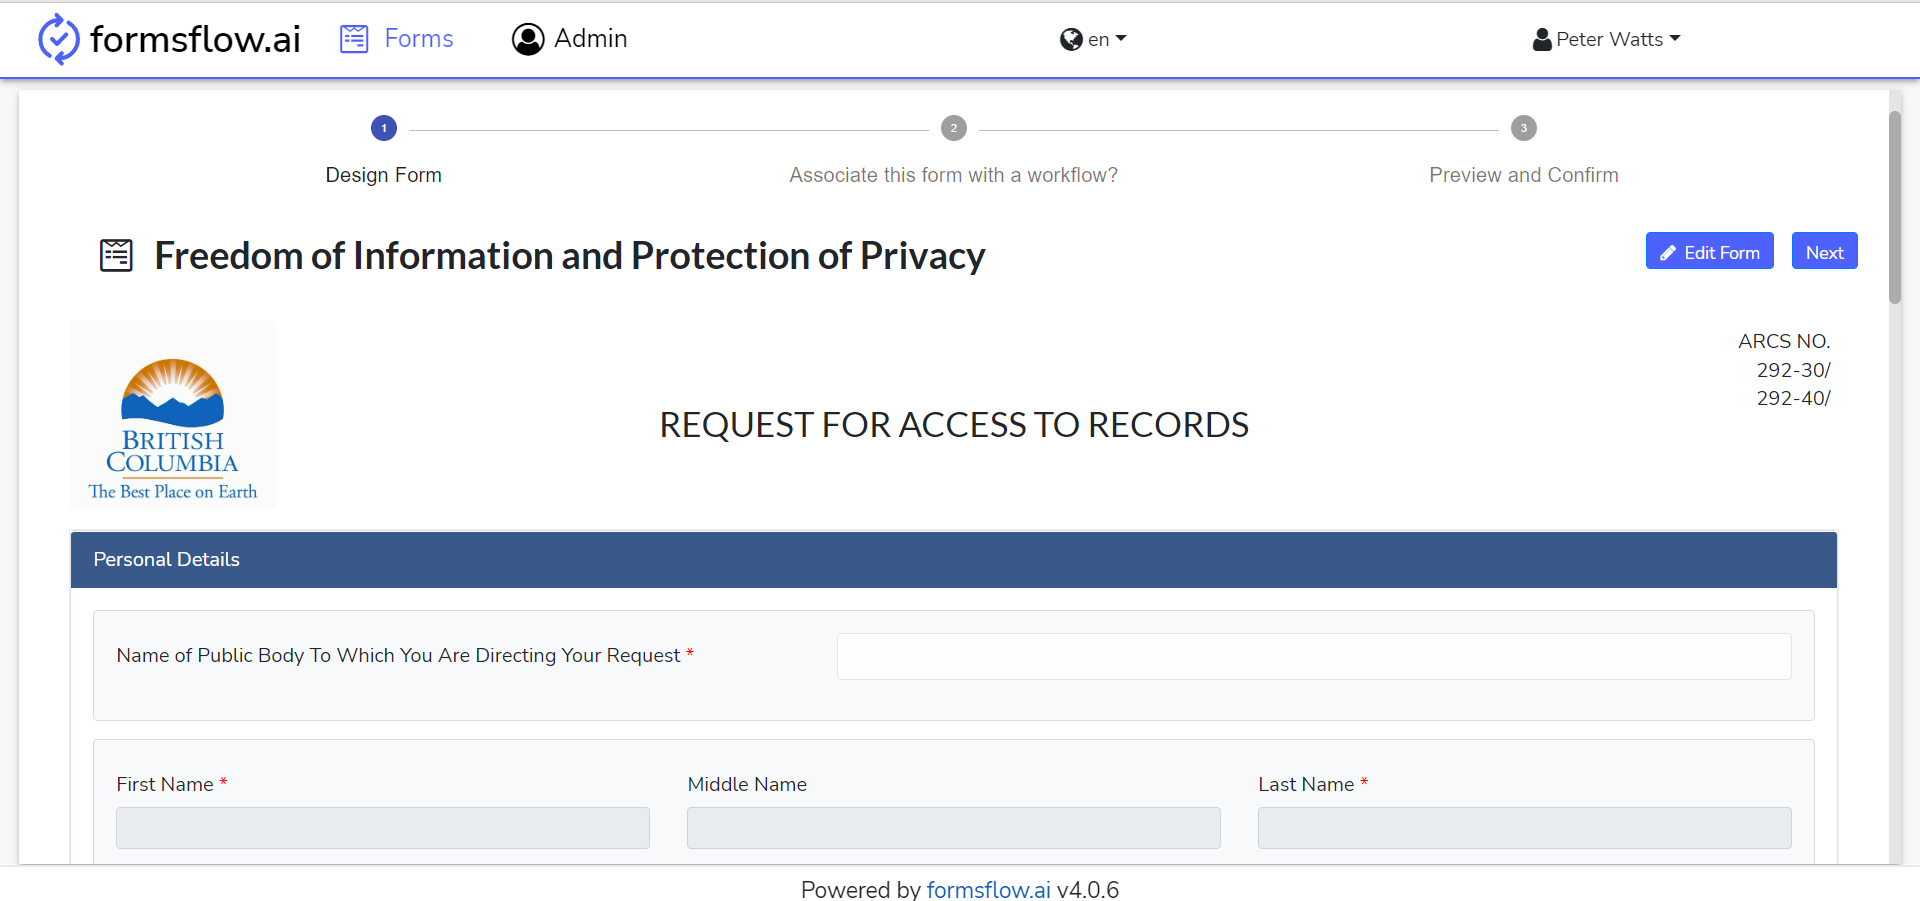
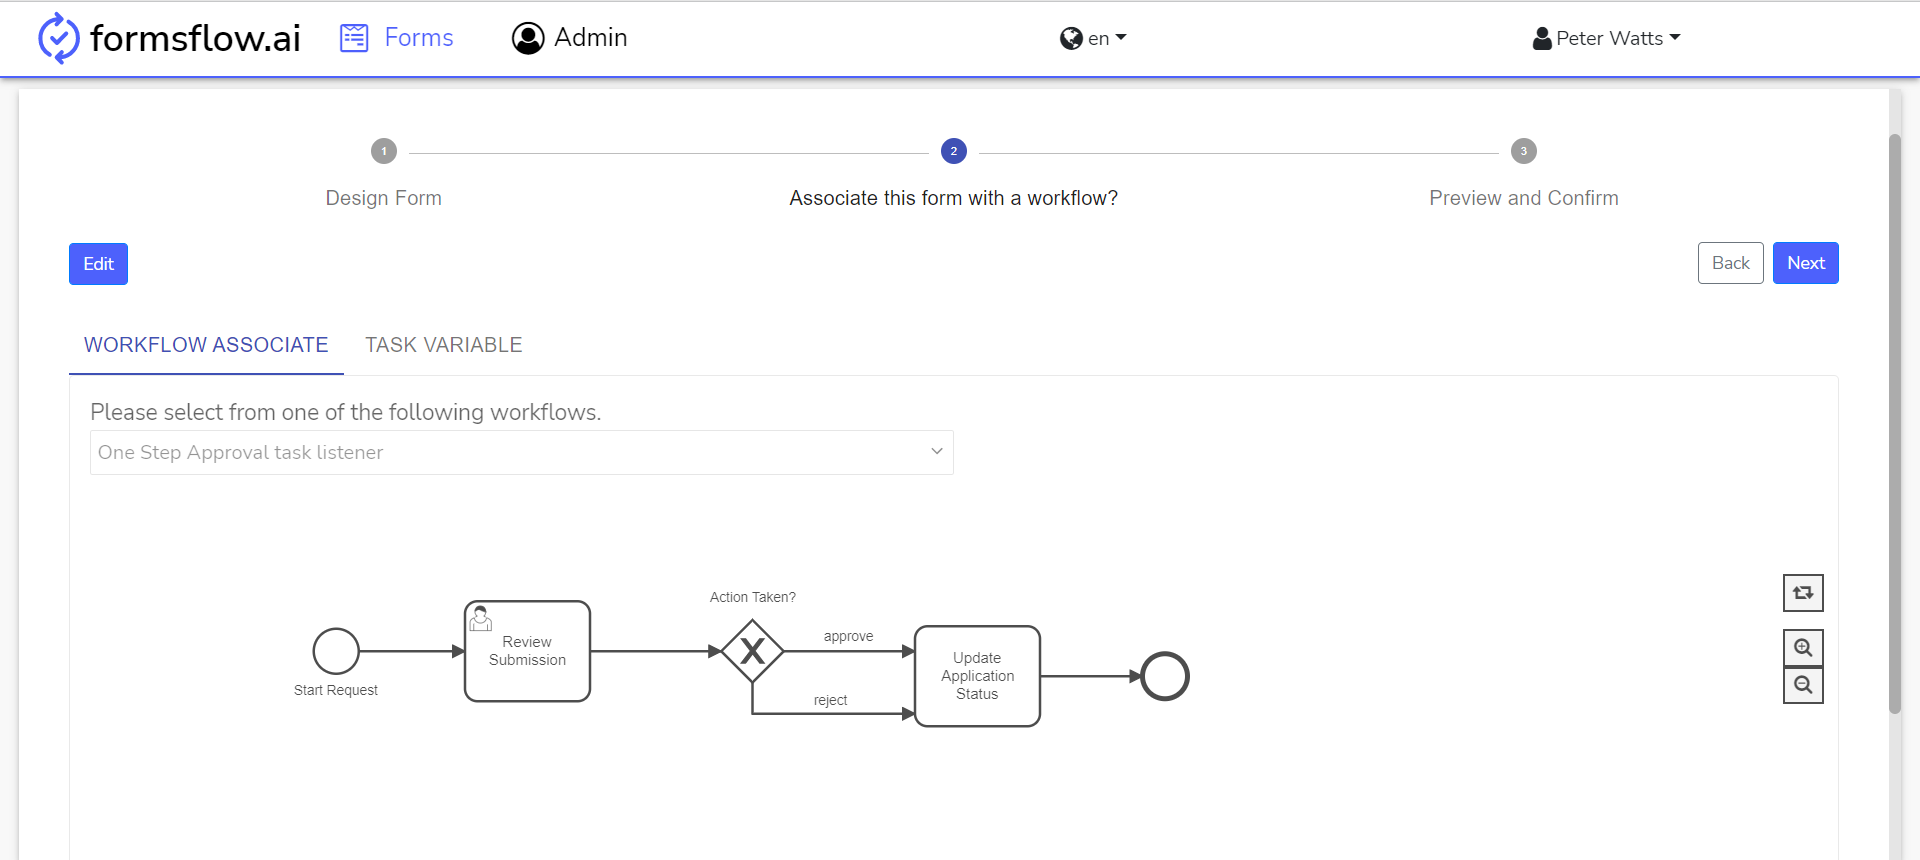
- At this stage form designing is completed, you can click on the EDIT Button and associate a workflow - One Step Approval.
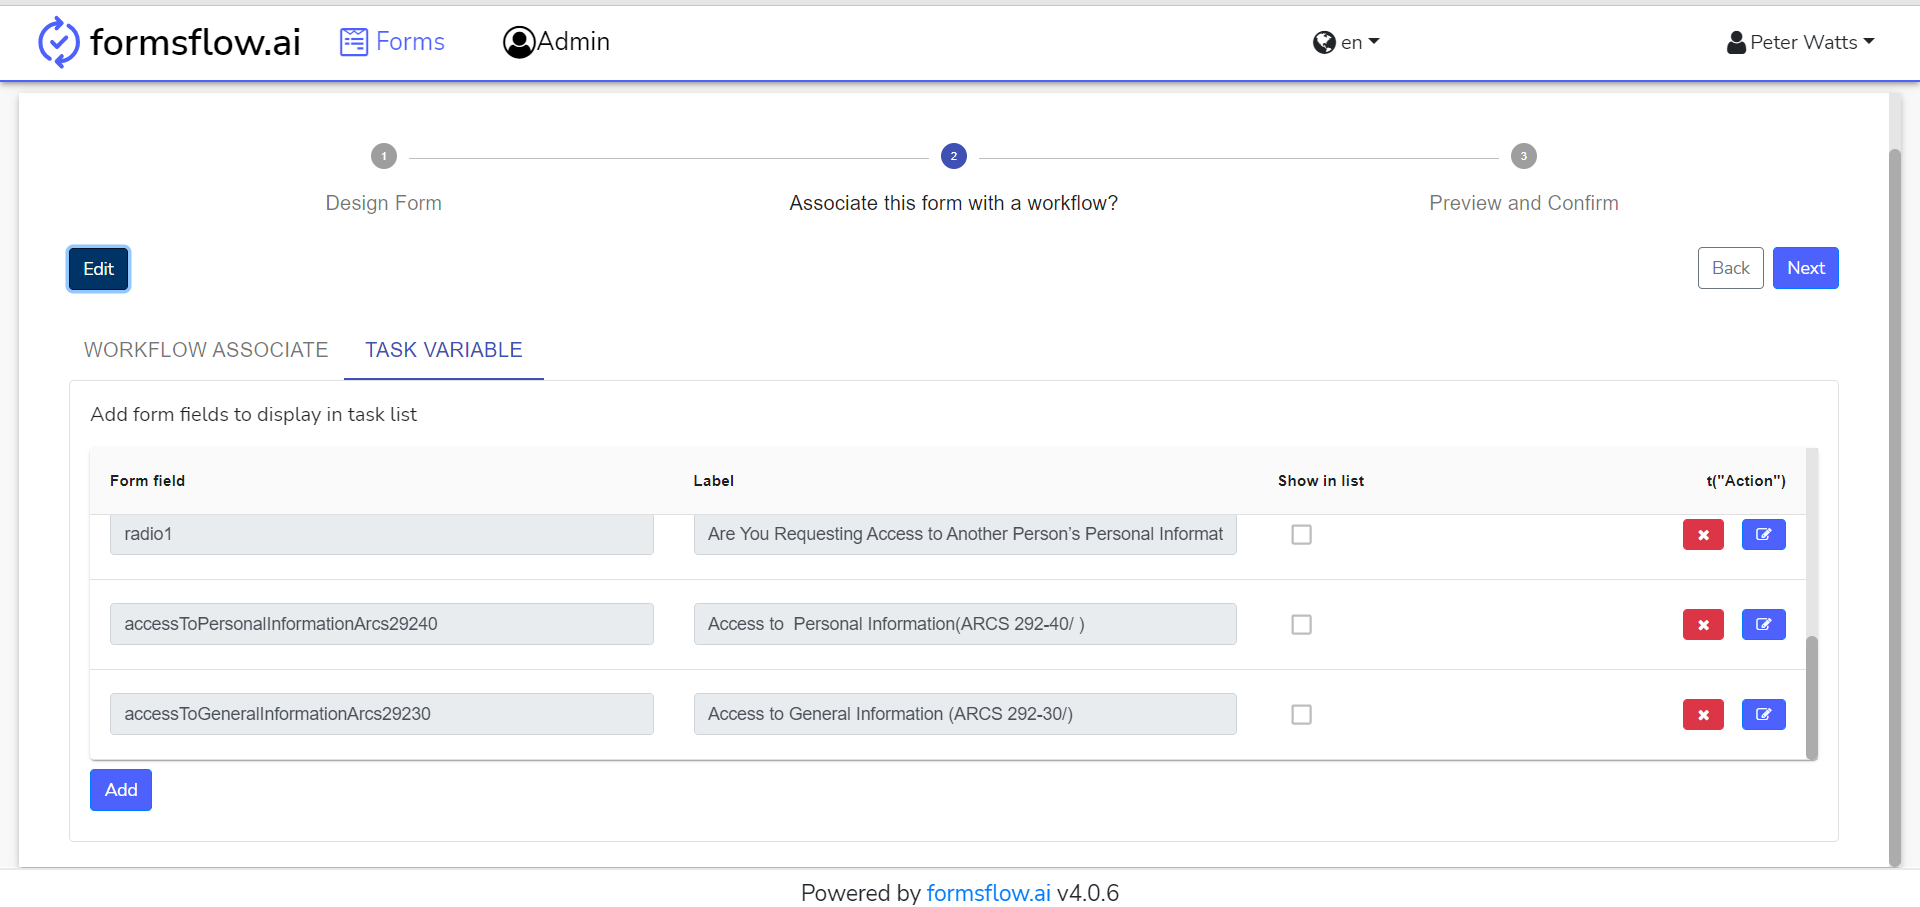
- After associating workflow click on the TASK VARIABLE to add taskvariables.
- After that click on the Next Button to Preview and Confirm.
- You can click on the EDIT Button and publish the form for clients.
-
Click on SAVE Button to completed designing a form.
-
Form designing is successfully completed, you can now Log out and go to Client Steps
Client Steps
- Log in to http://localhost:3000 (forms-flow-web) with valid default user credentials for the client.
- After the Log in is successful you will be redirected to http://localhost:3000/form where you can View and Submit a form.
- Click Submit New Button on the form to fill and submit it.

- If you had associated a workflow with the form, the form will start the workflow.
- This action is completed, you can now Log out and go to Reviewer Steps if you have a user review mentioned in your workflow.
Reviewer Steps
- Log in to http://localhost:3000 (forms-flow-web) with valid default user credentials for the reviewer.
- After the Log in is successful you will be redirected to http://localhost:3000/task.

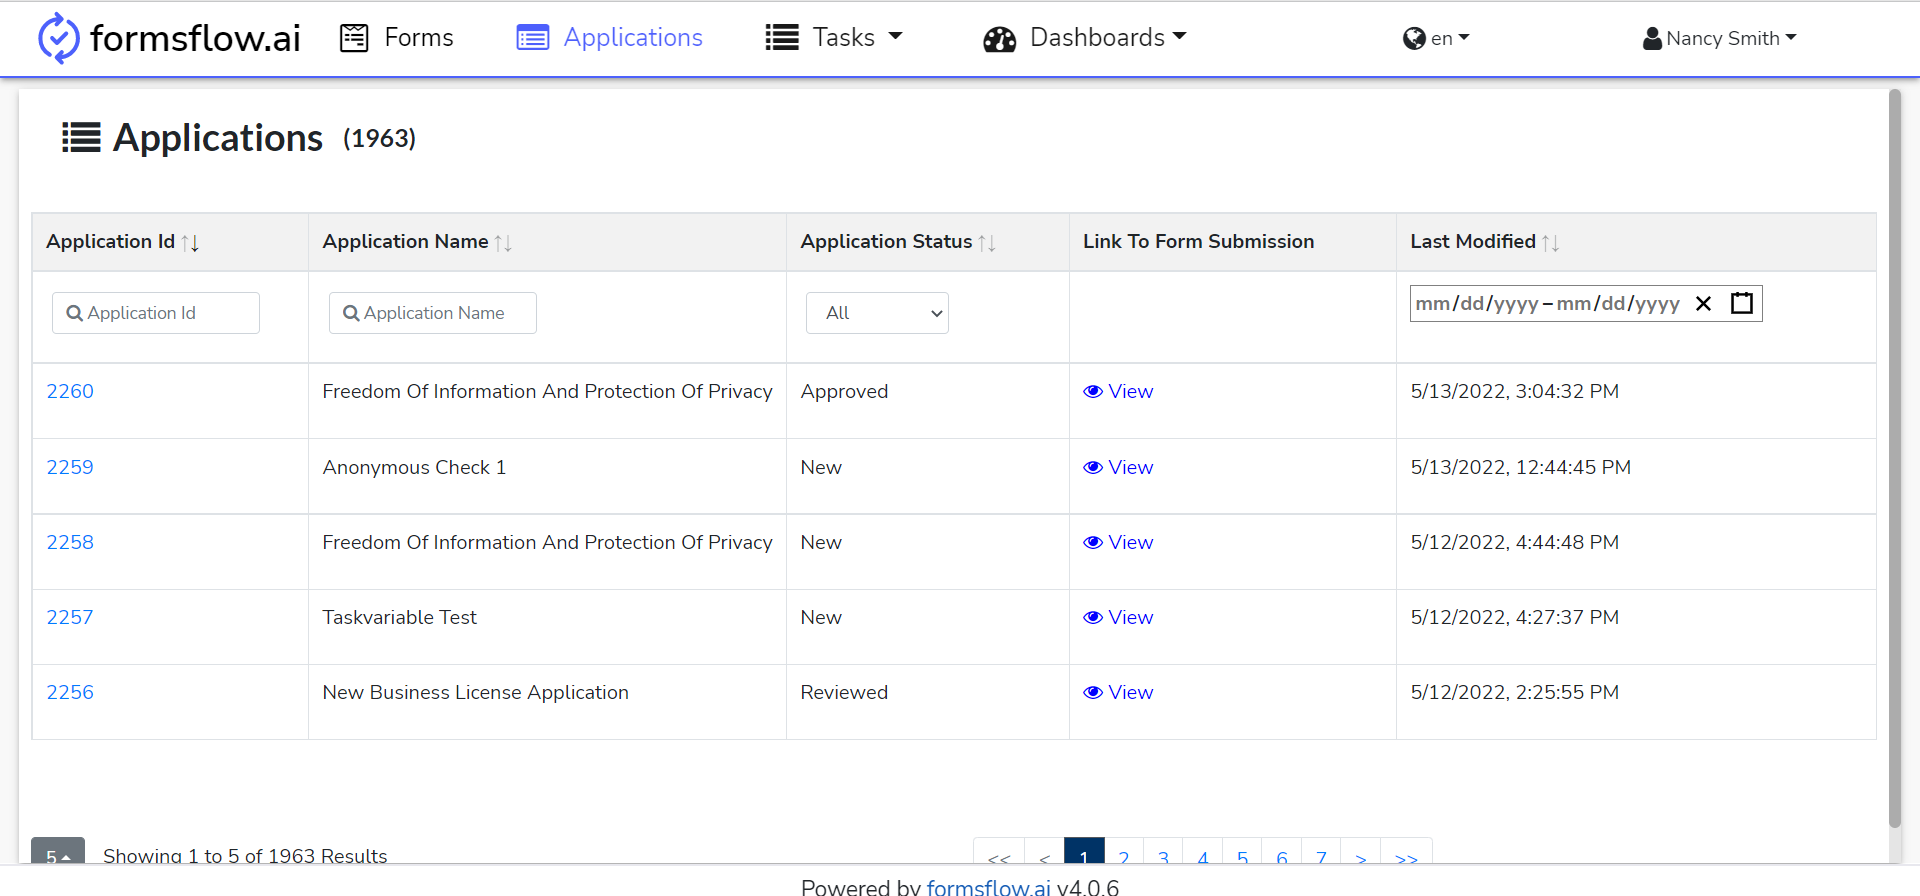
- You can navigate to the Applications tab to View the Form submissions.
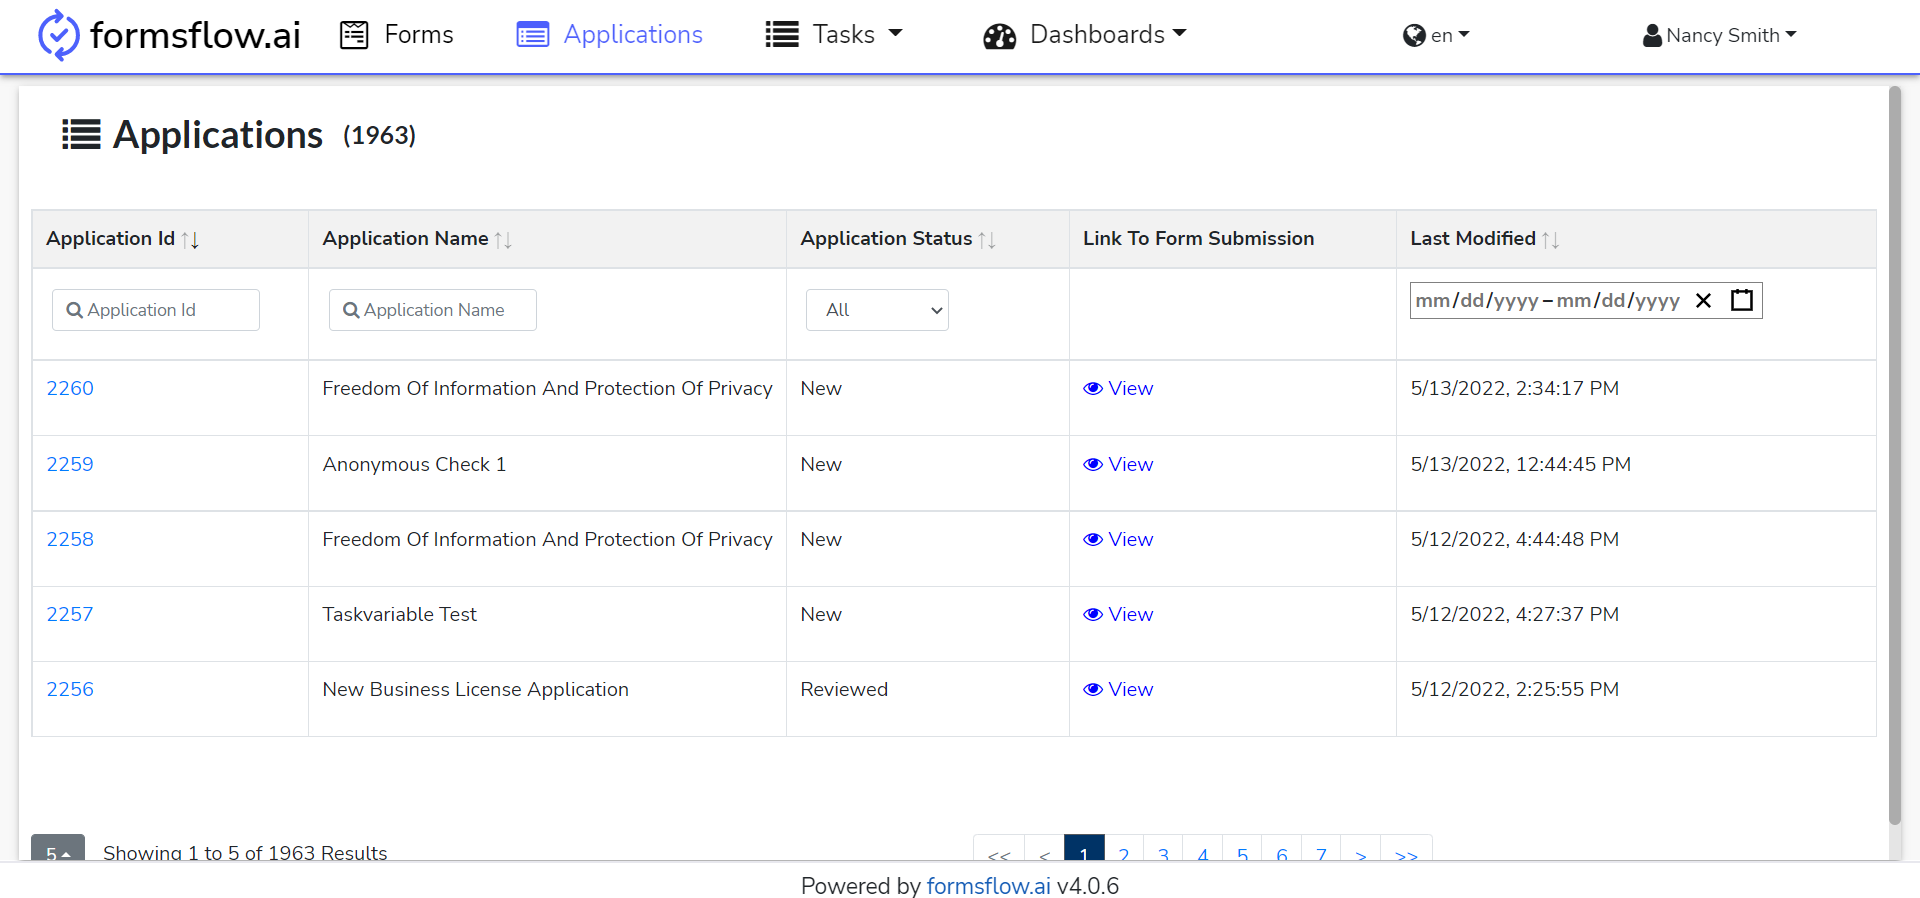
- You can View the submissions against a form by clicking on the View button.
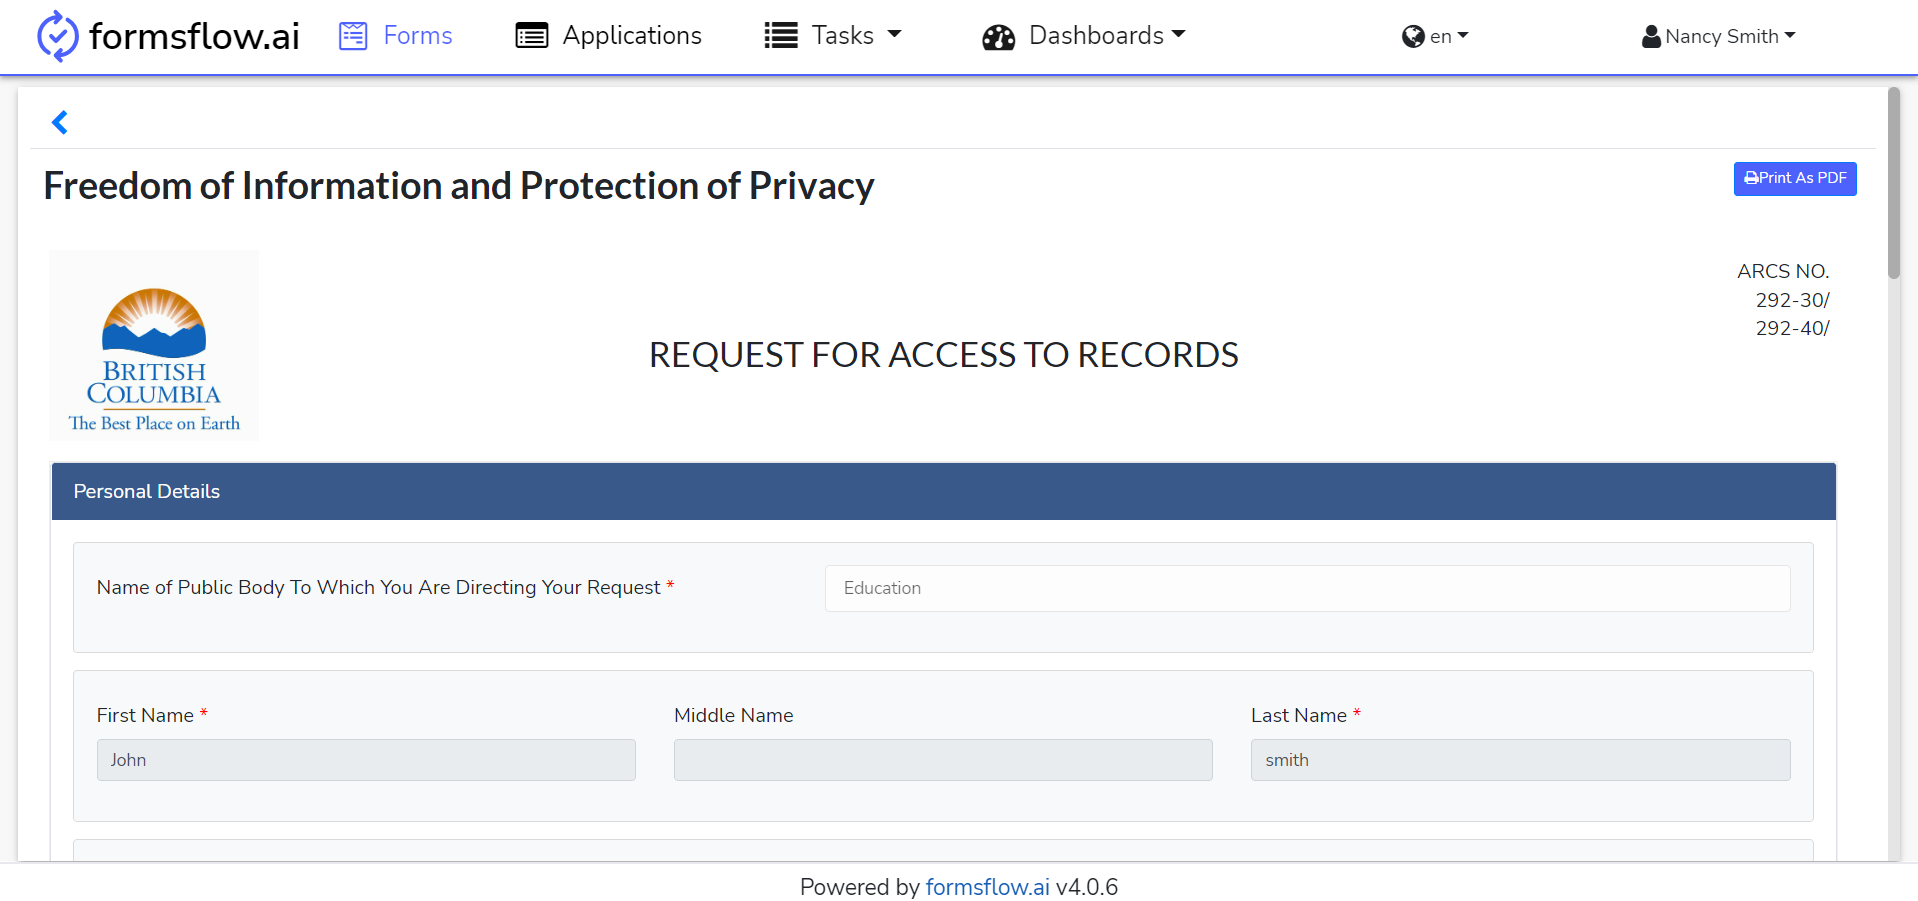
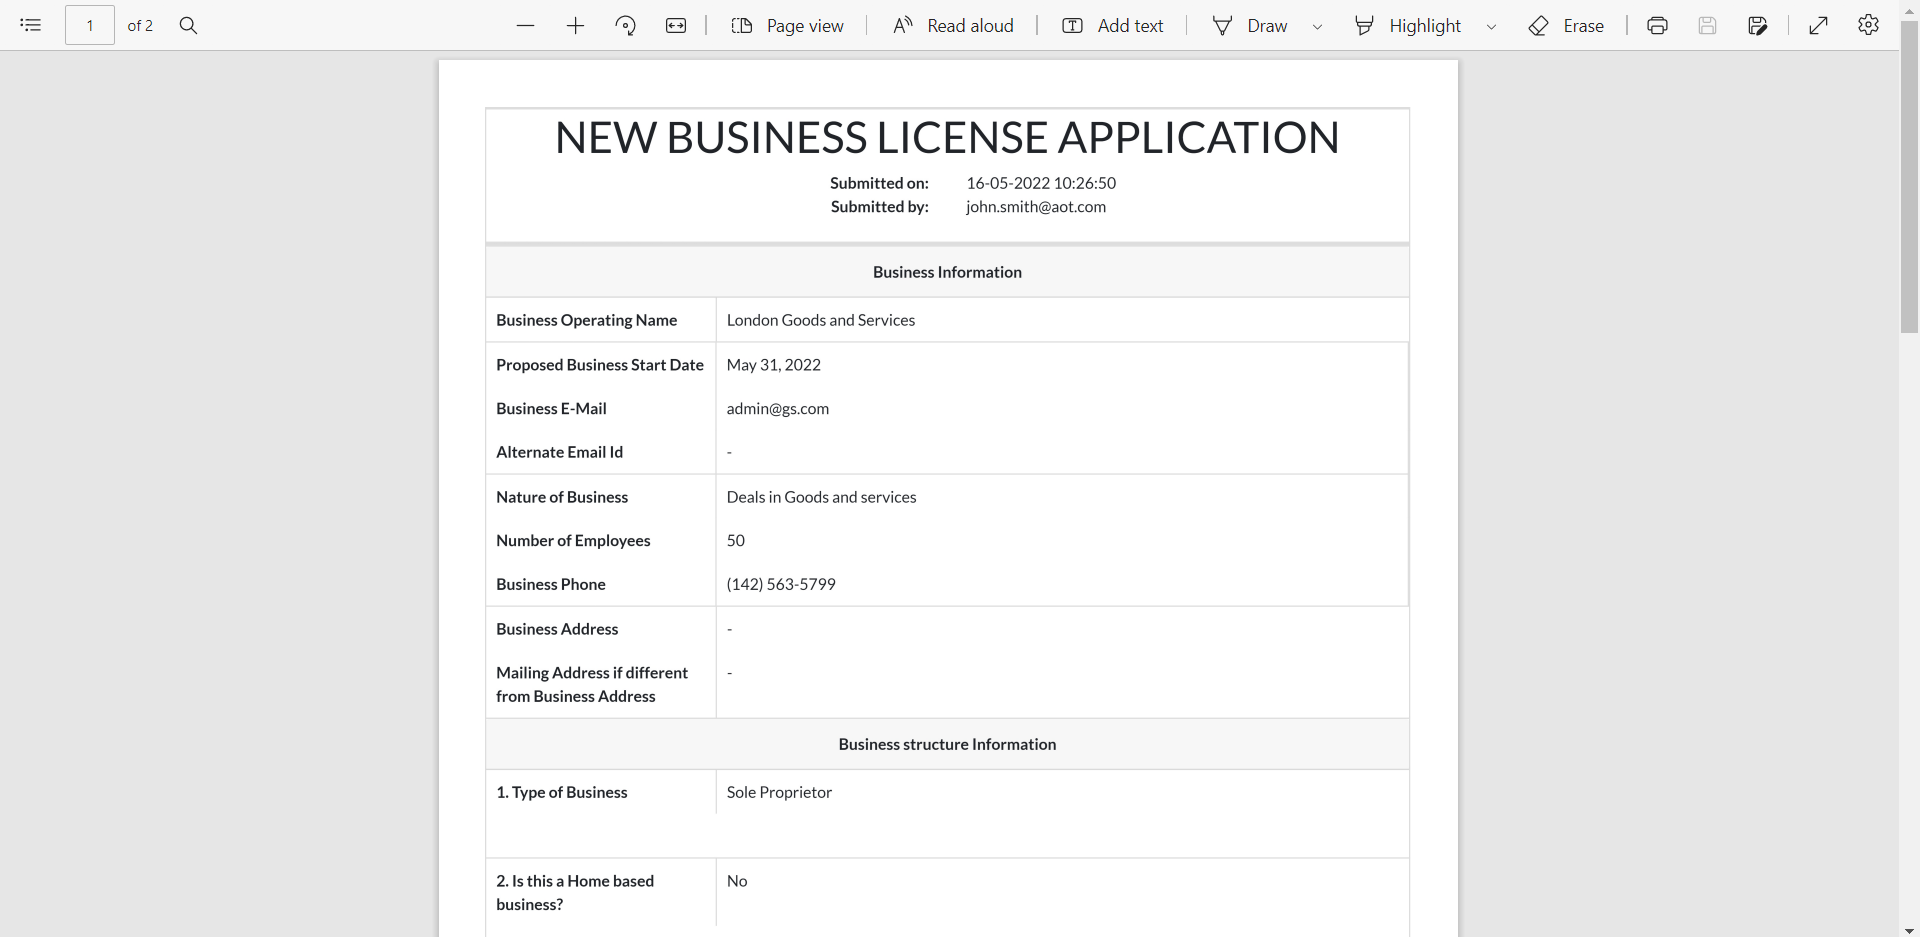
- You can print the Form as a PDF.

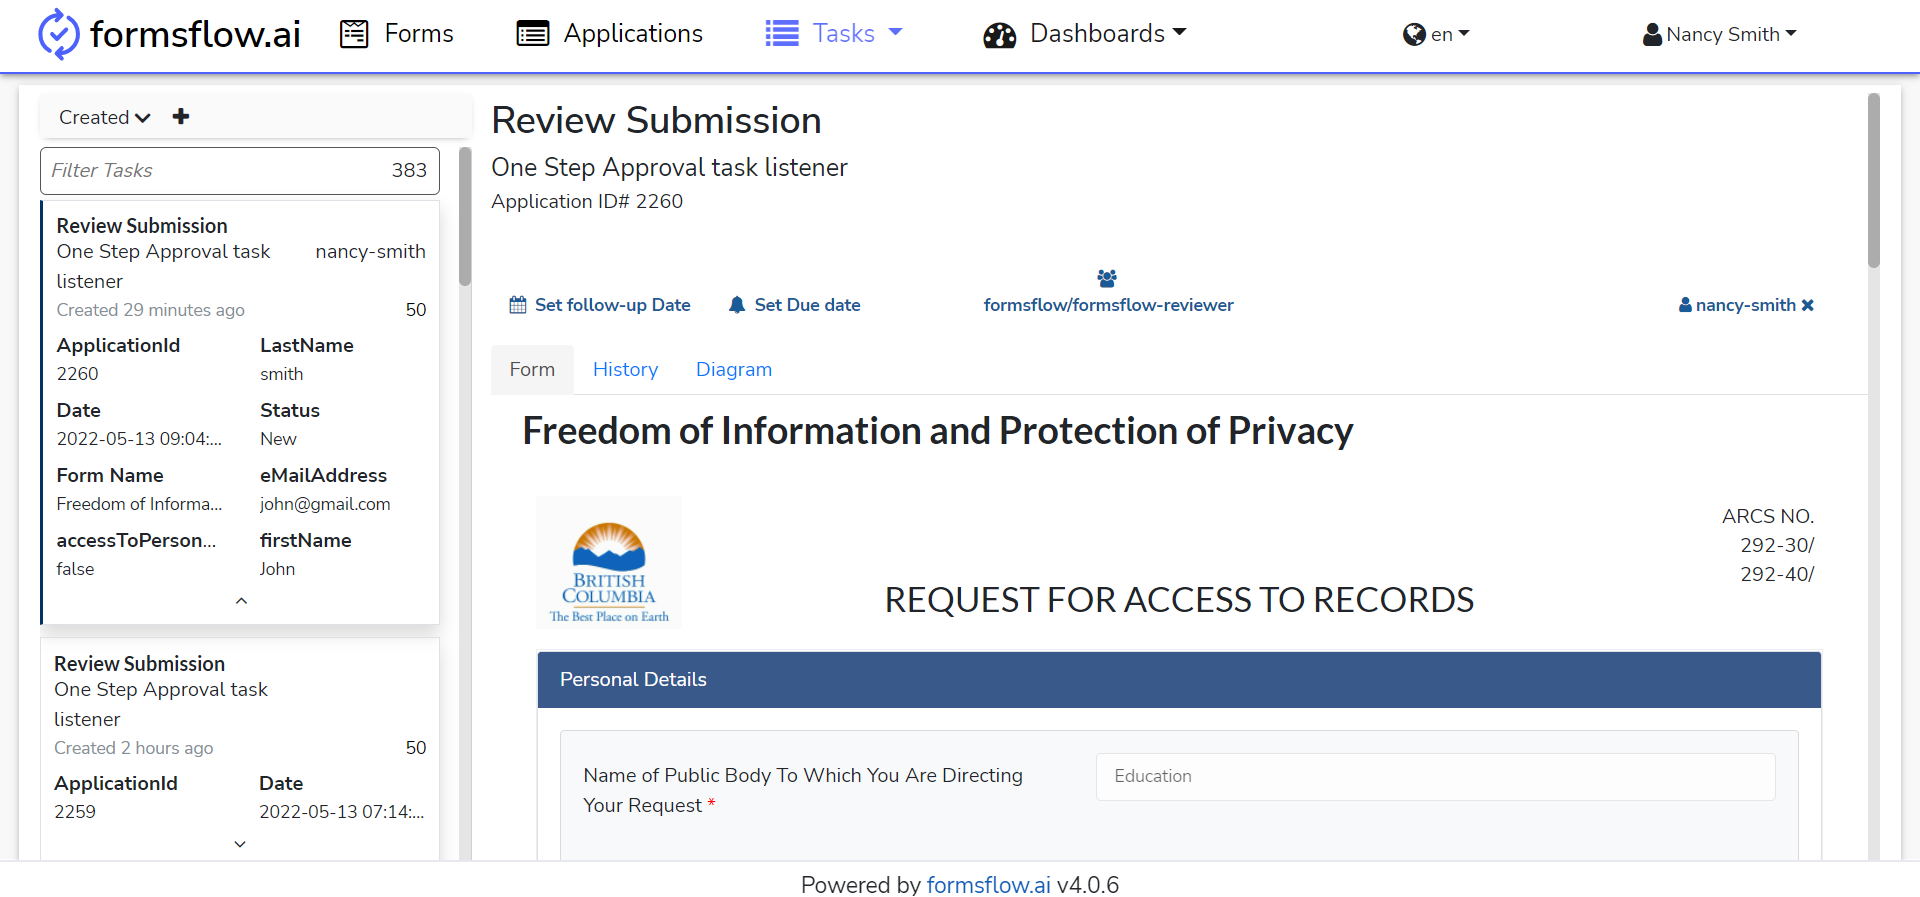
- On clicking the associated task which was recently created ie. Freedom of Information and Protection of Privacy, the task detailed menu usually has three sections - Form, History, Diagram
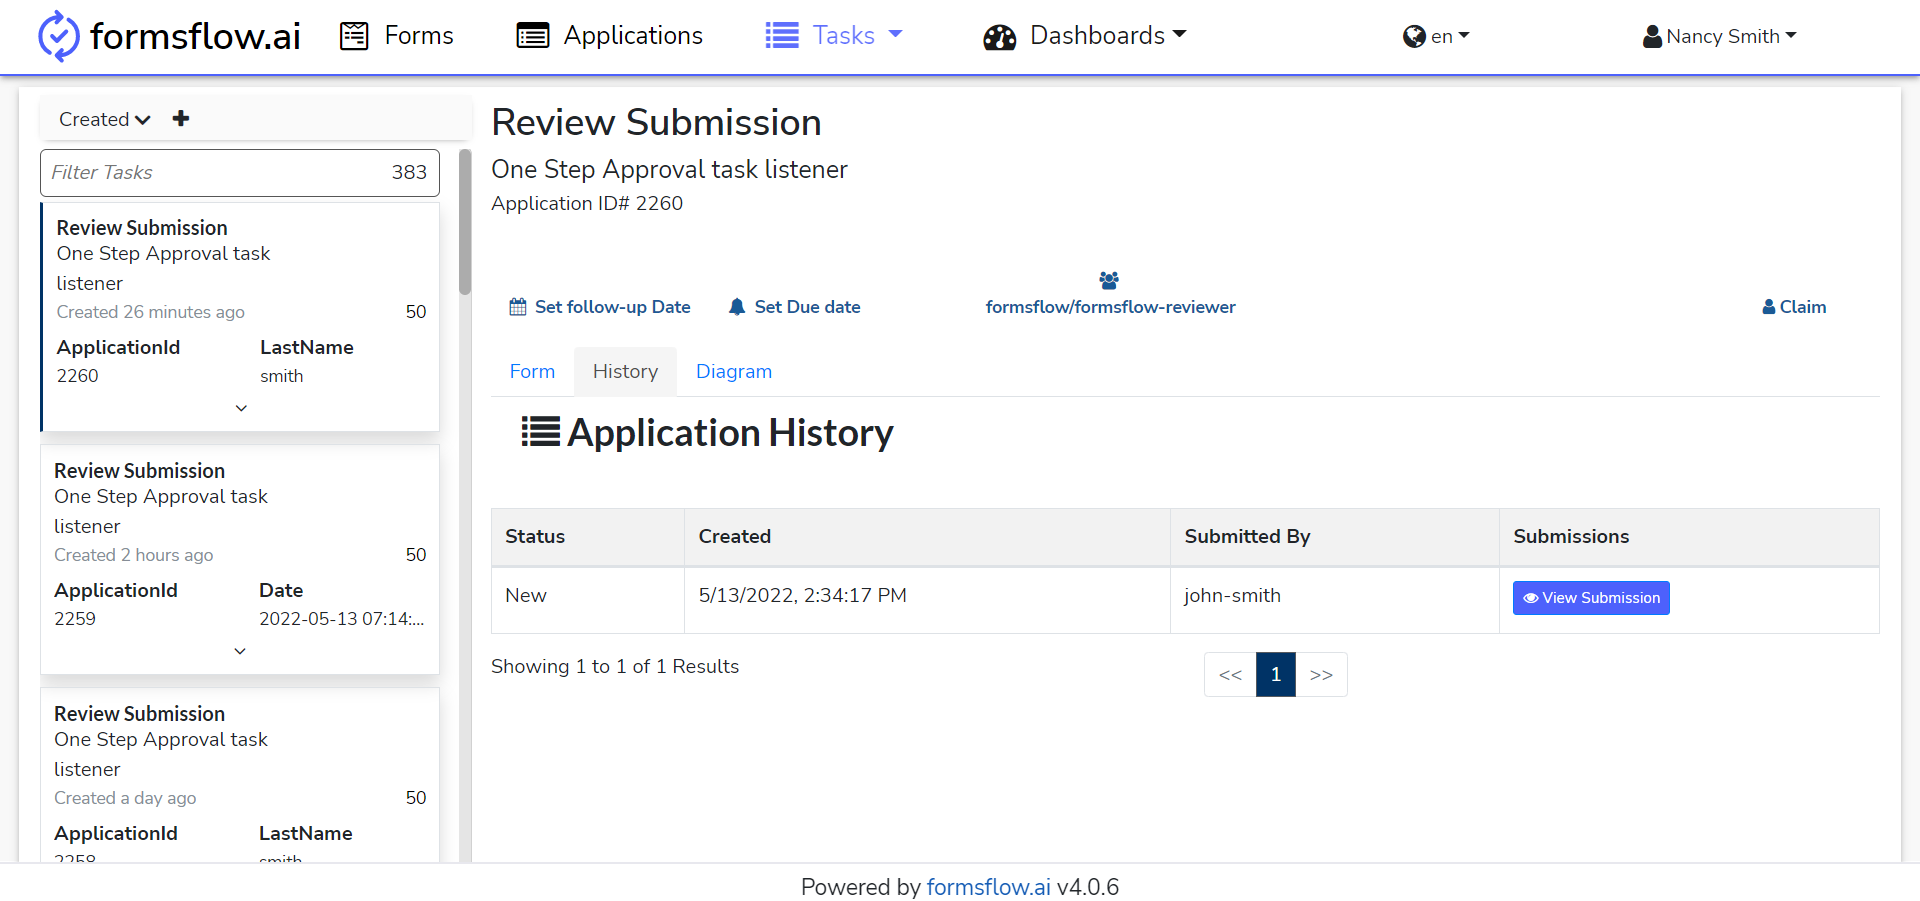

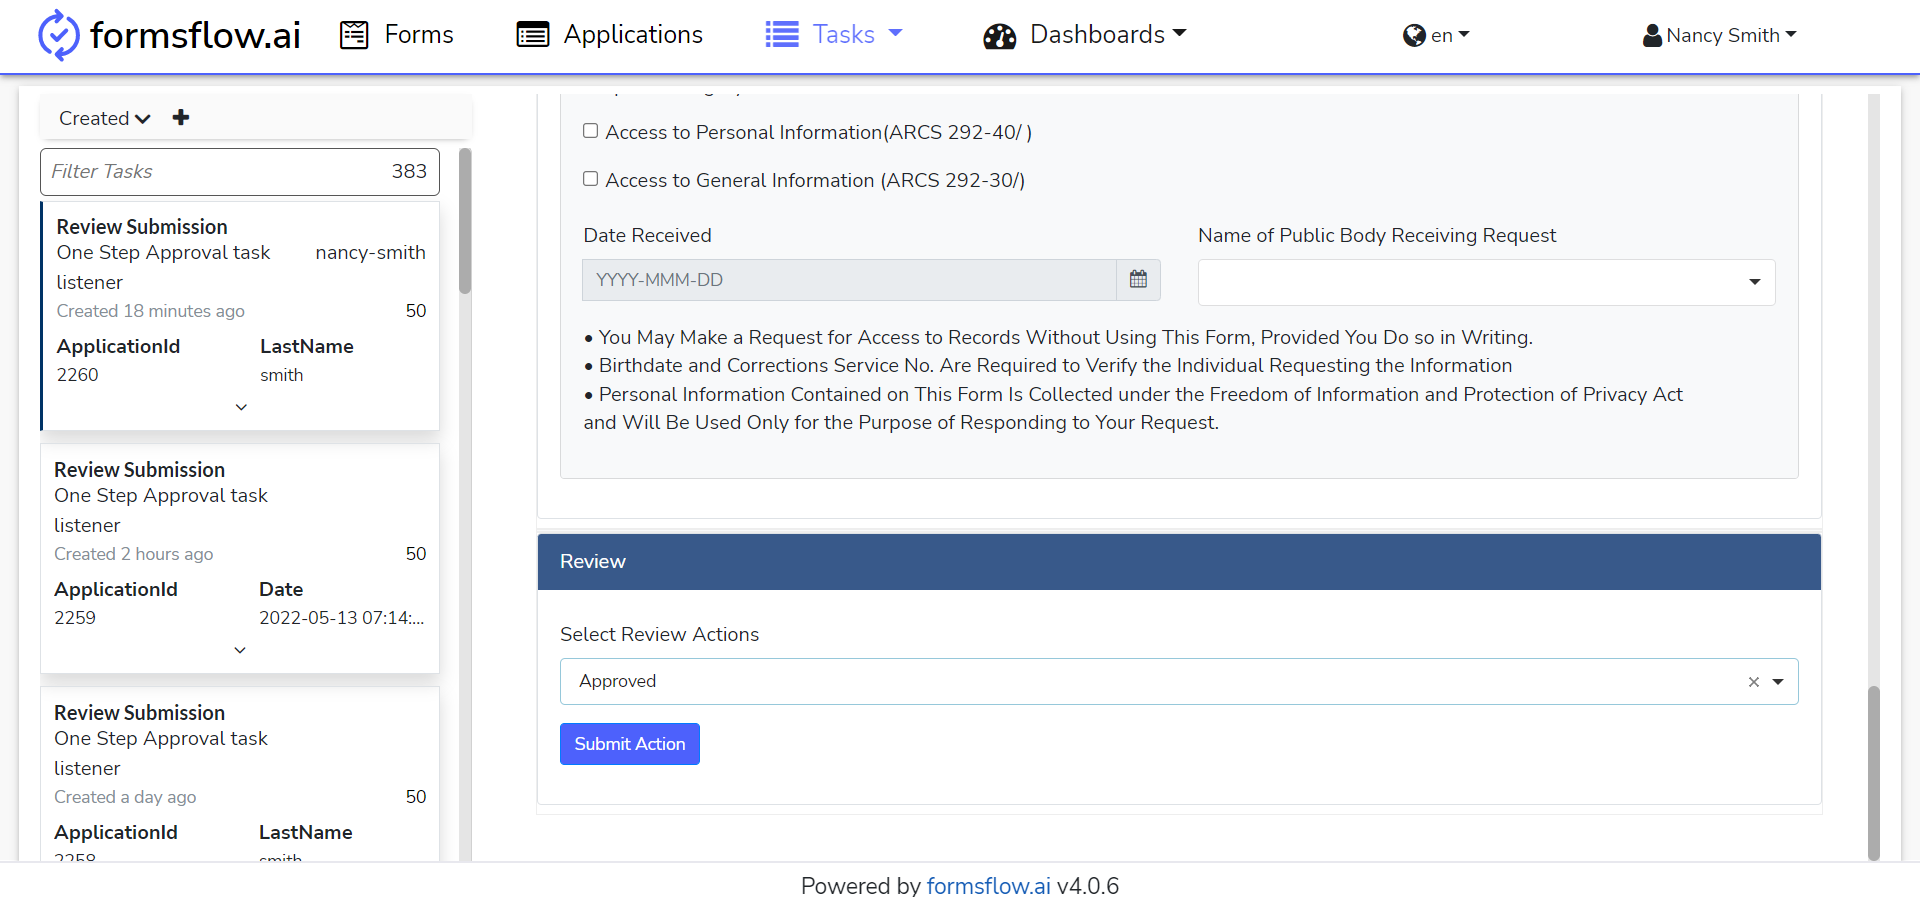
- On claiming the task, the Reviewer can fill the form and submit his/her review.
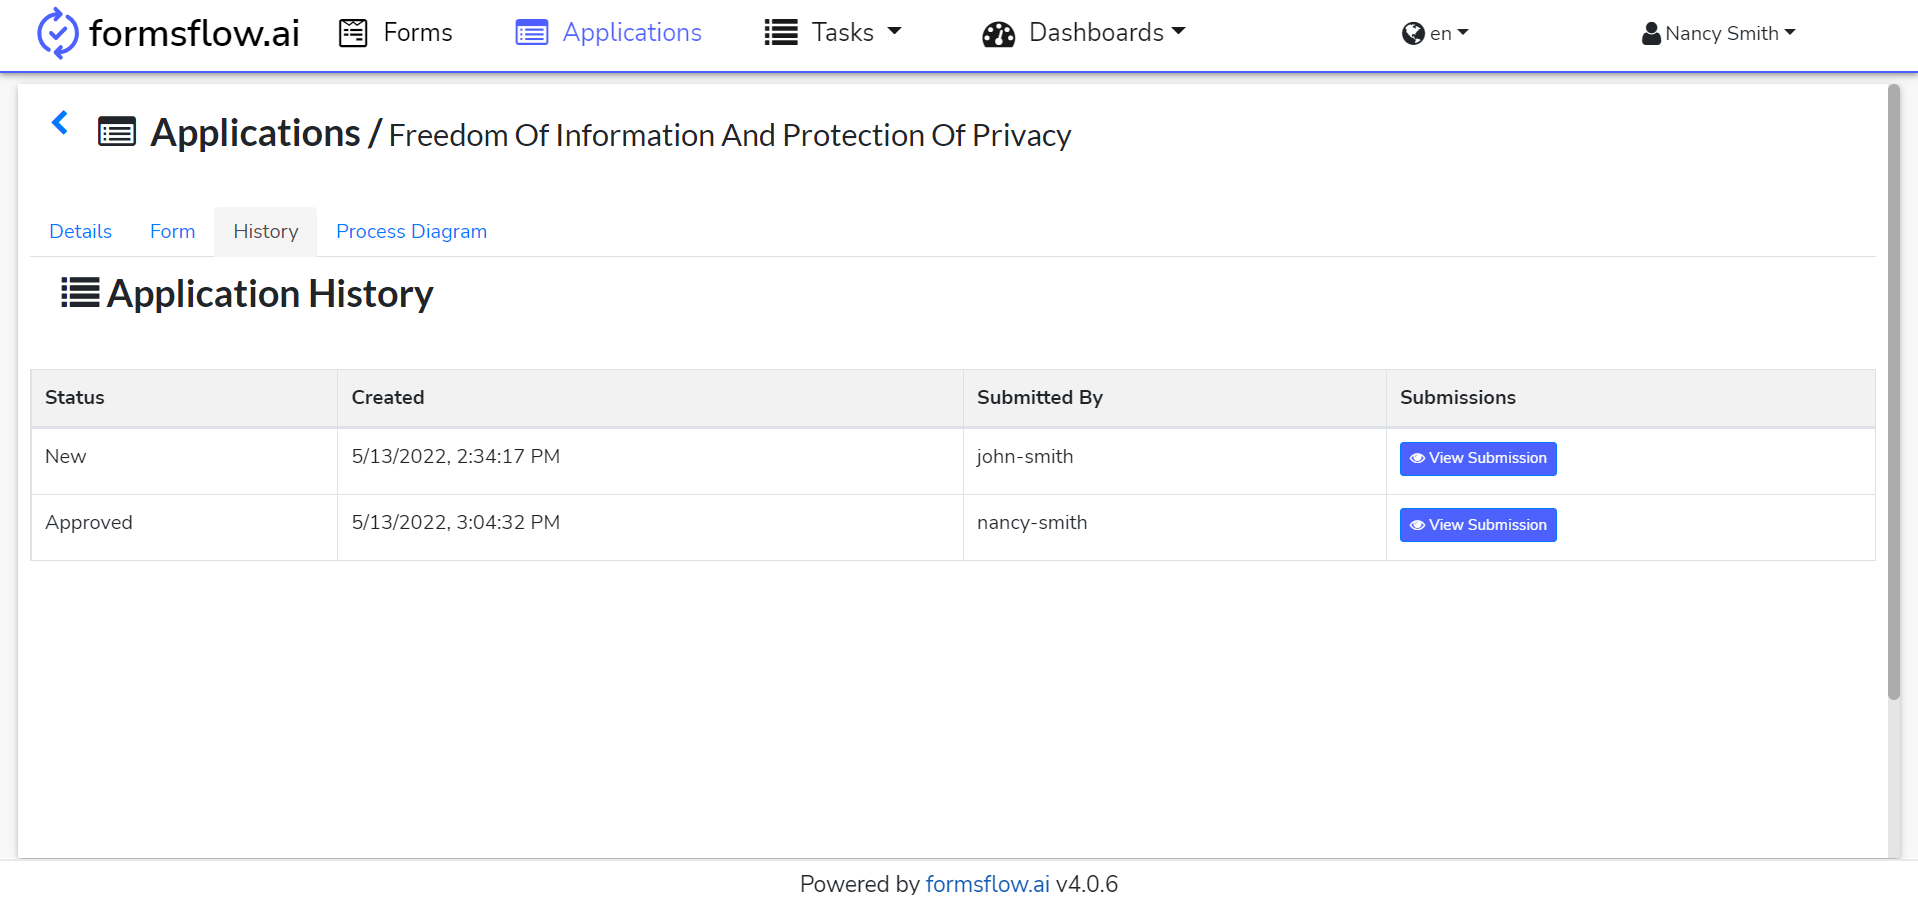
- On the Application section, the form submission history can be found and the form can be viewed.
- Reviewer action is completed.
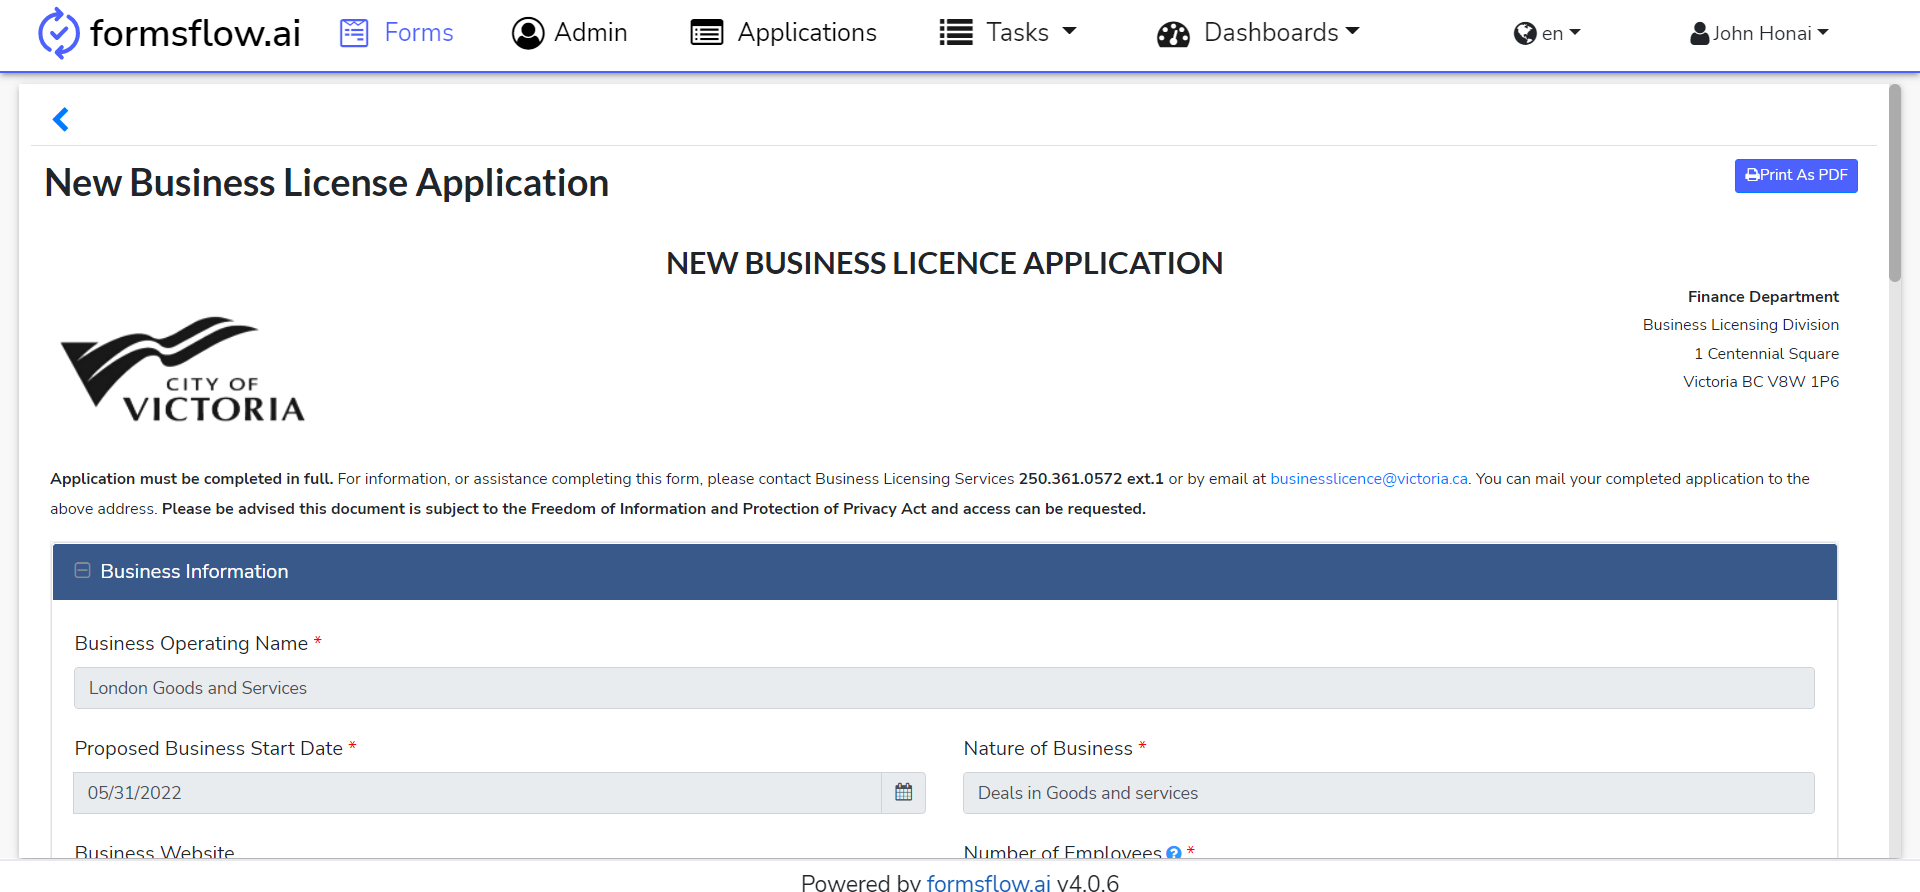
Create New Business License Application
The following instructions are using an example form from the form.io -
Create New Business License Application.
Designer Steps
- Log in to http://localhost:3000 (forms-flow-web) with valid user credentials for the designer.
- After the Log in is successful you will be redirected to http://localhost:3000/form where
you
can
Create / View / Edit / Deletea form.
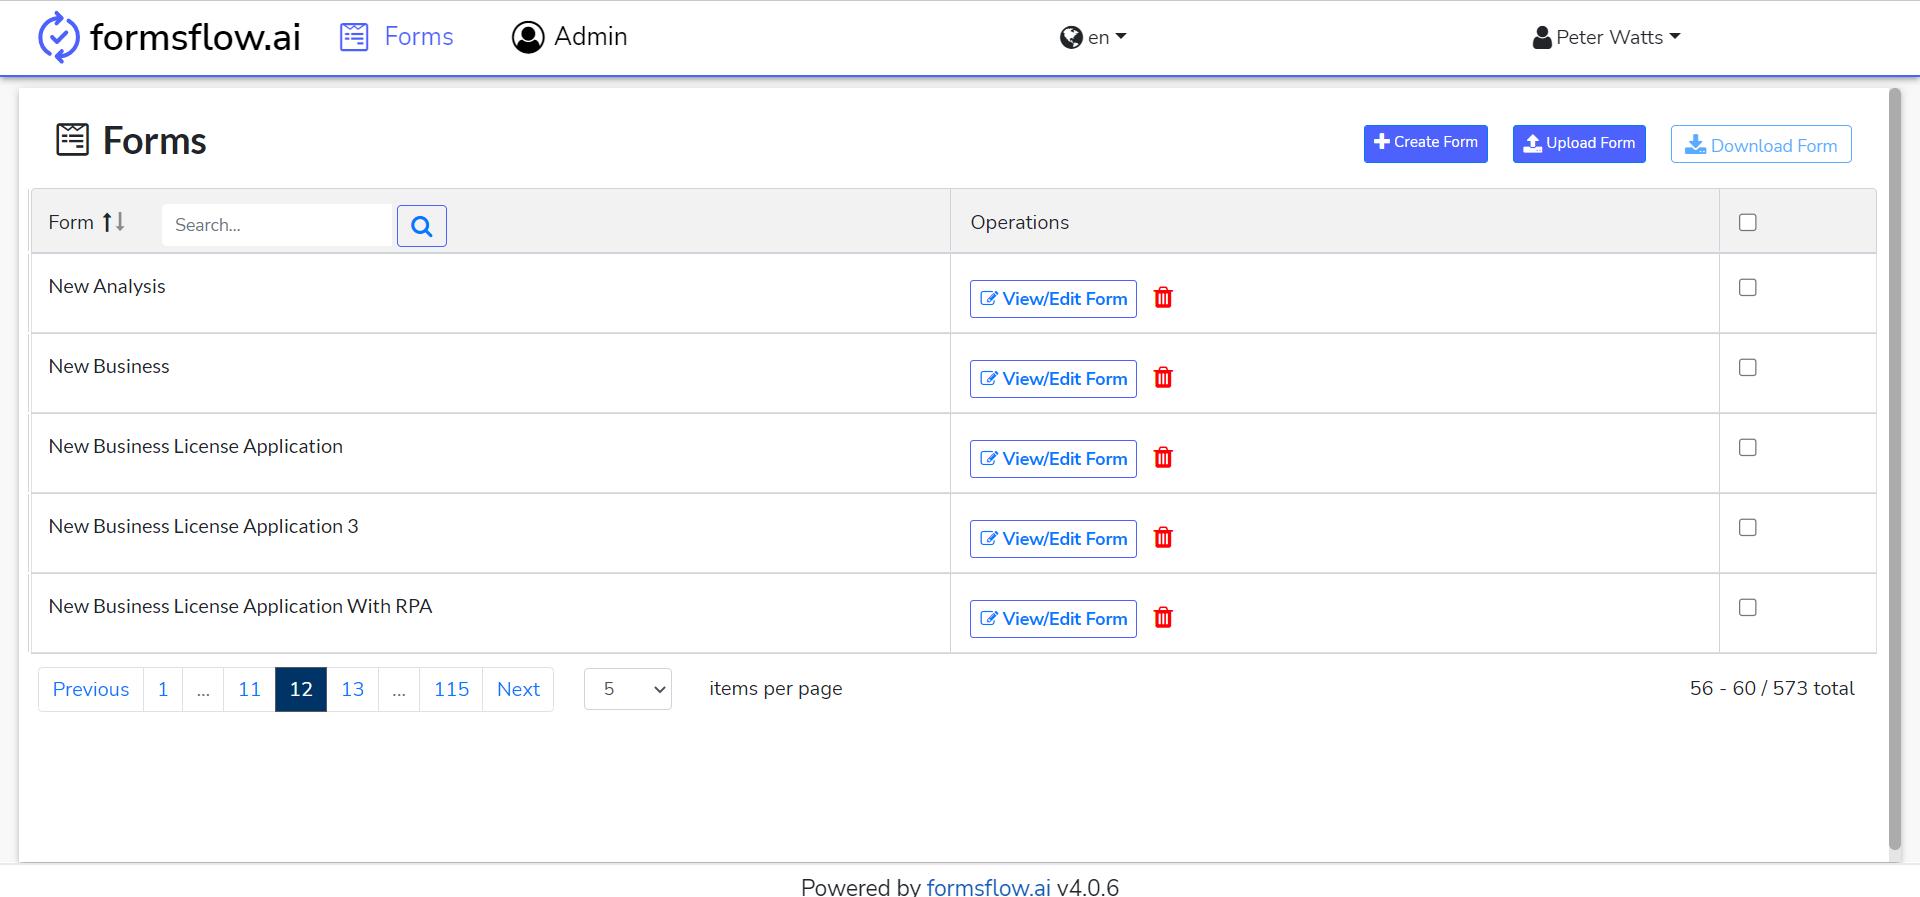
- Select the
New Business License Applicationform by clicking on it. - You can modify the form by clicking on the View/Edit Form button or continue by clicking the Next button.
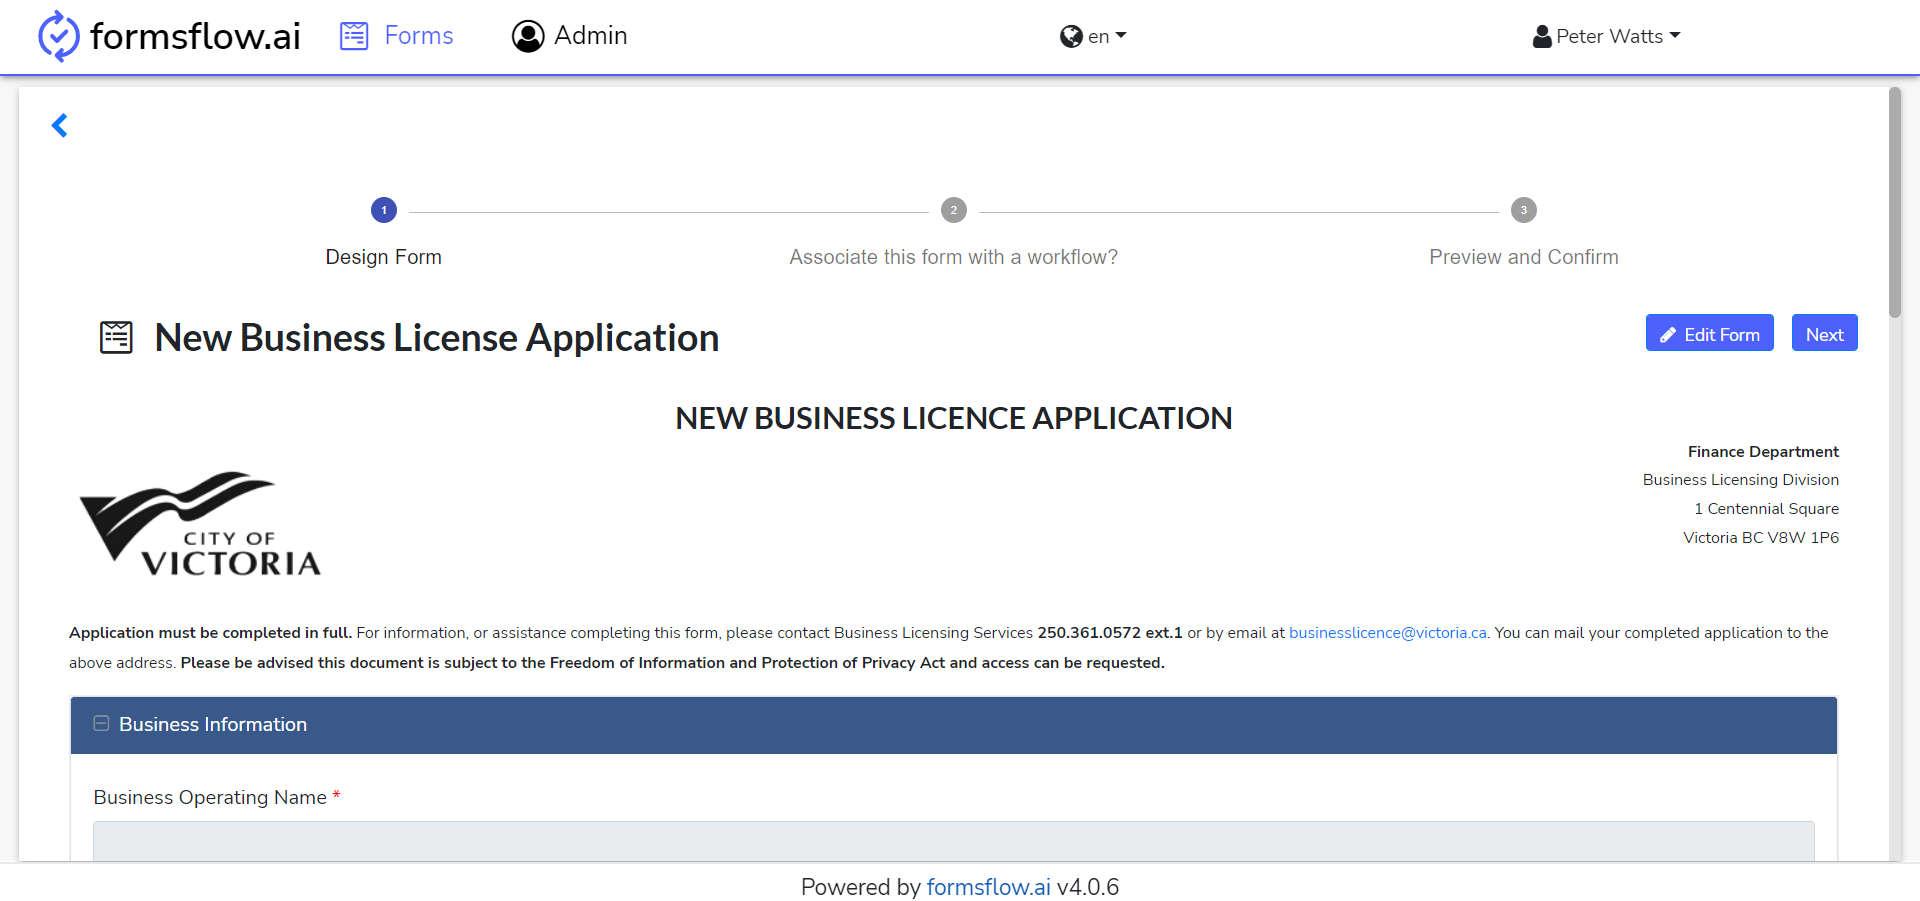
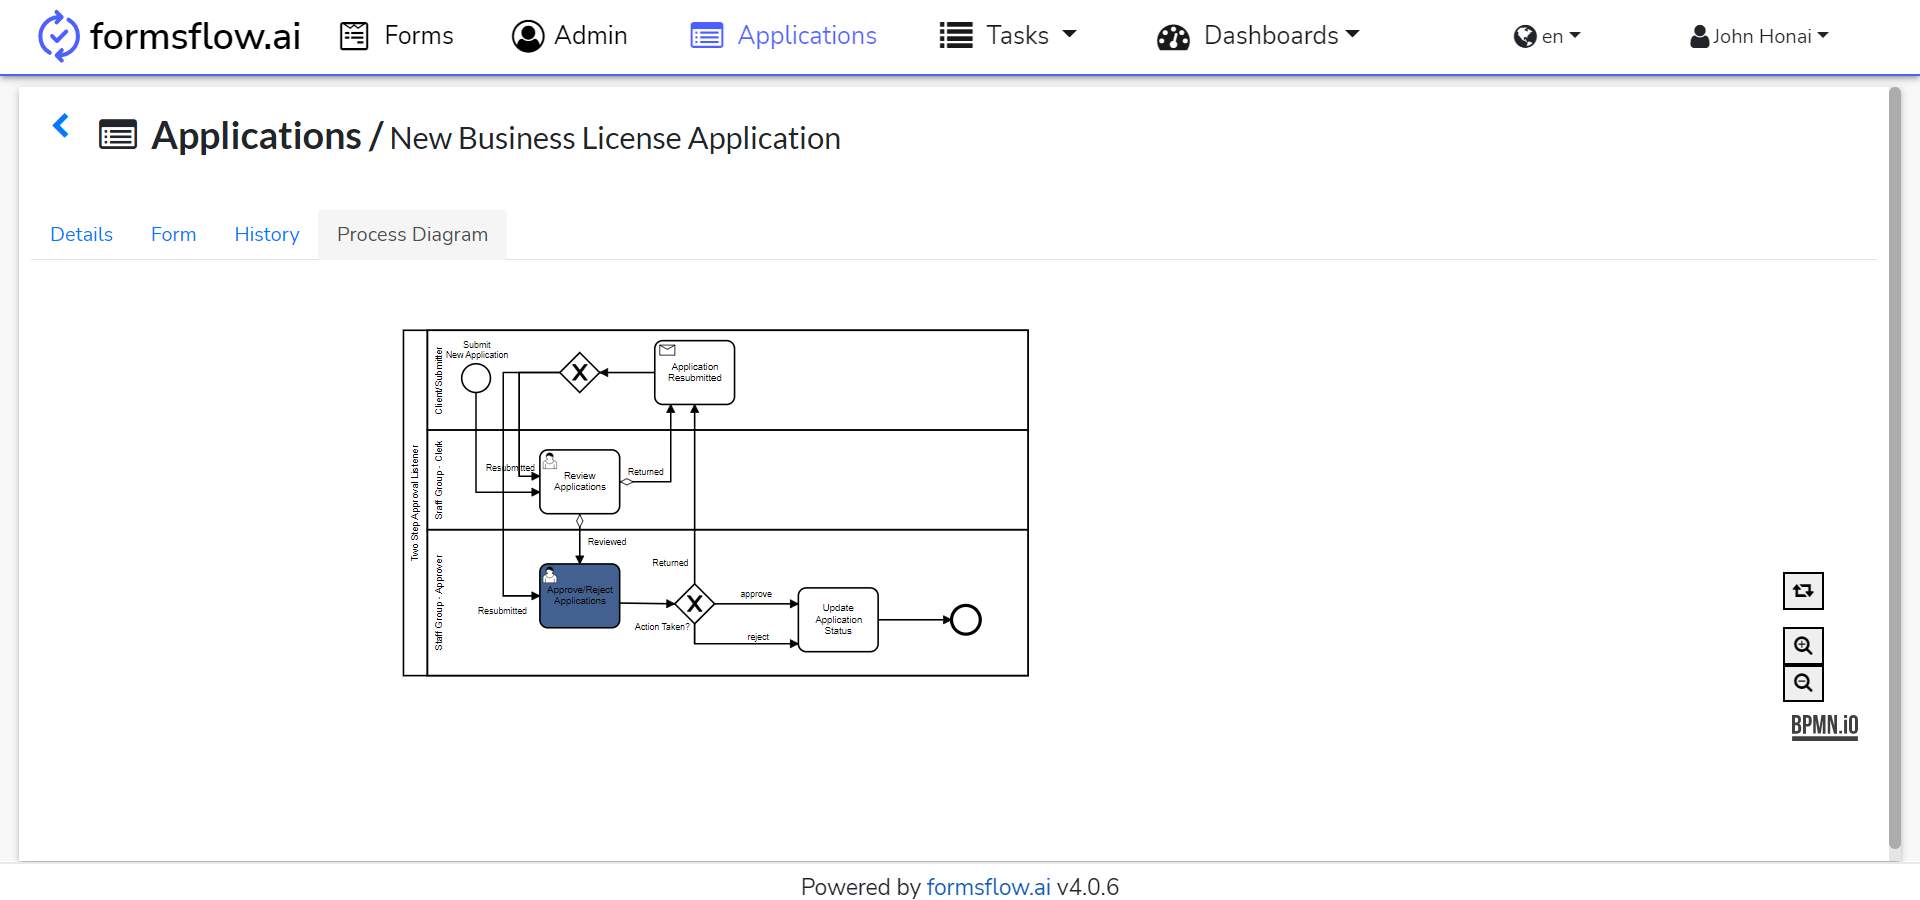
- At this stage form designing is completed, you can click on the EDIT Button and associate a workflow - Two-Step Approval-listener.
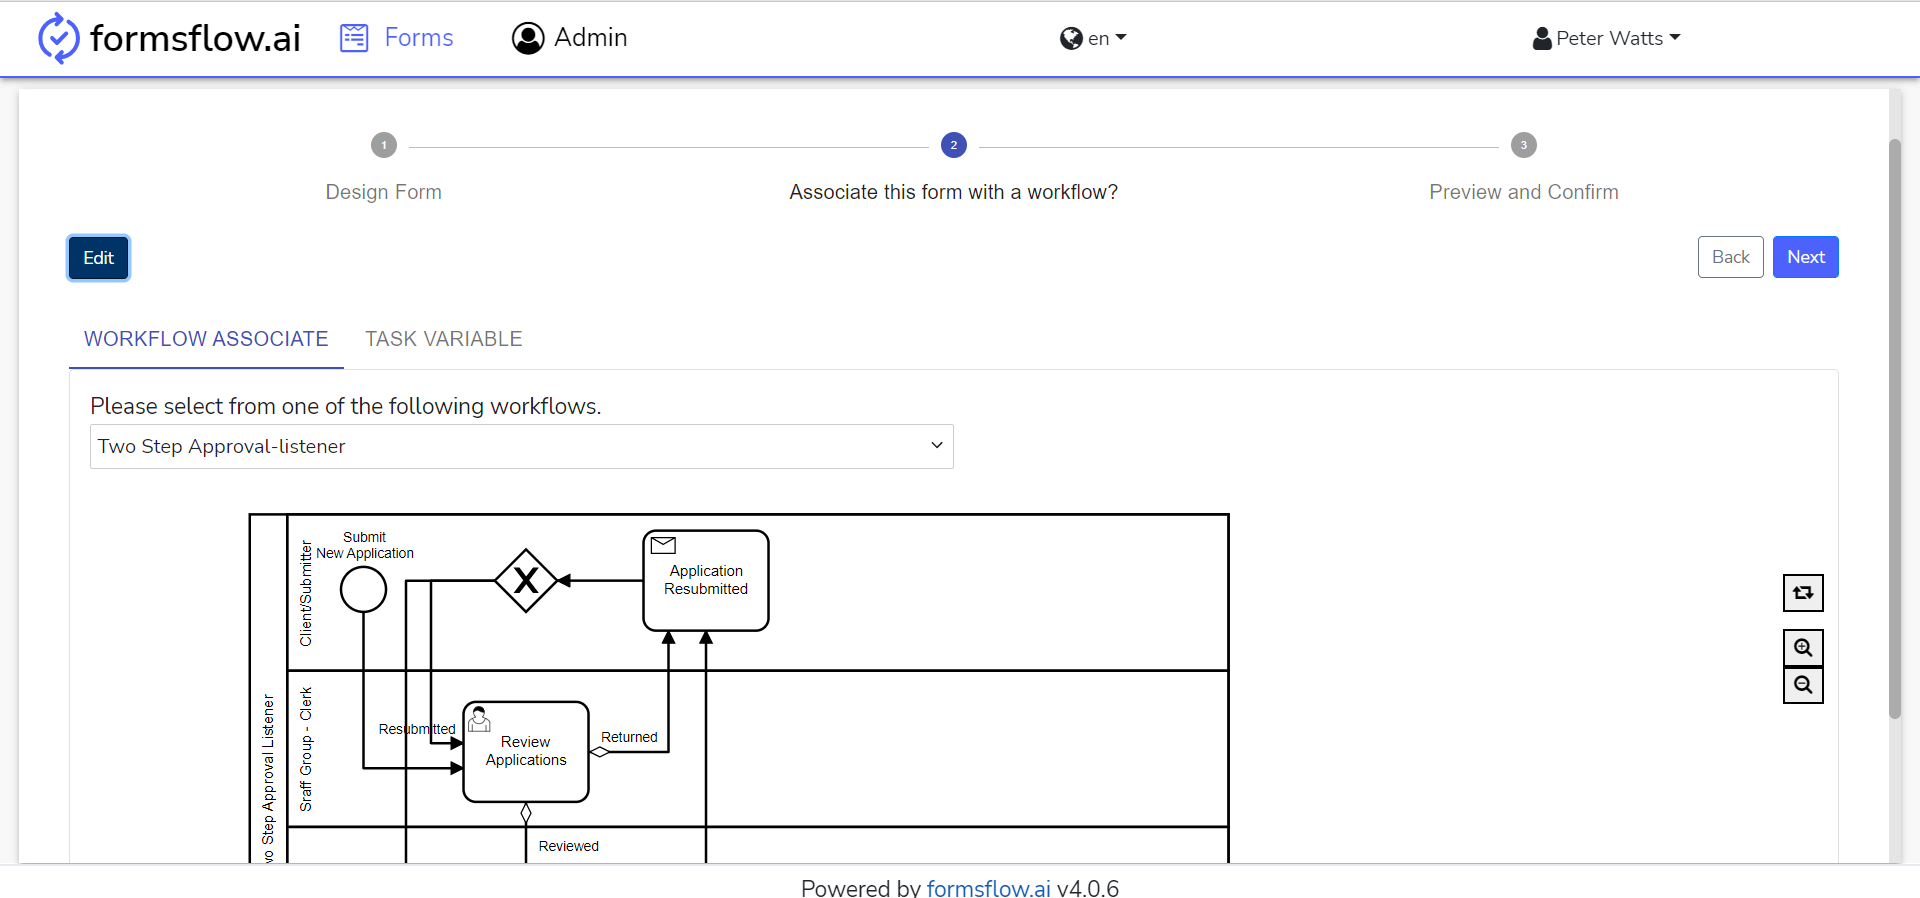
- After the associate workflow is completed click on the Next Button to Preview and Confirm.
- You can click on the EDIT Button and publish the form for clients.
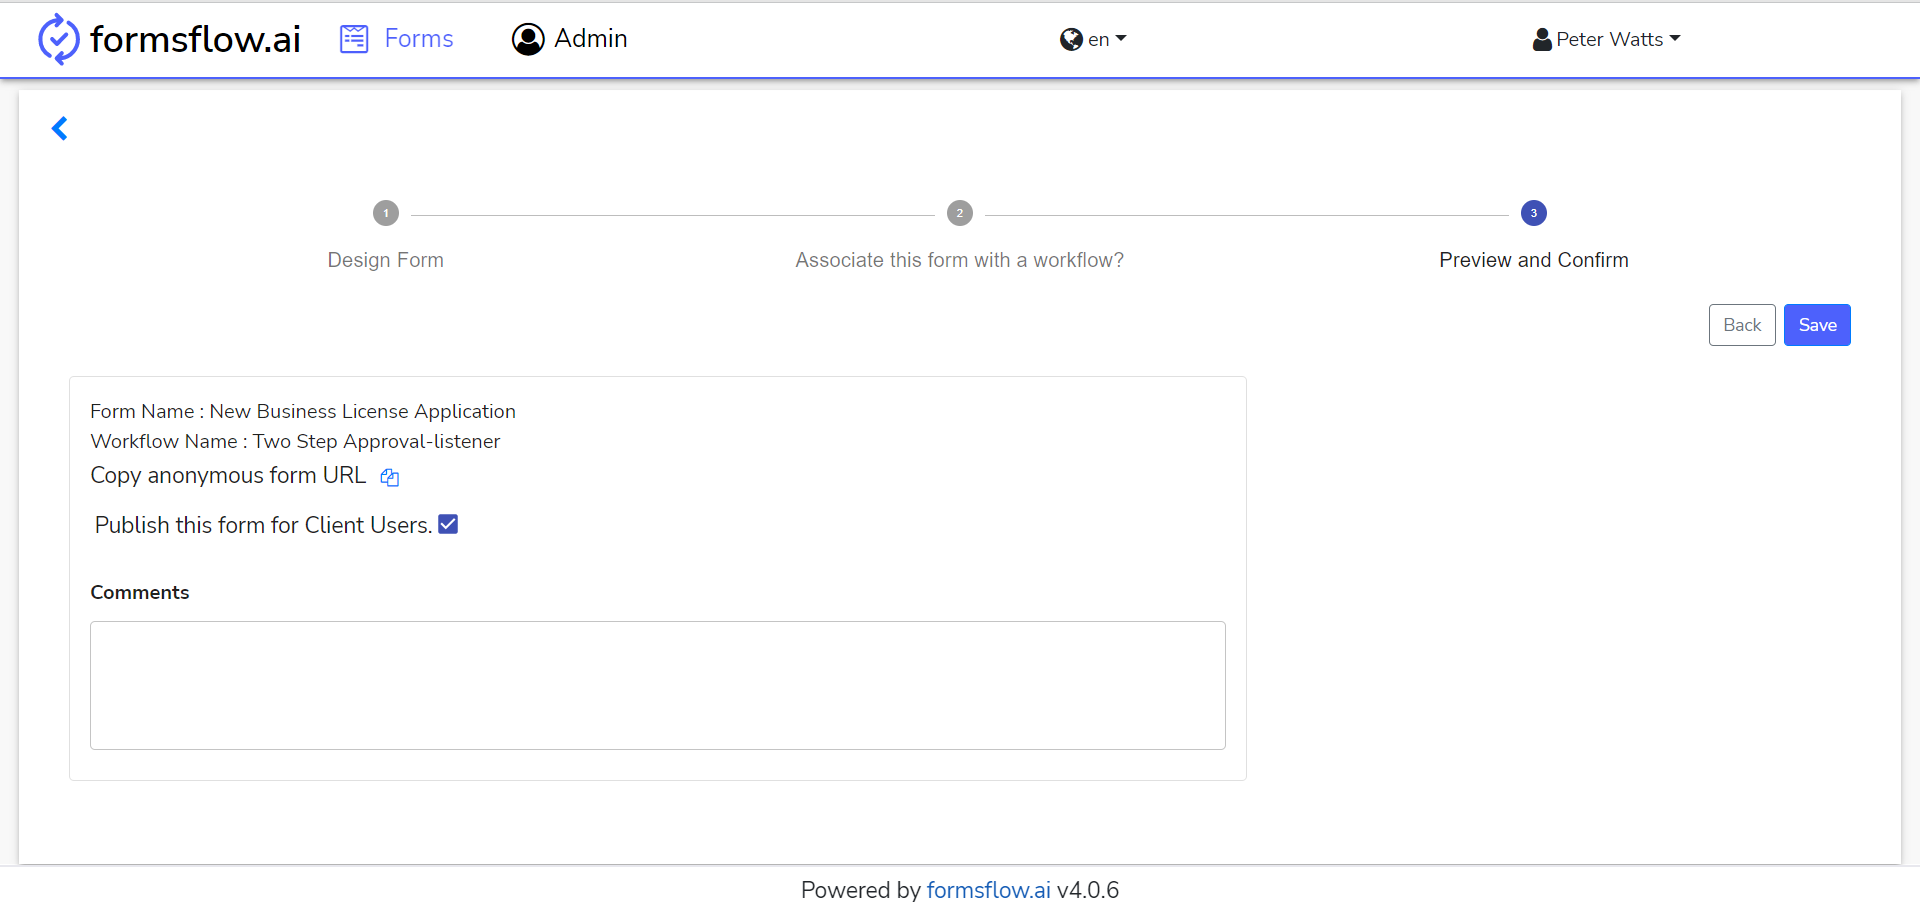
- Click on SAVE Button to completed designing a form.
- Form designing is successfully completed, you can now Log out and go to Client Steps
Client Steps
- Log in to http://localhost:3000 (forms-flow-web) with valid default user credentials for the client.
- After the Log in is successful you will be redirected to http://localhost:3000/form where you can View and Submit a form.
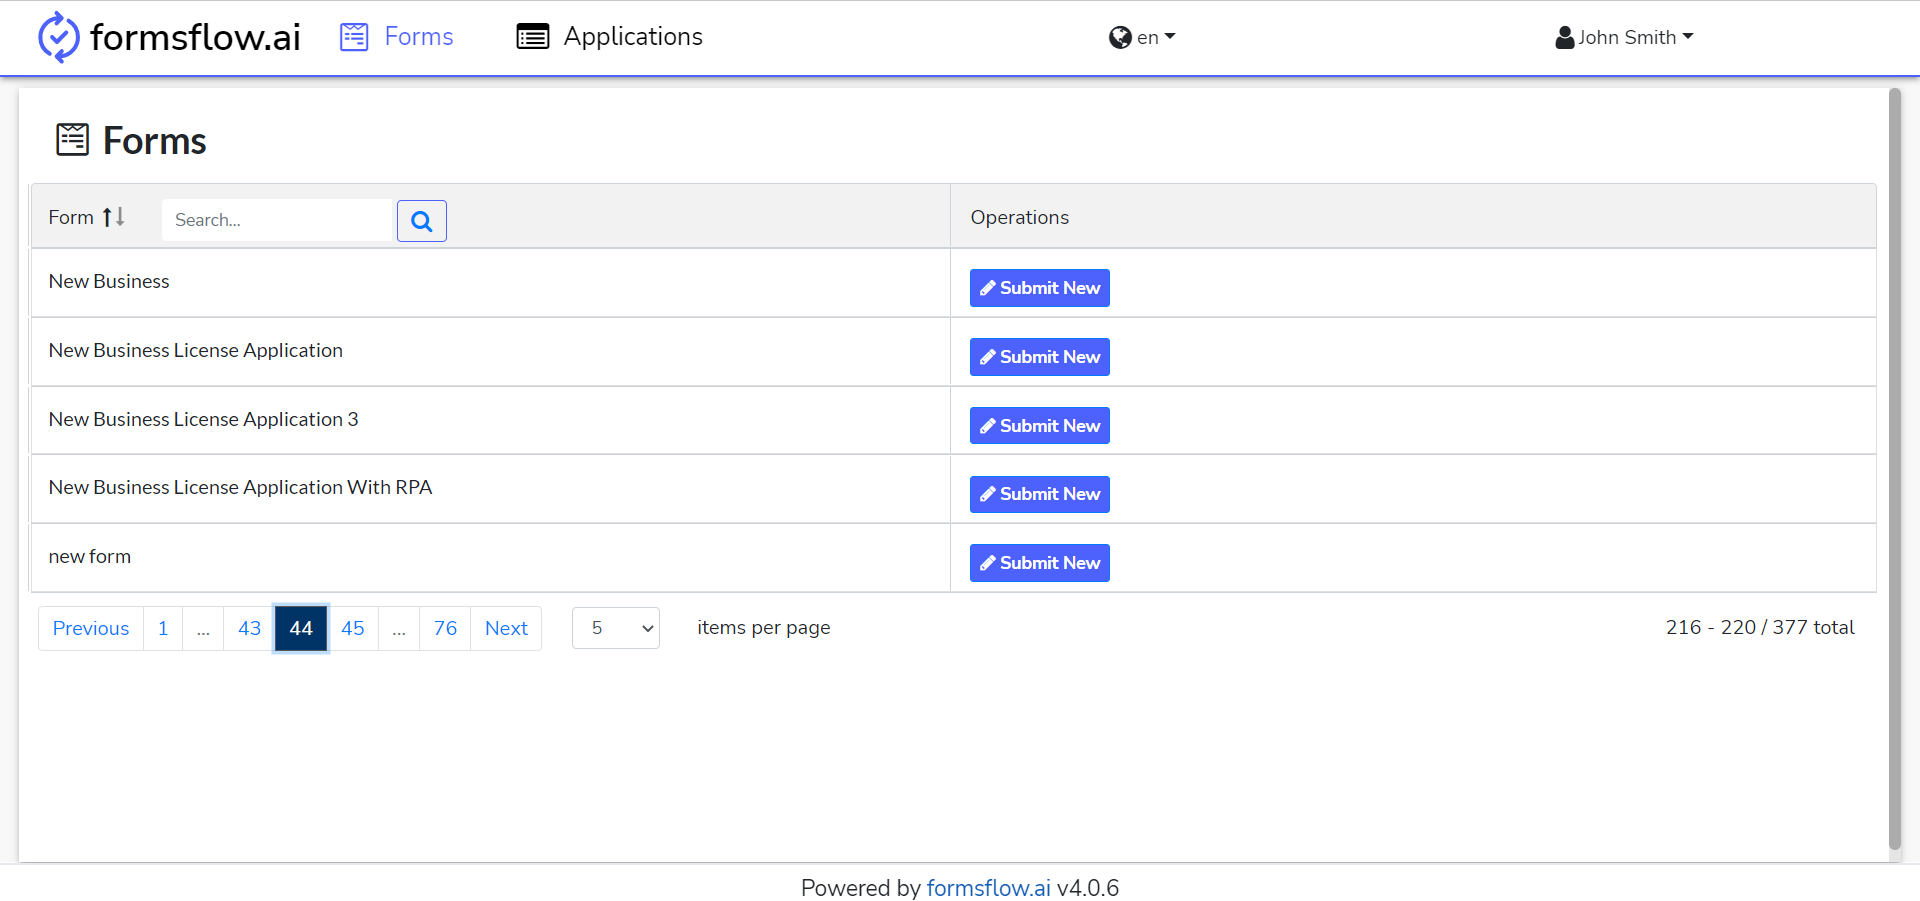
- Click Submit New Button on the form which you wanted to submit.
- The previous action will redirect you to the form, where you can fill in the details and Submit them.
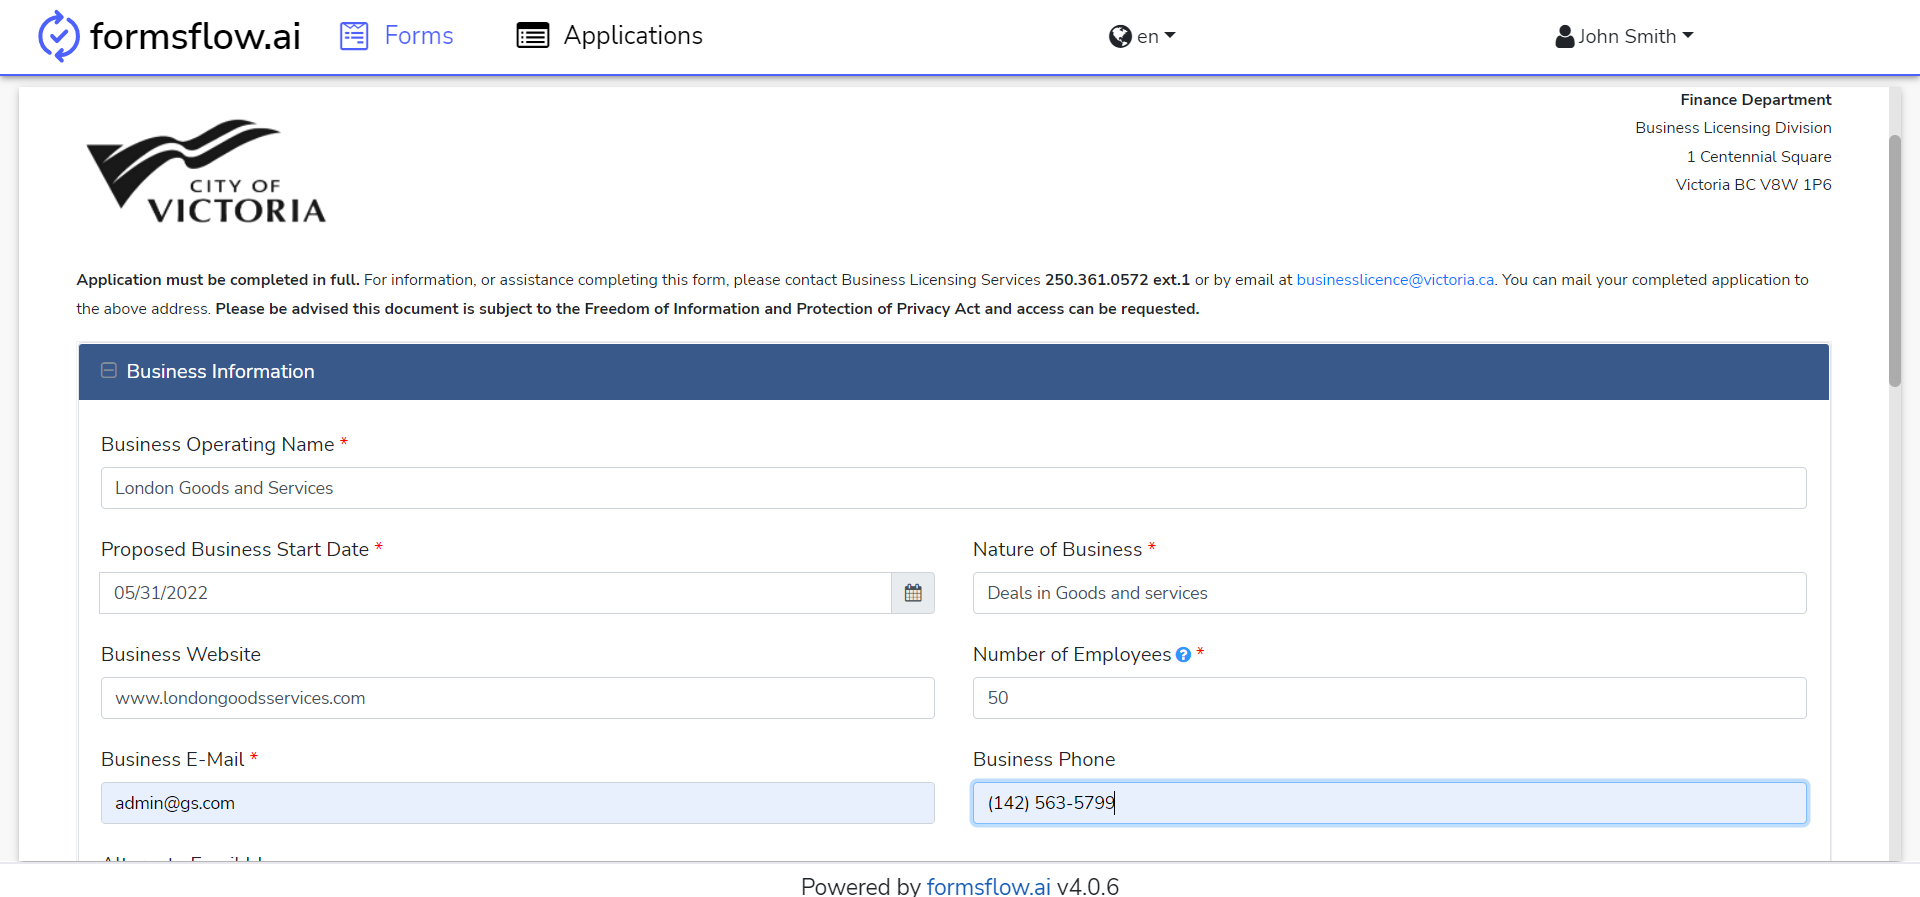
-
Fill in the details and Submit the form, You can repeat this action as per your requirement.
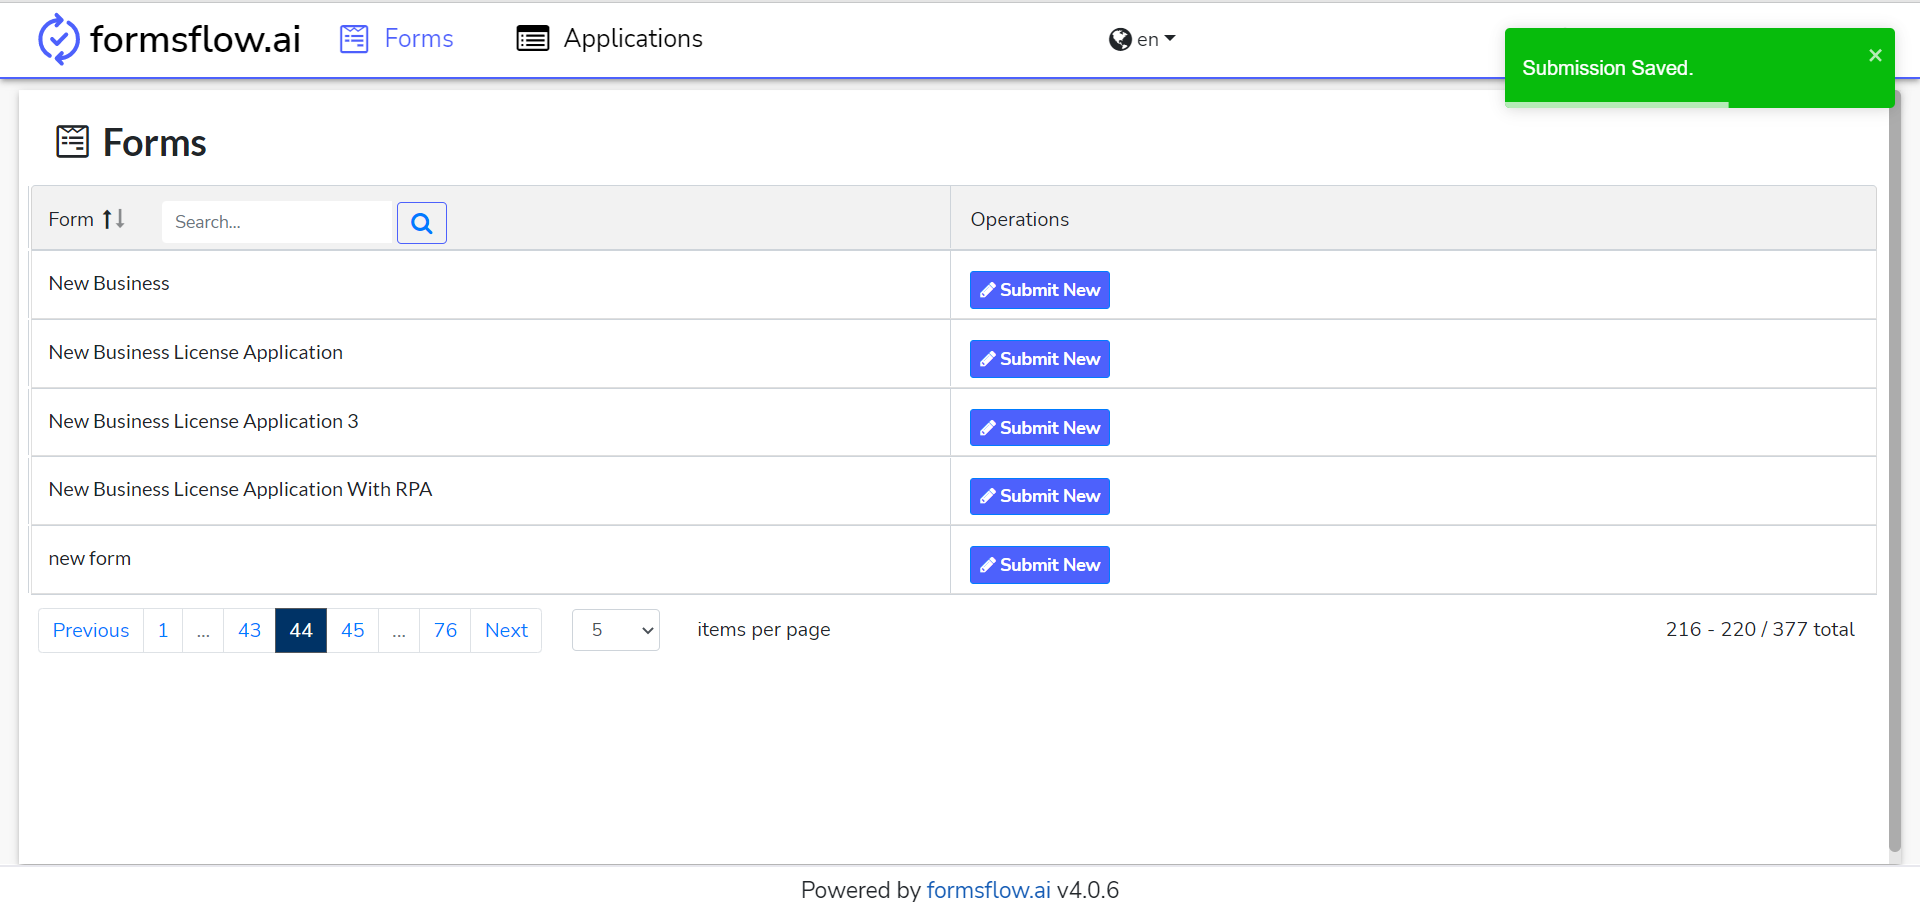
- If you had associated a workflow with the form, the form will start the workflow.
- This action is completed, you can now Log out and go to Clerk Steps.
Clerk Steps
- Log in to http://localhost:3000 (forms-flow-web) with valid default user credentials for Clerk.
- After the Log in is successful you will be redirected to http://localhost:3000/task.
- You can navigate to the Applications tab to View the Form submissions.
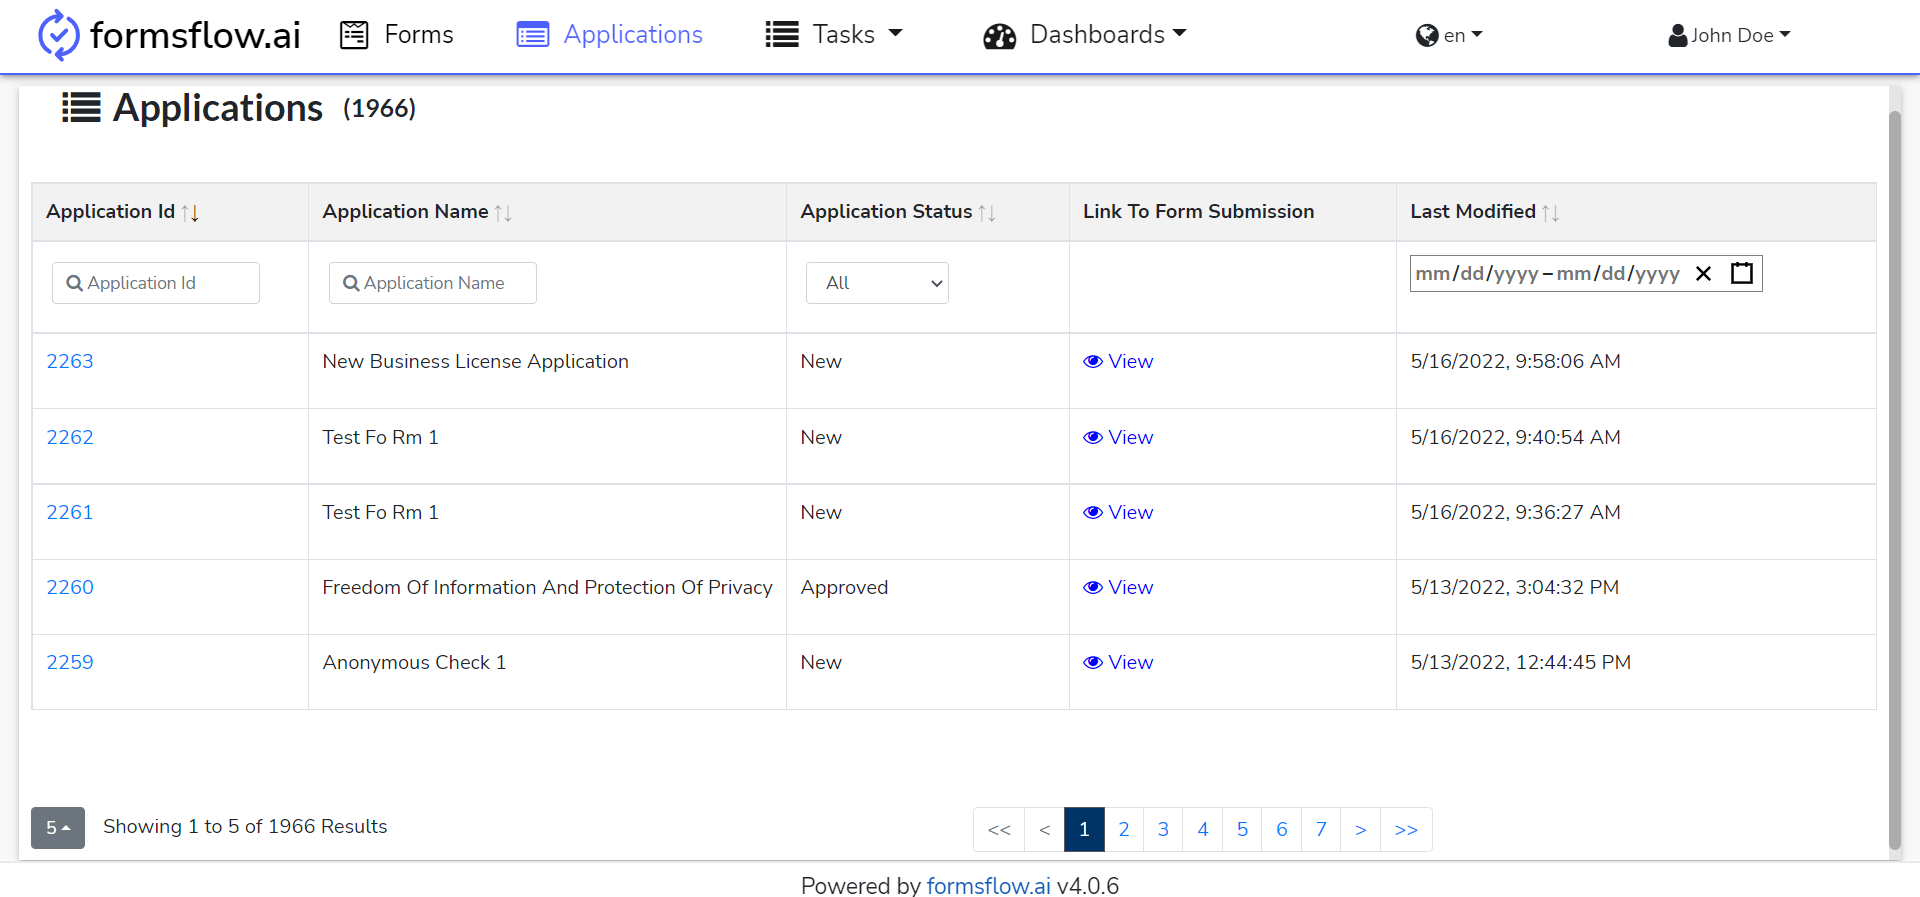
- You can View the submissions against a form by clicking on the View button.
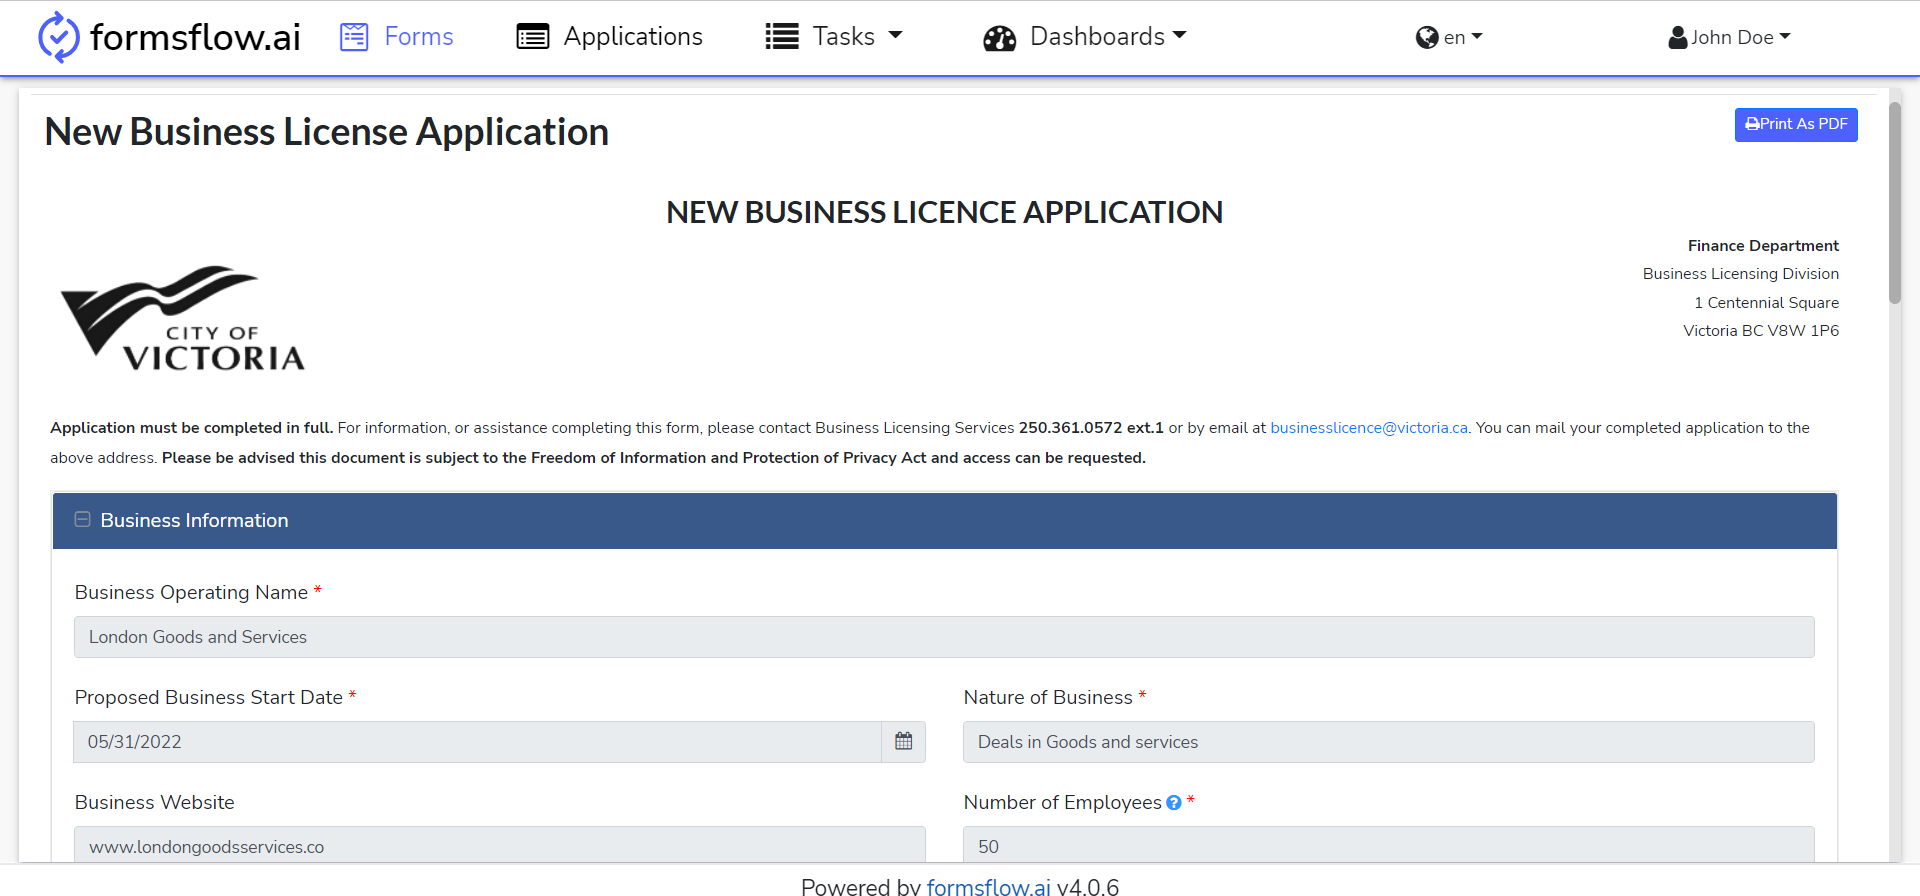
- You can print the Form submission as a PDF.

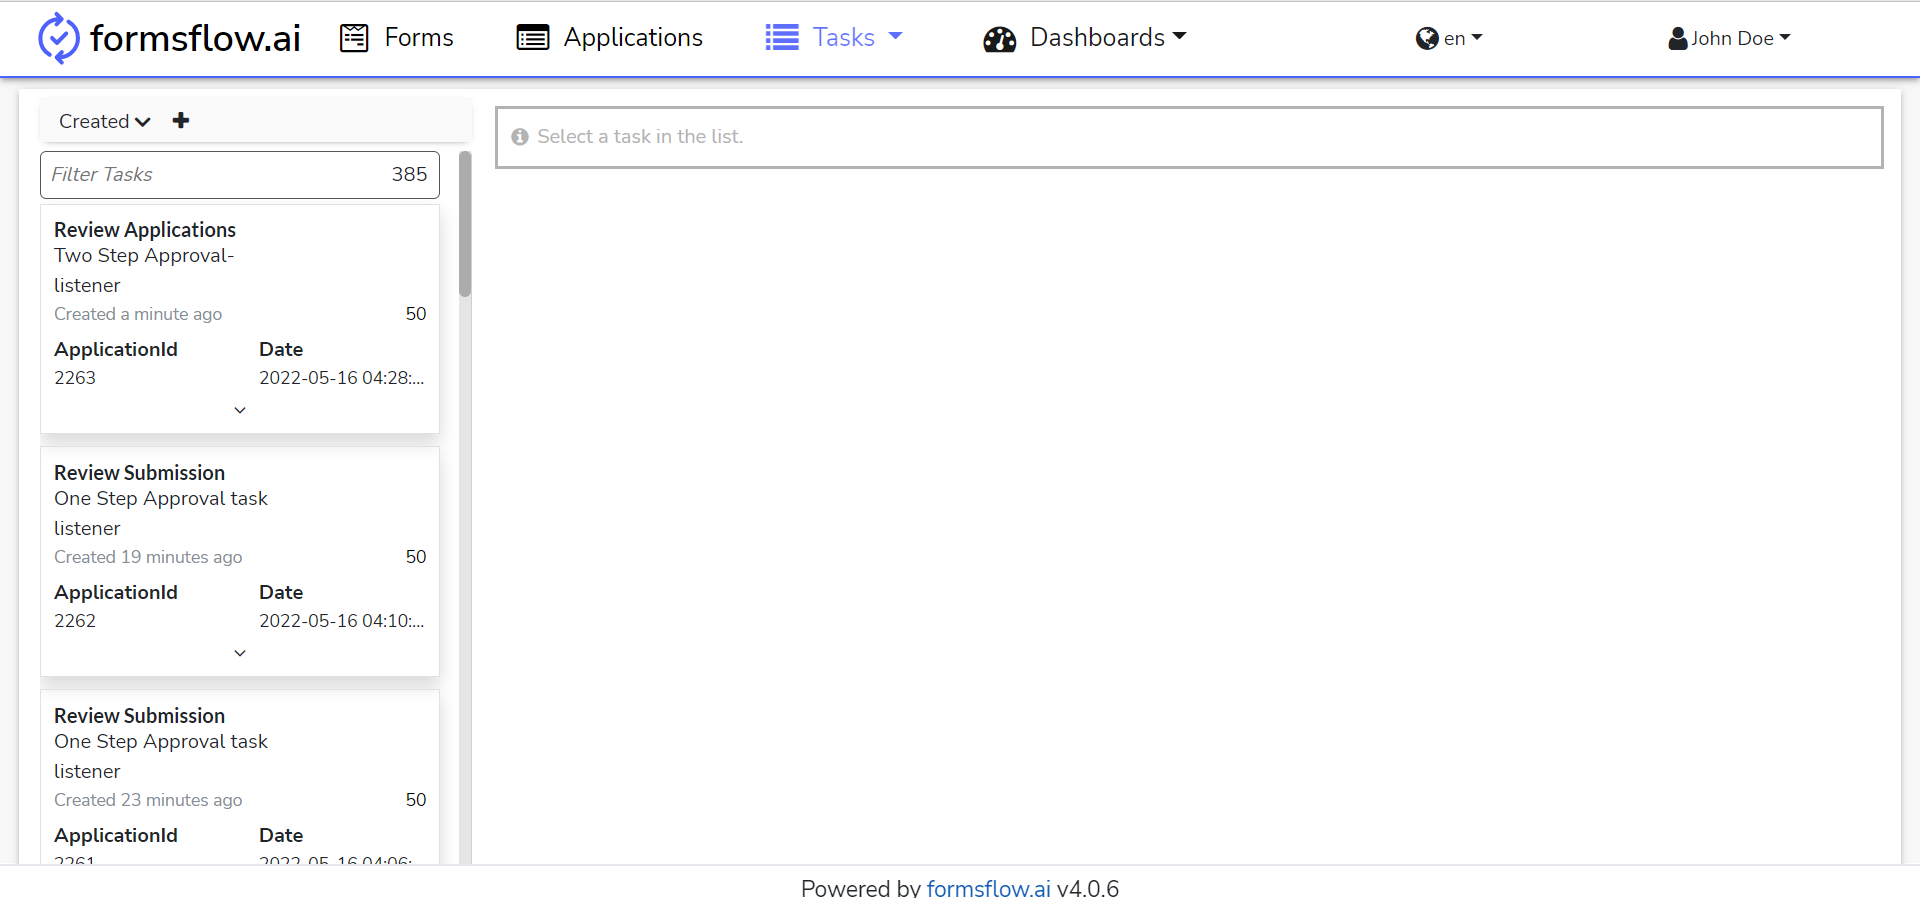
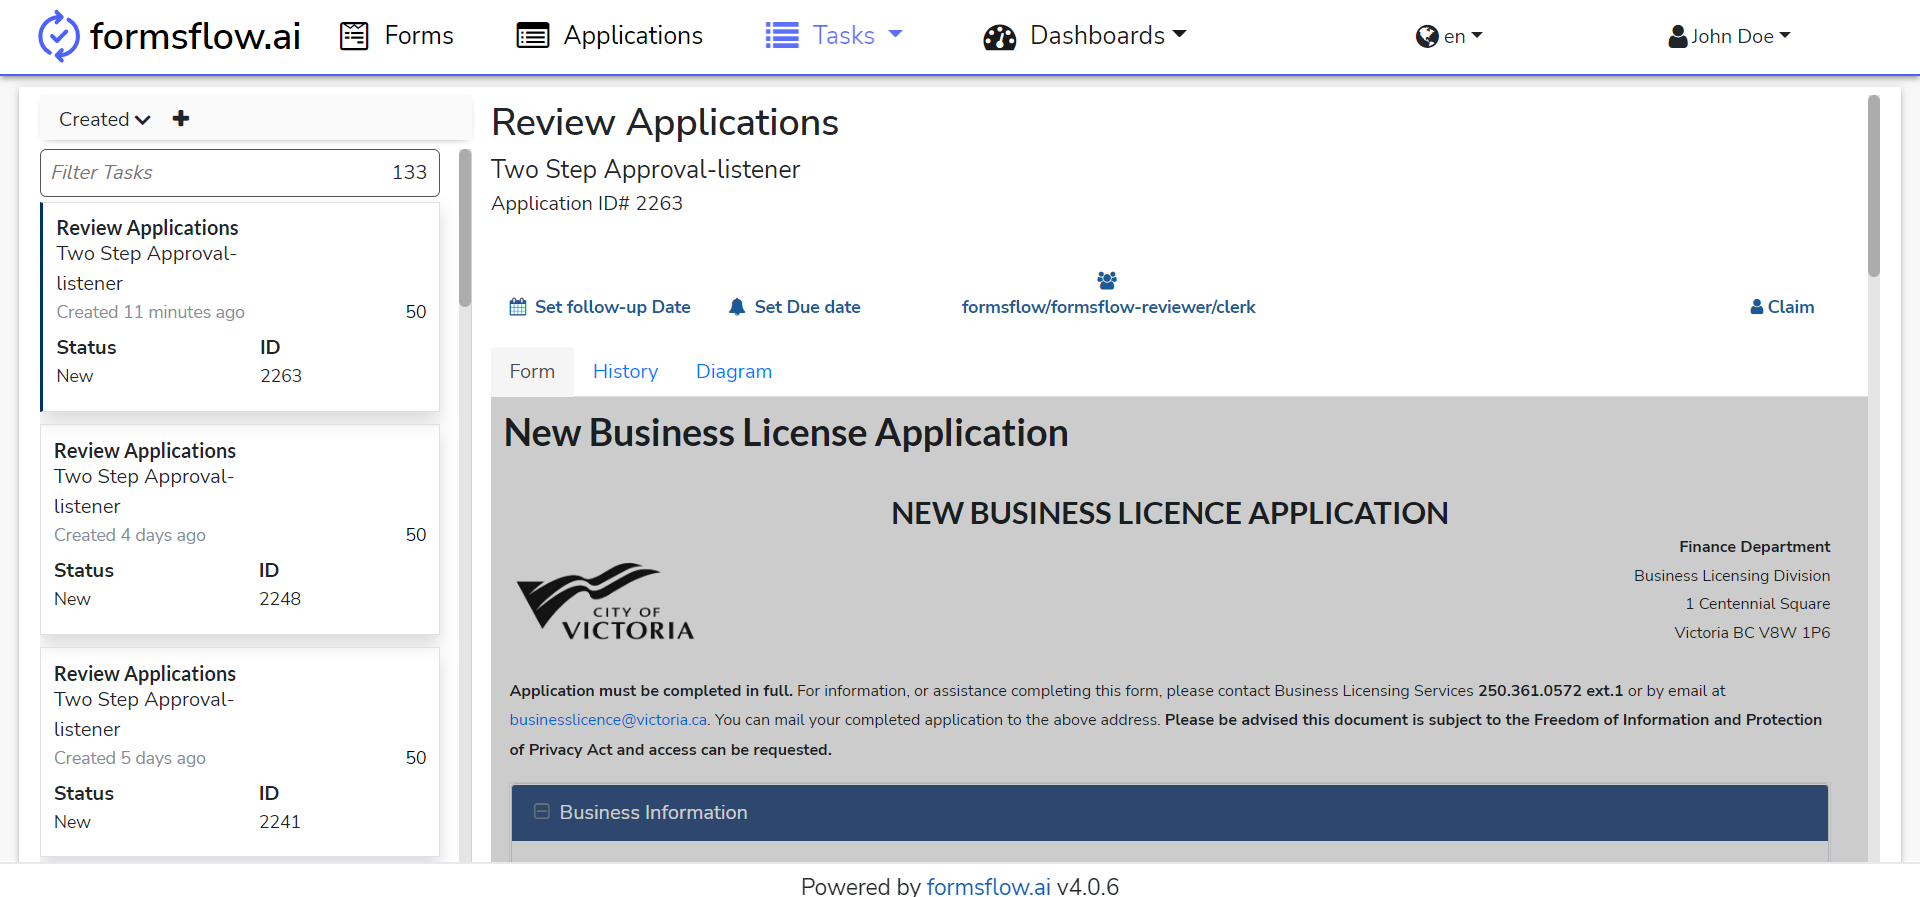
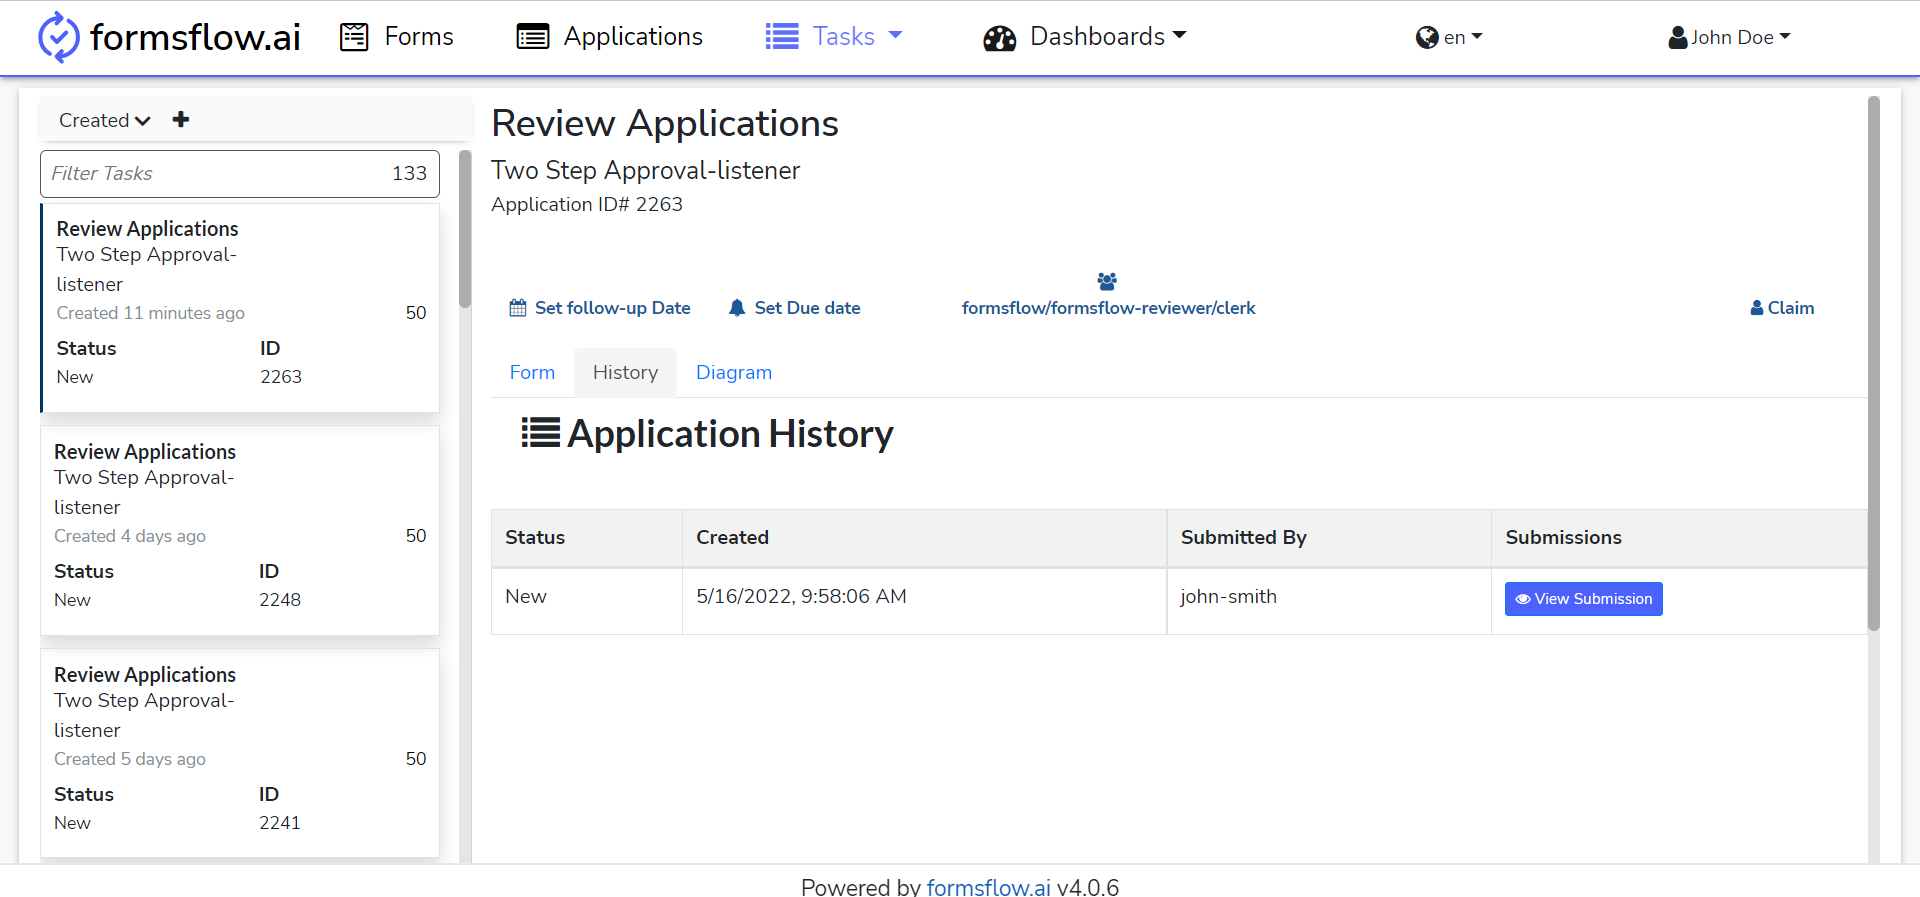
- The associated task can be found for the Clerk role in the Task Menu section
-
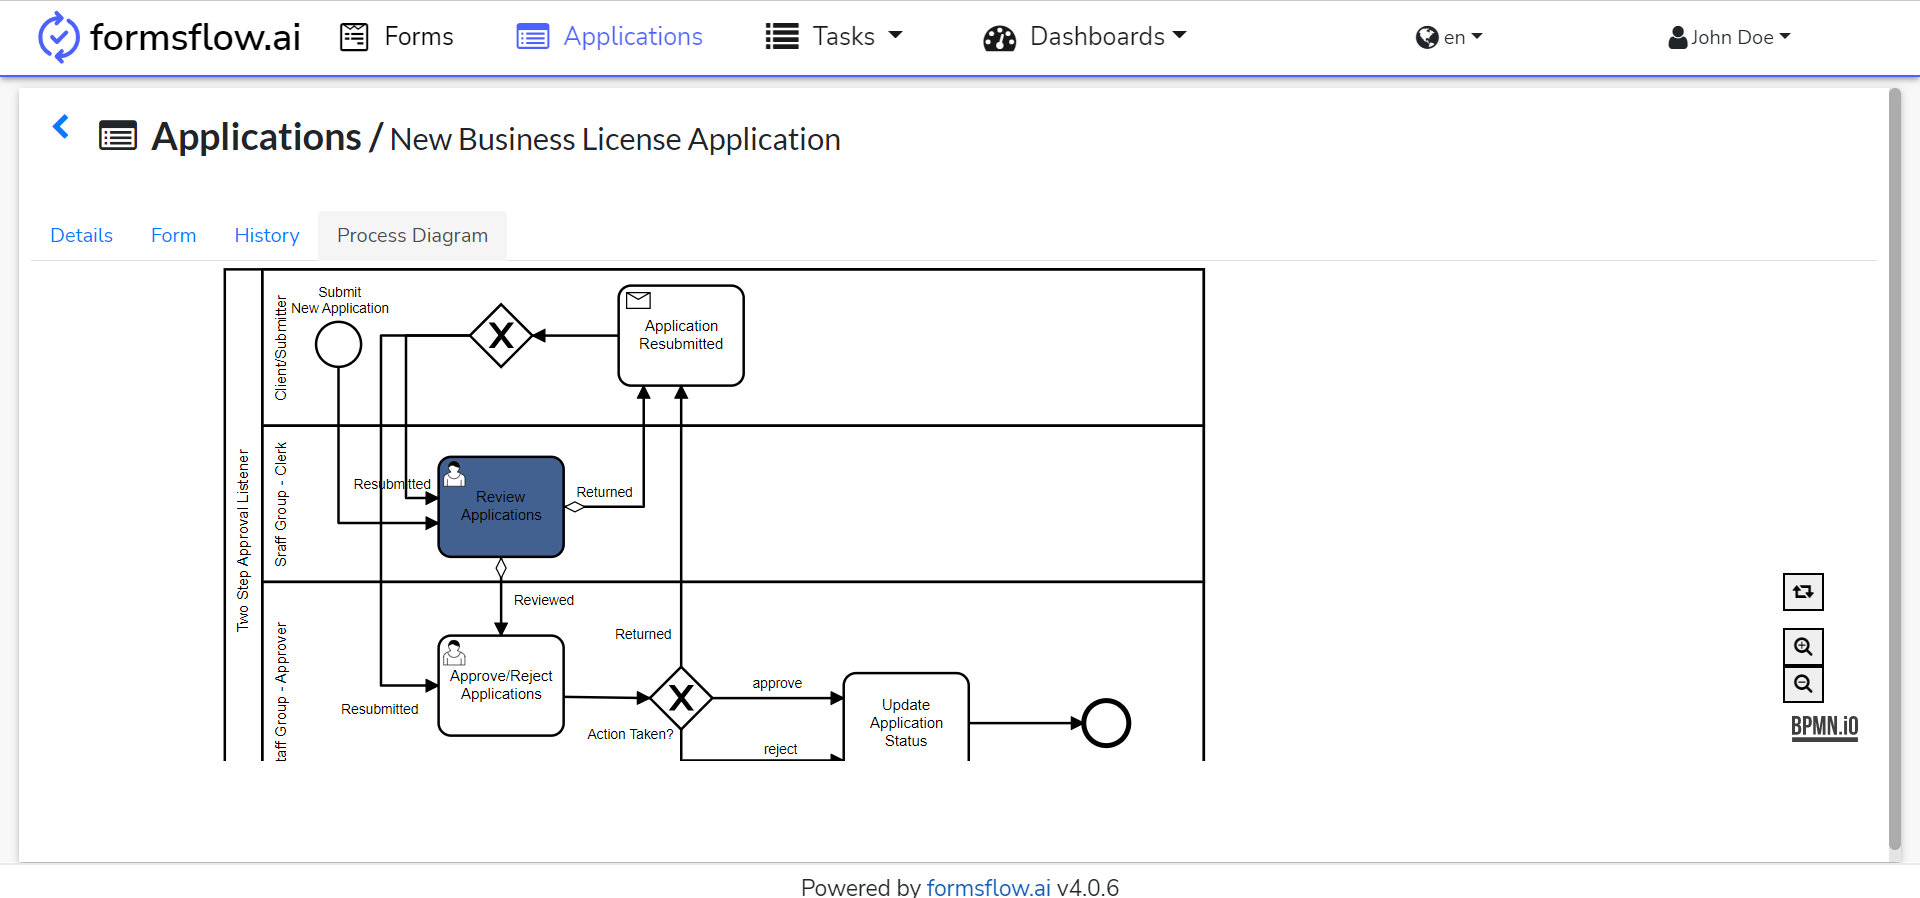
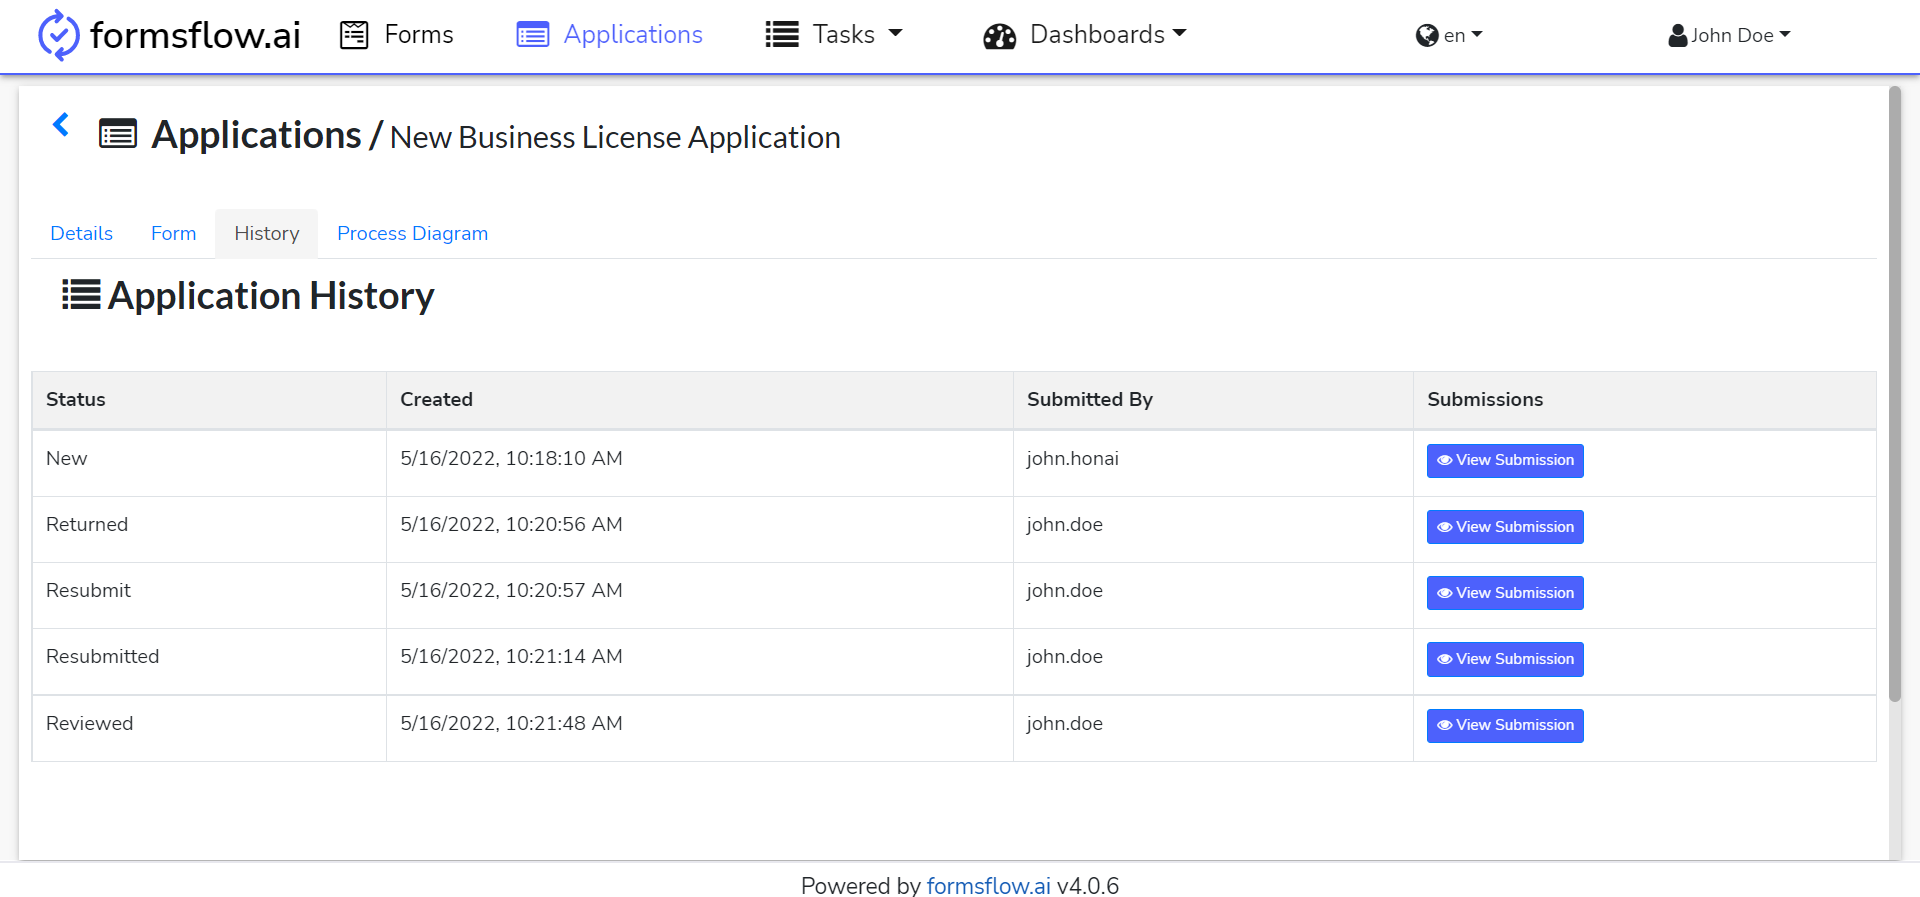
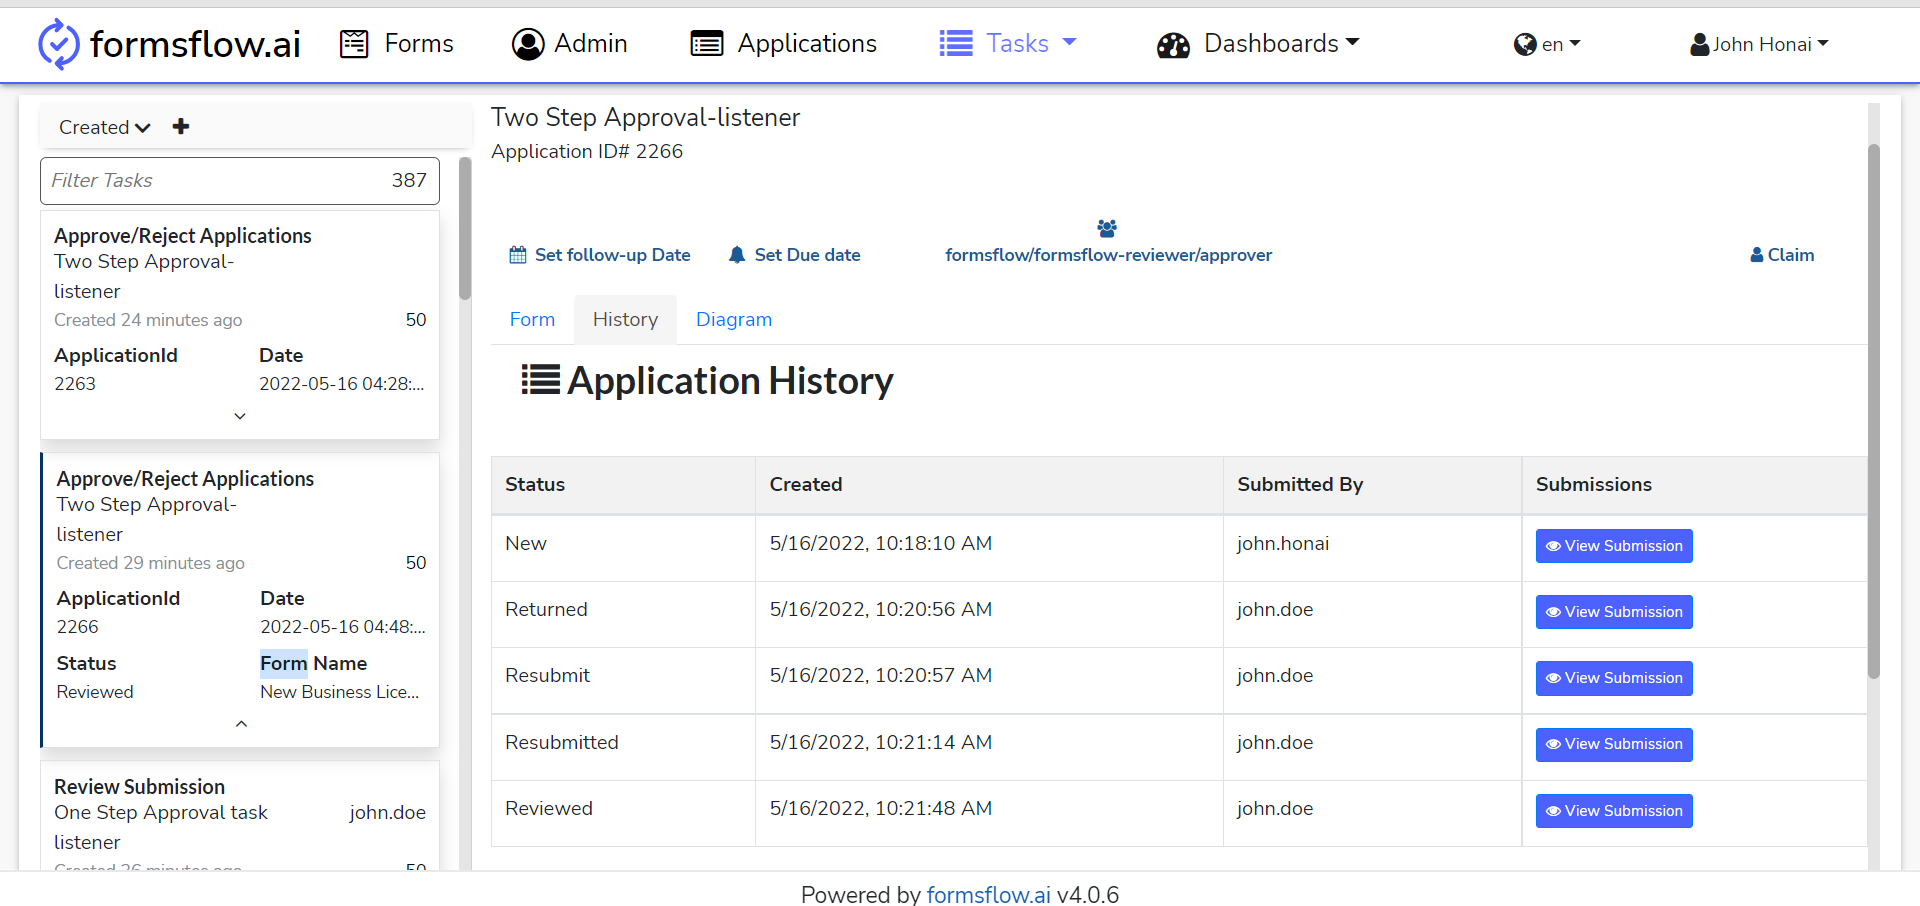
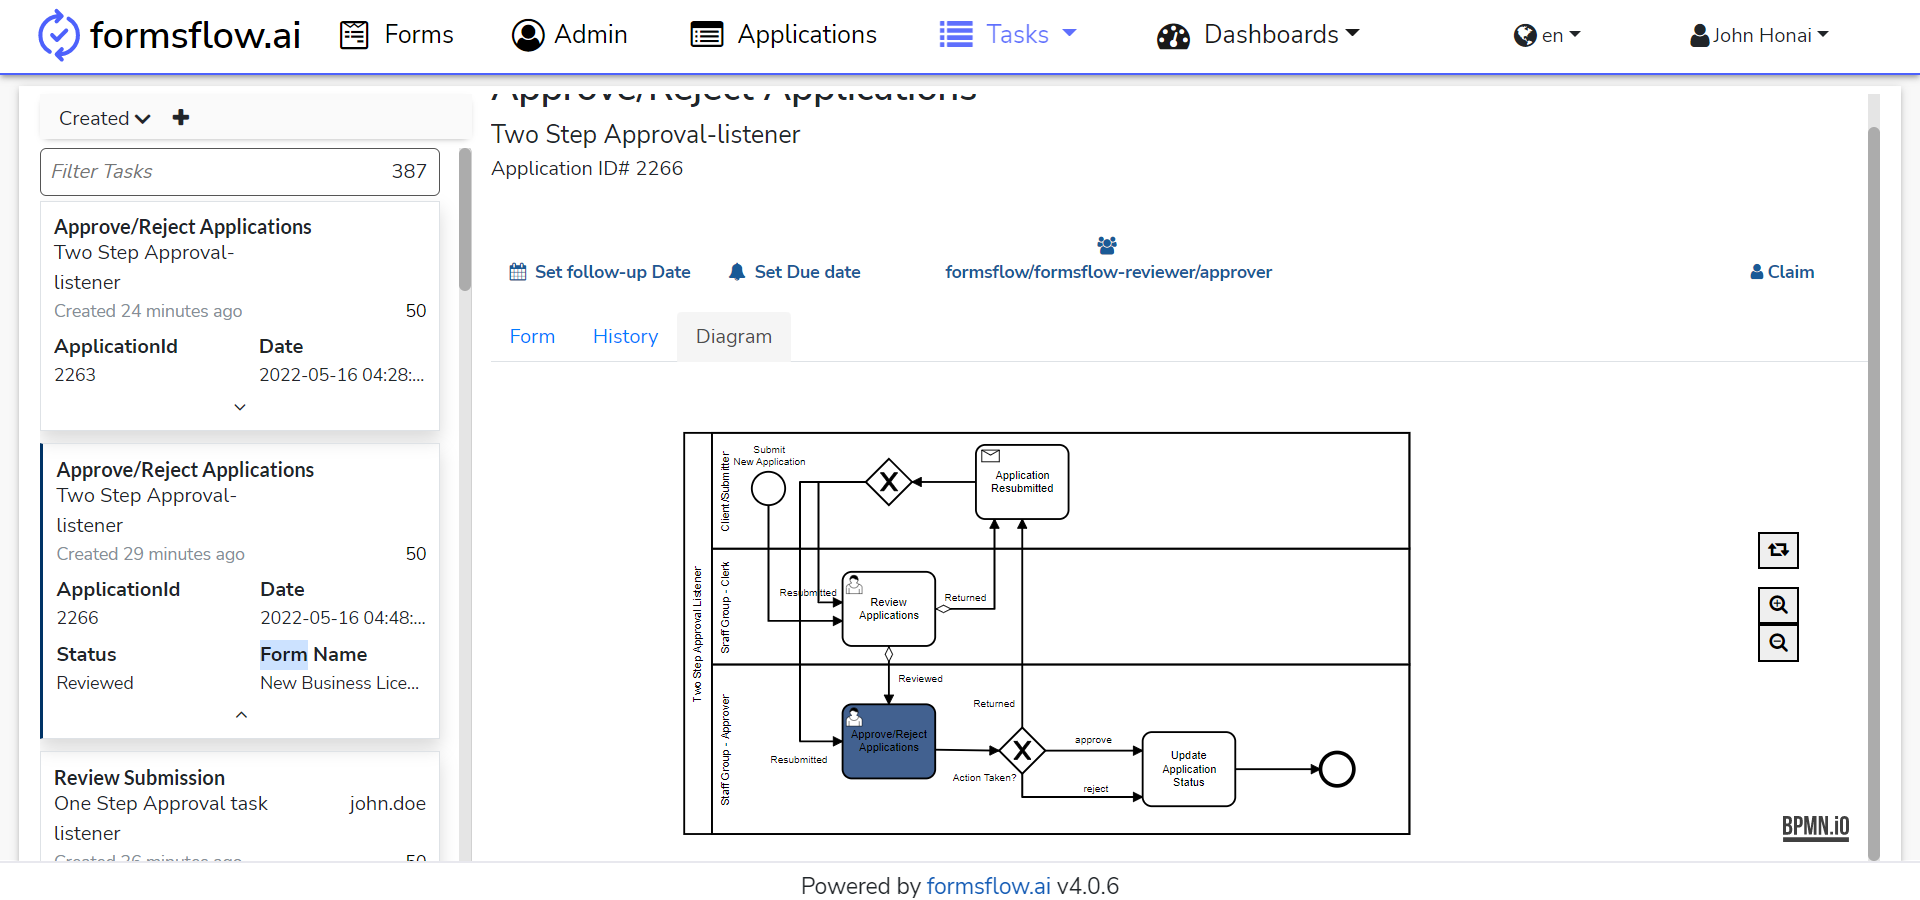
On clicking the associated task which was recently created ie. New Business License Application with Two-Step Approval-listener , the task detailed menu usually has three sections - Form, History, Diagram

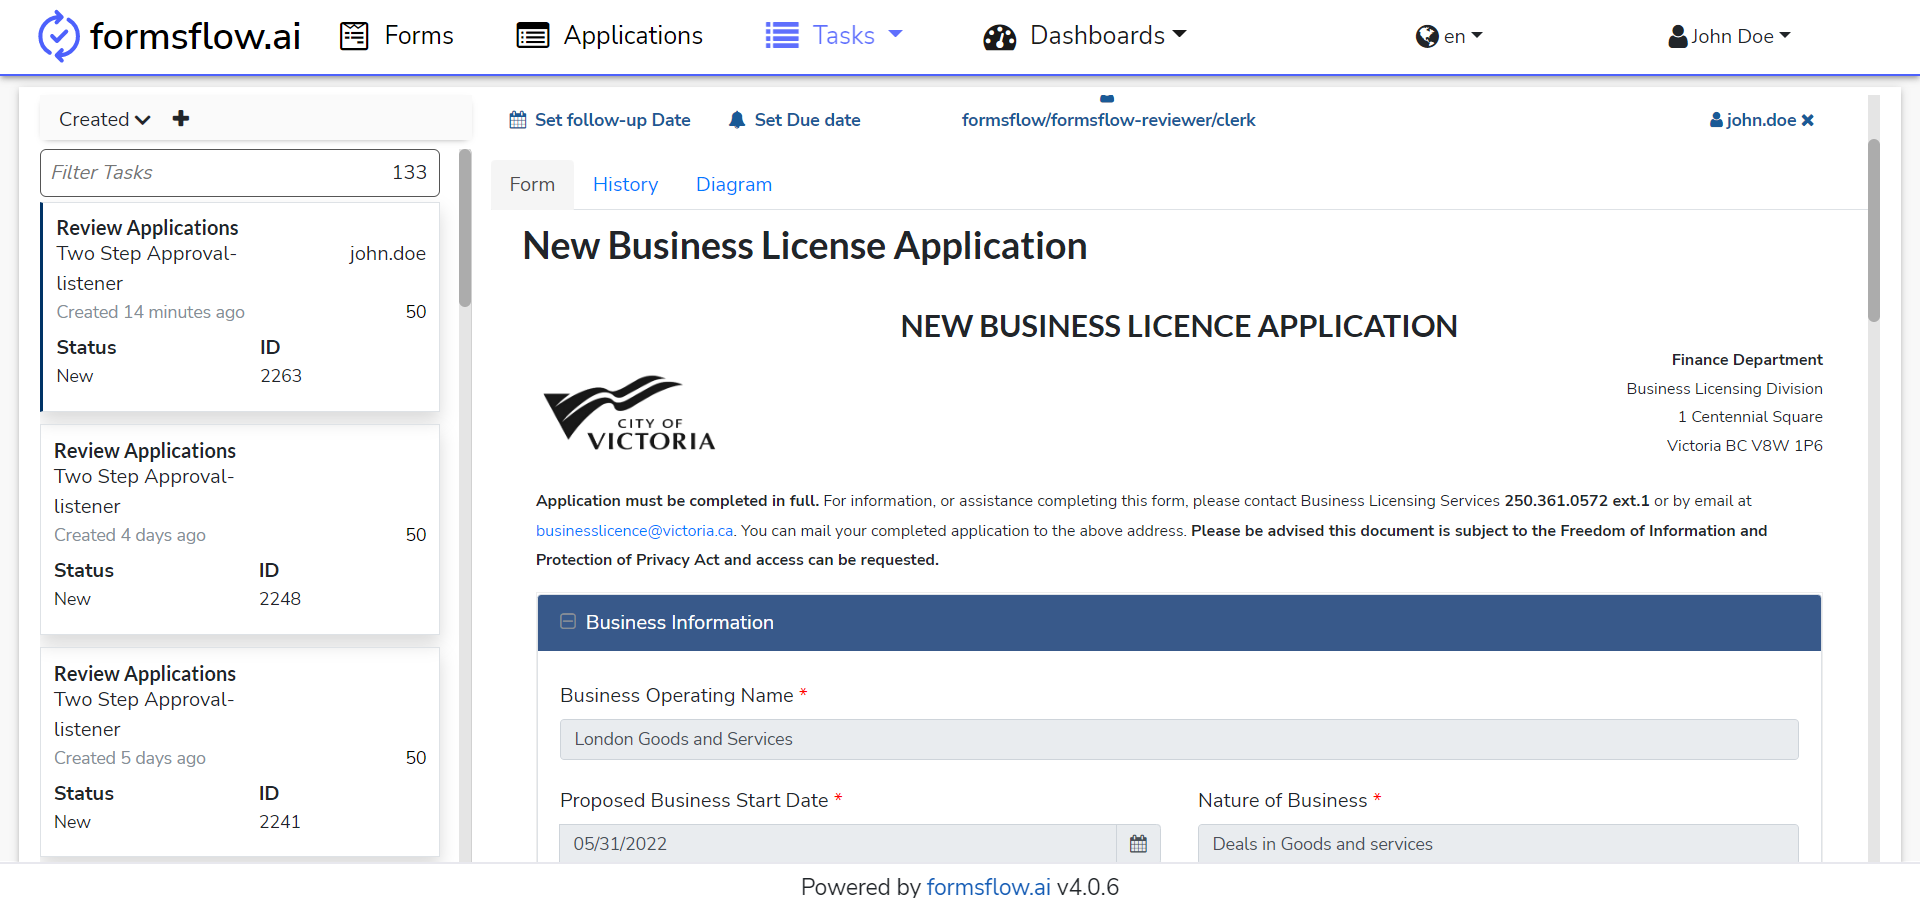
-
On claiming the task, the Clerk can fill the form and submit his/her review with feedback.
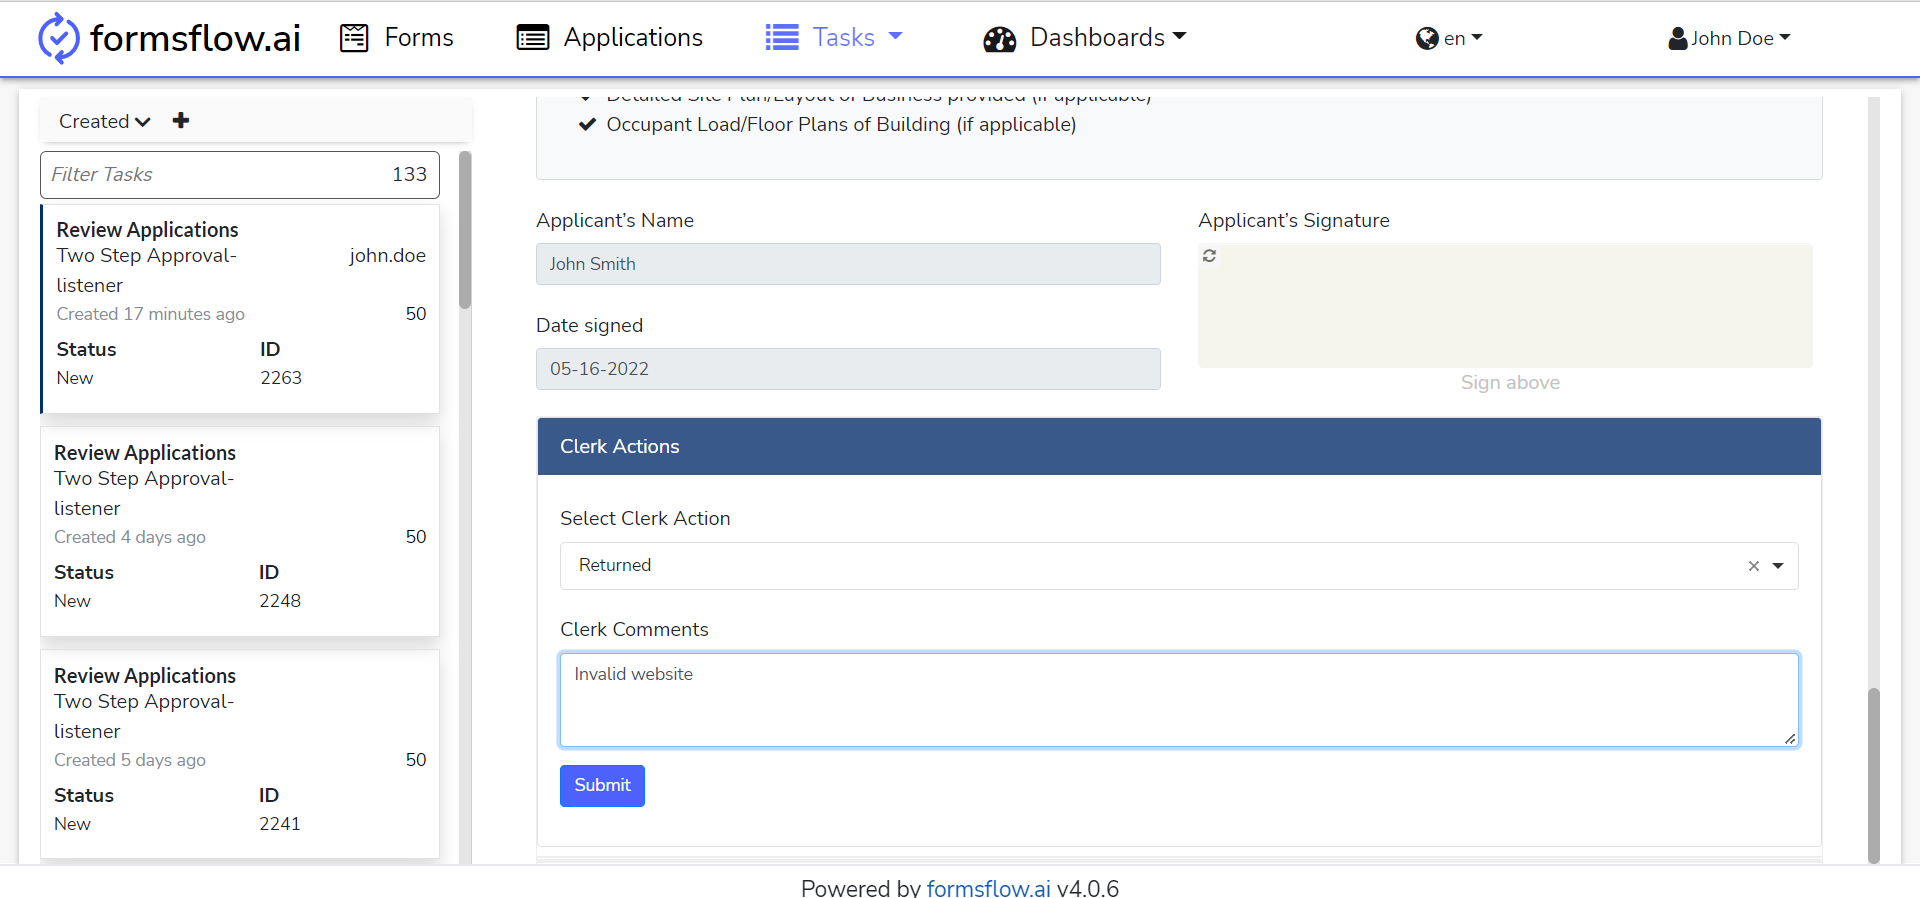
-
Return option will send the form back to the client for edit and resubmission.
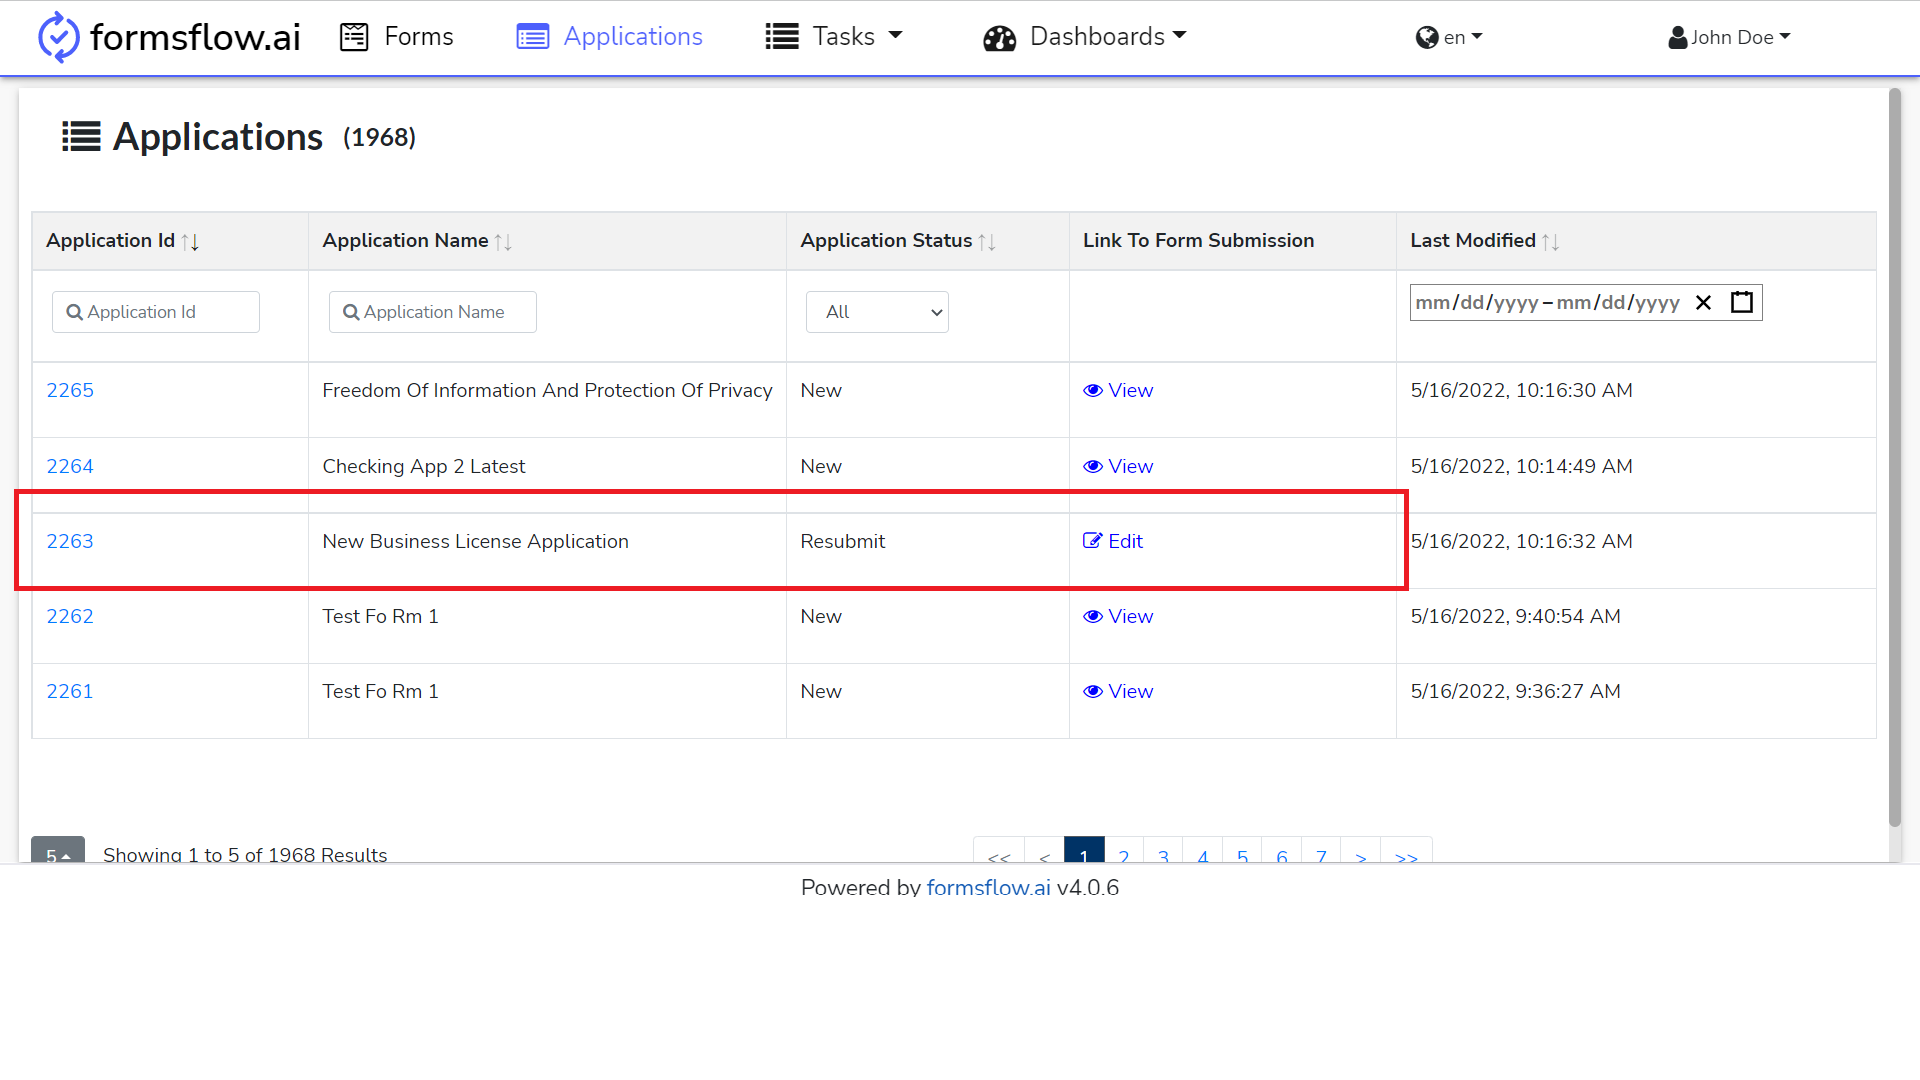
-
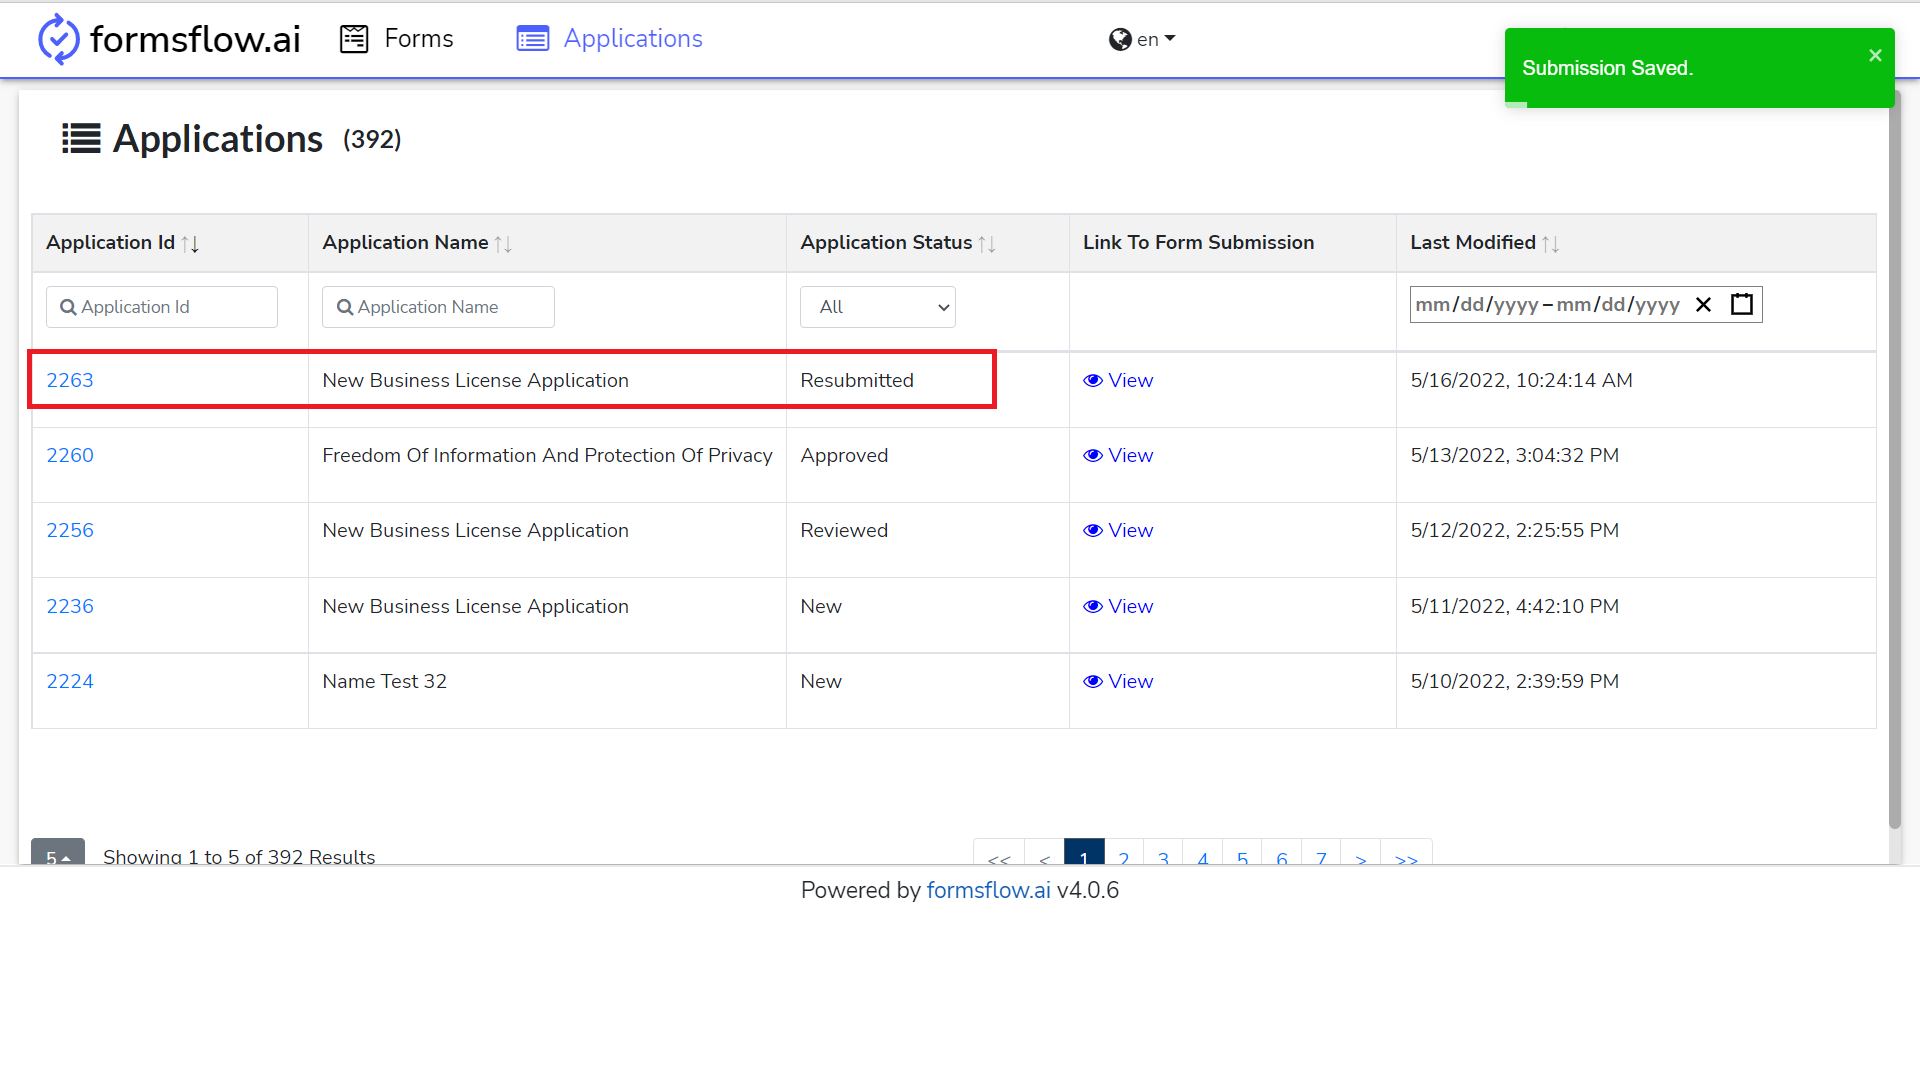
On returning, the form application status change from New to Resubmit with an edit option
- Log in as a client and resubmit the form, then status change to
resubmitted.
-
Log in as a clerk and claim the task. Submit his/her review with feedback. Then the status change to reviewed.
-
This action is completed, you can now Log out and go to Approver Steps.
Approver Steps
- Log in to http://localhost:3000 (forms-flow-web) with valid default user credentials for Approver.
- After the Log in is successful you will be redirected to http://localhost:3000/task.
- You can navigate to the Applications tab to View the Form submissions.
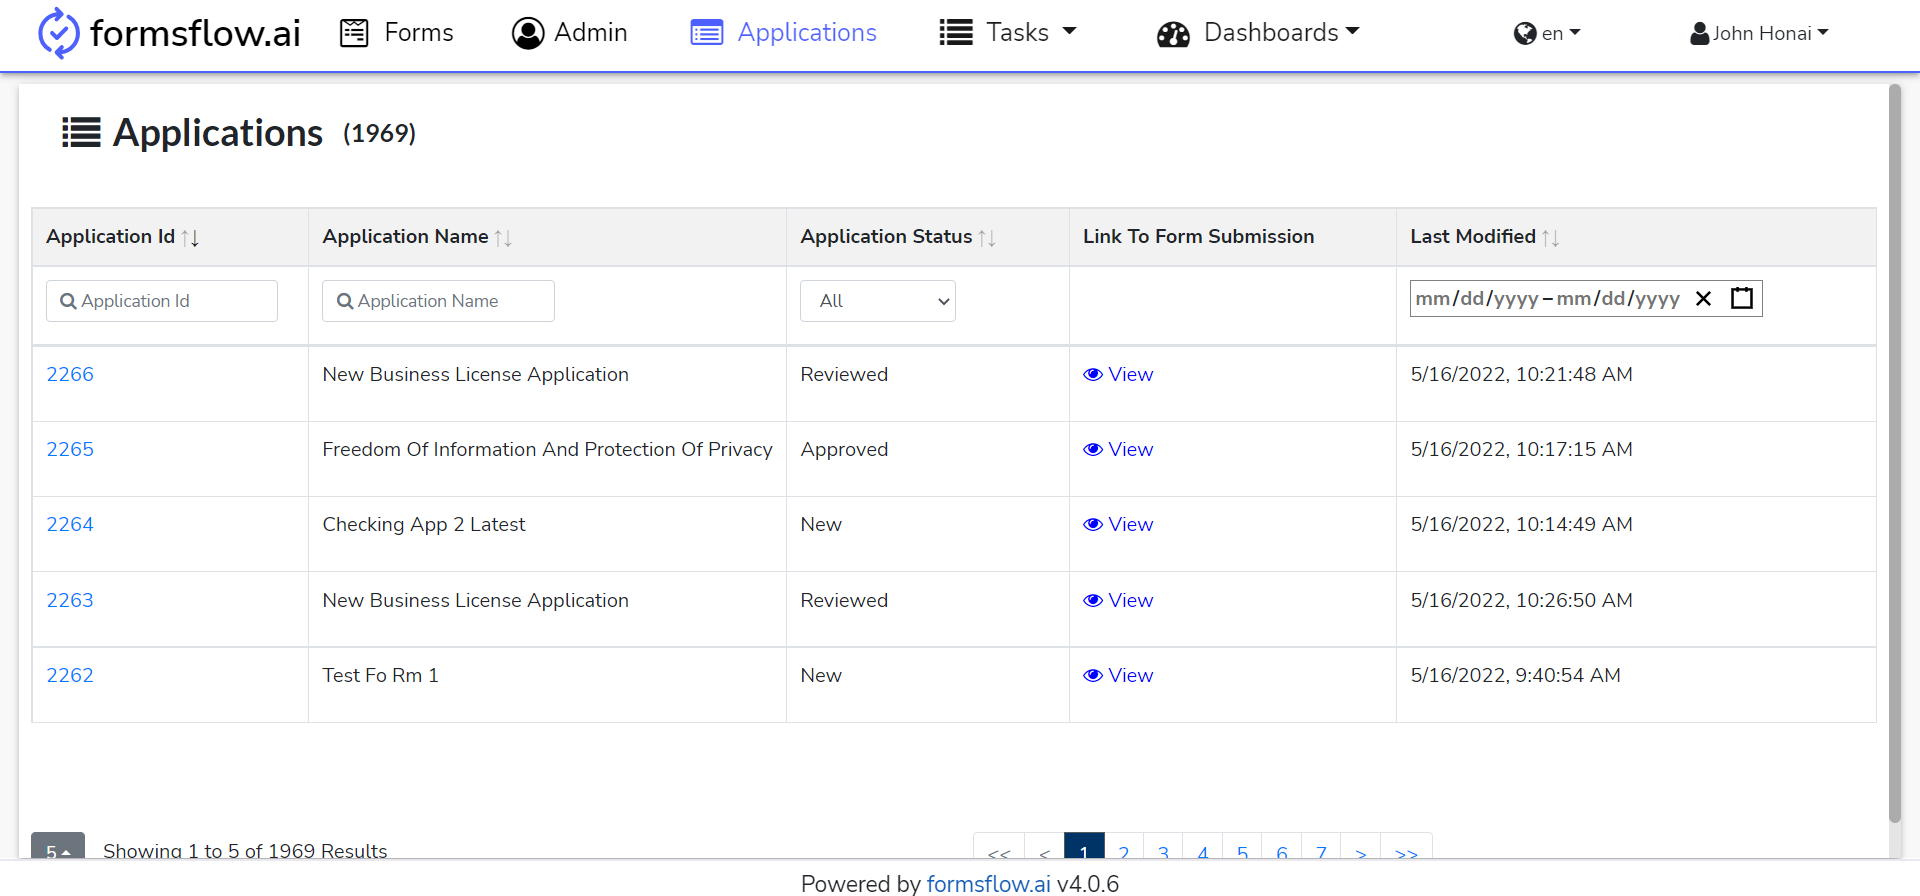
- You can View the submissions against a form by clicking on the View button.
- You can print the Form submission as a PDF.
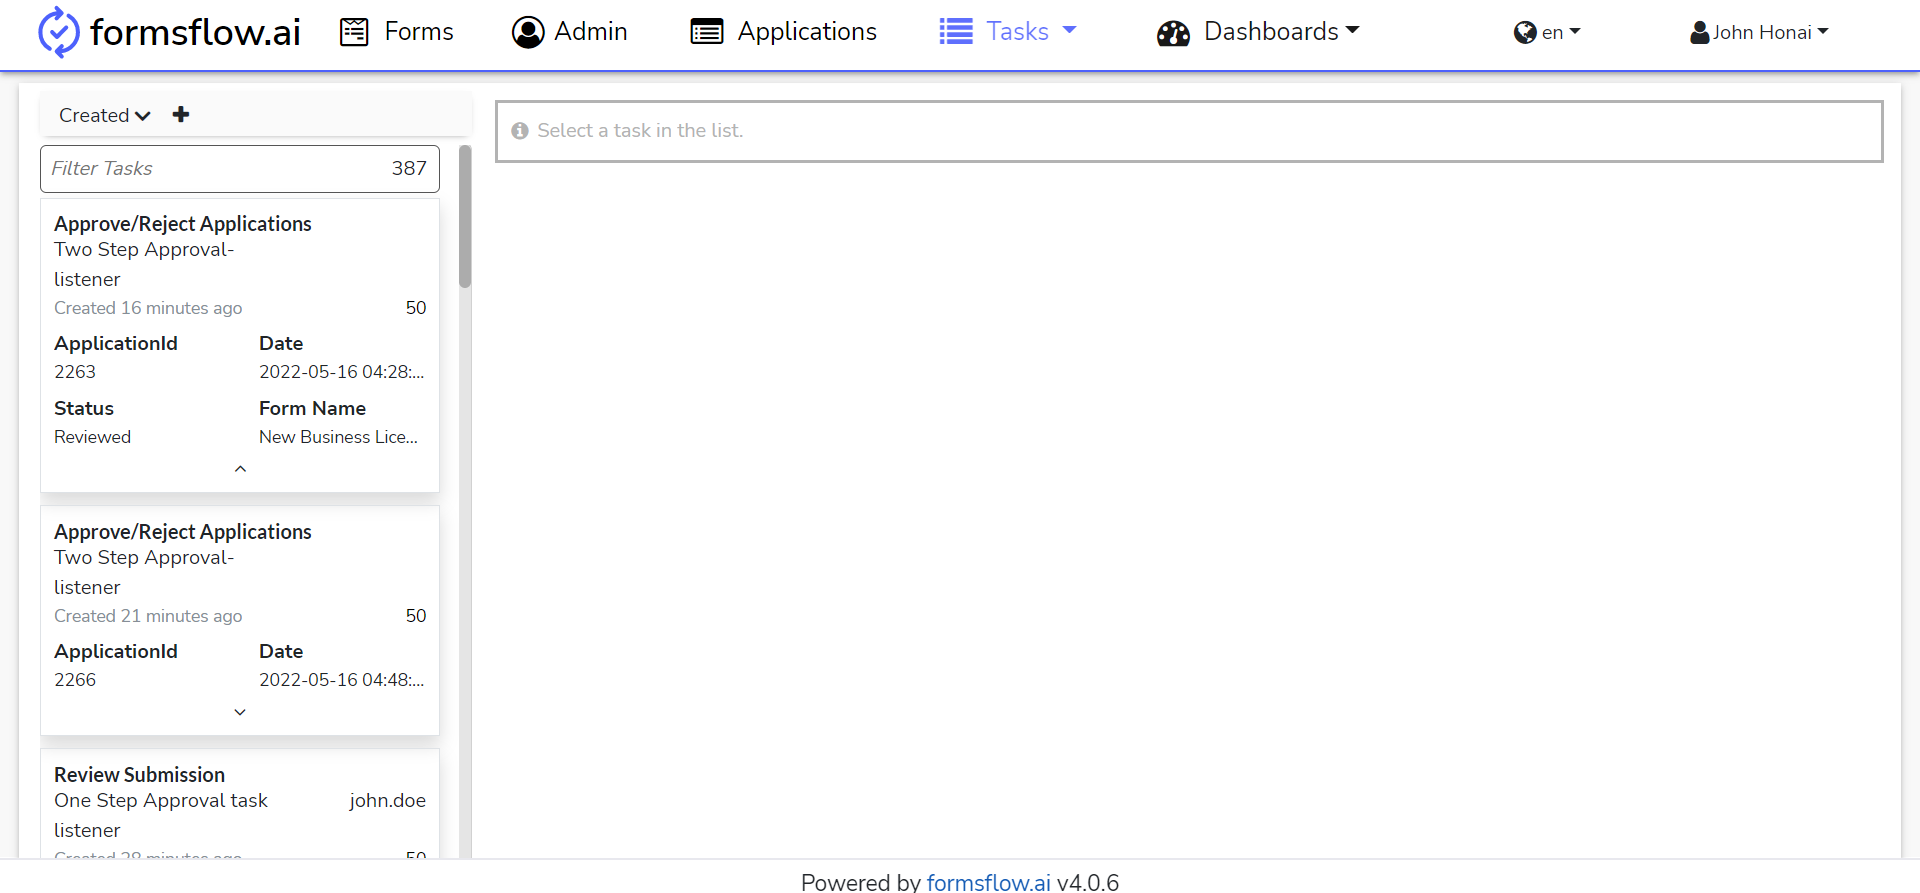
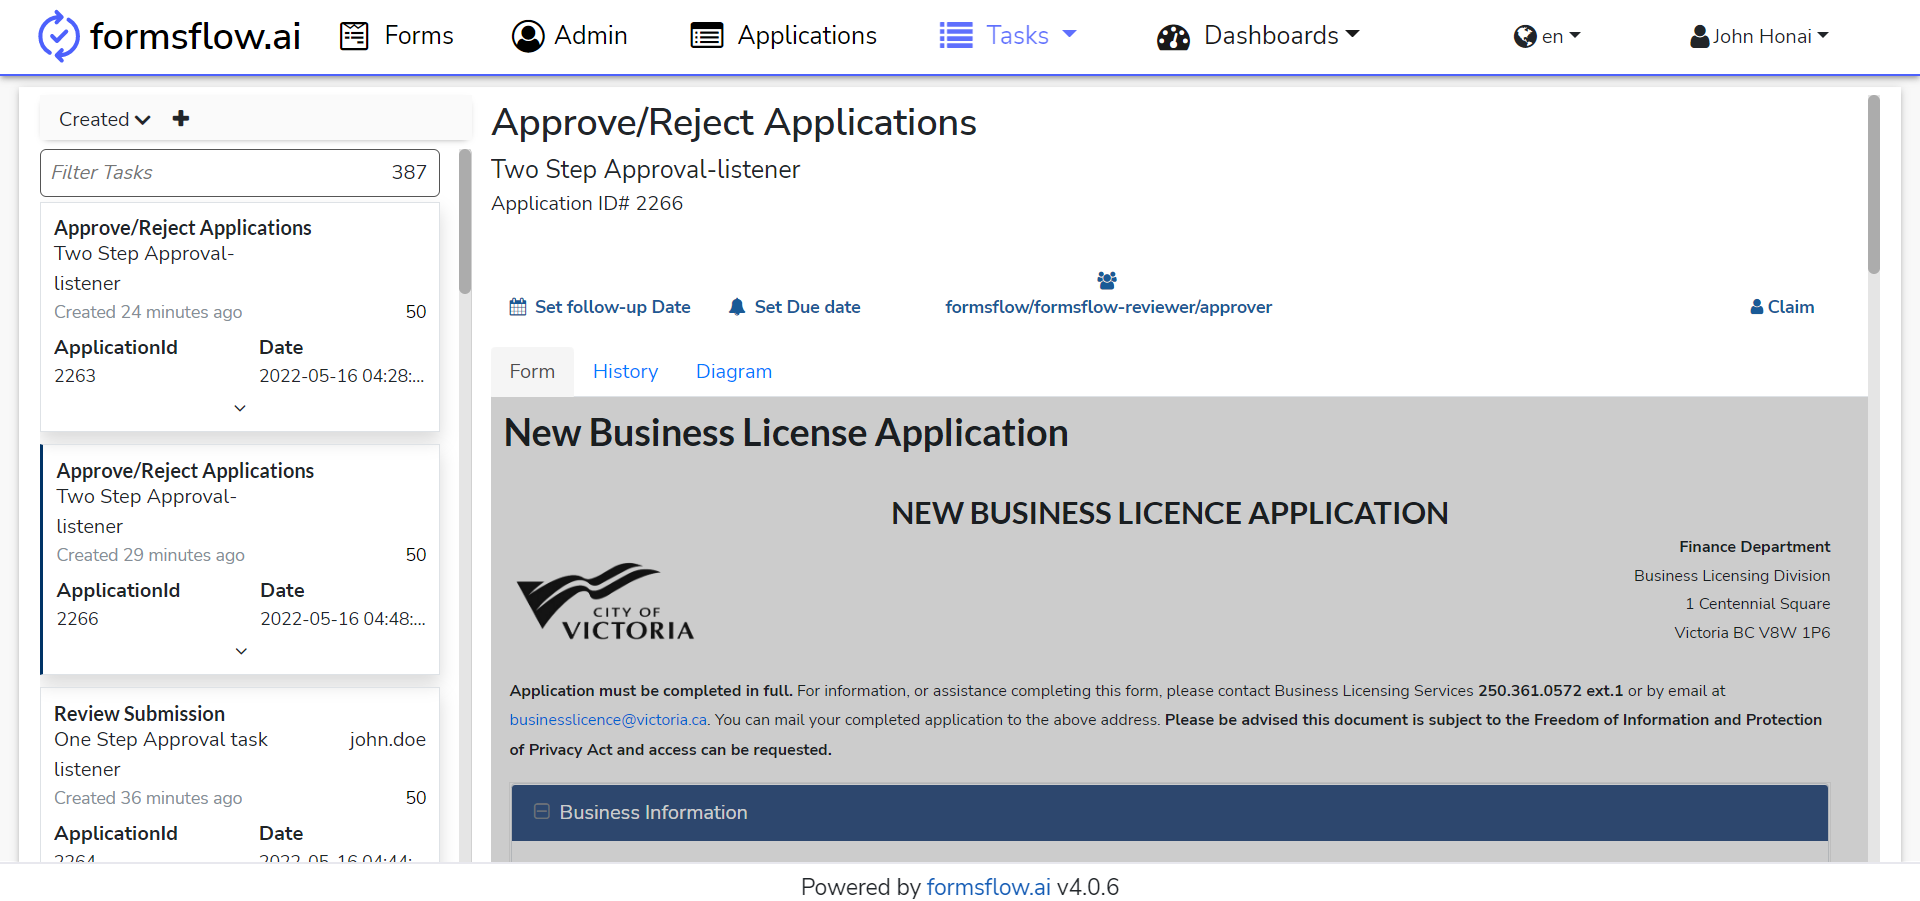
- The associated task can be found for the Approver role in the Task Menu section
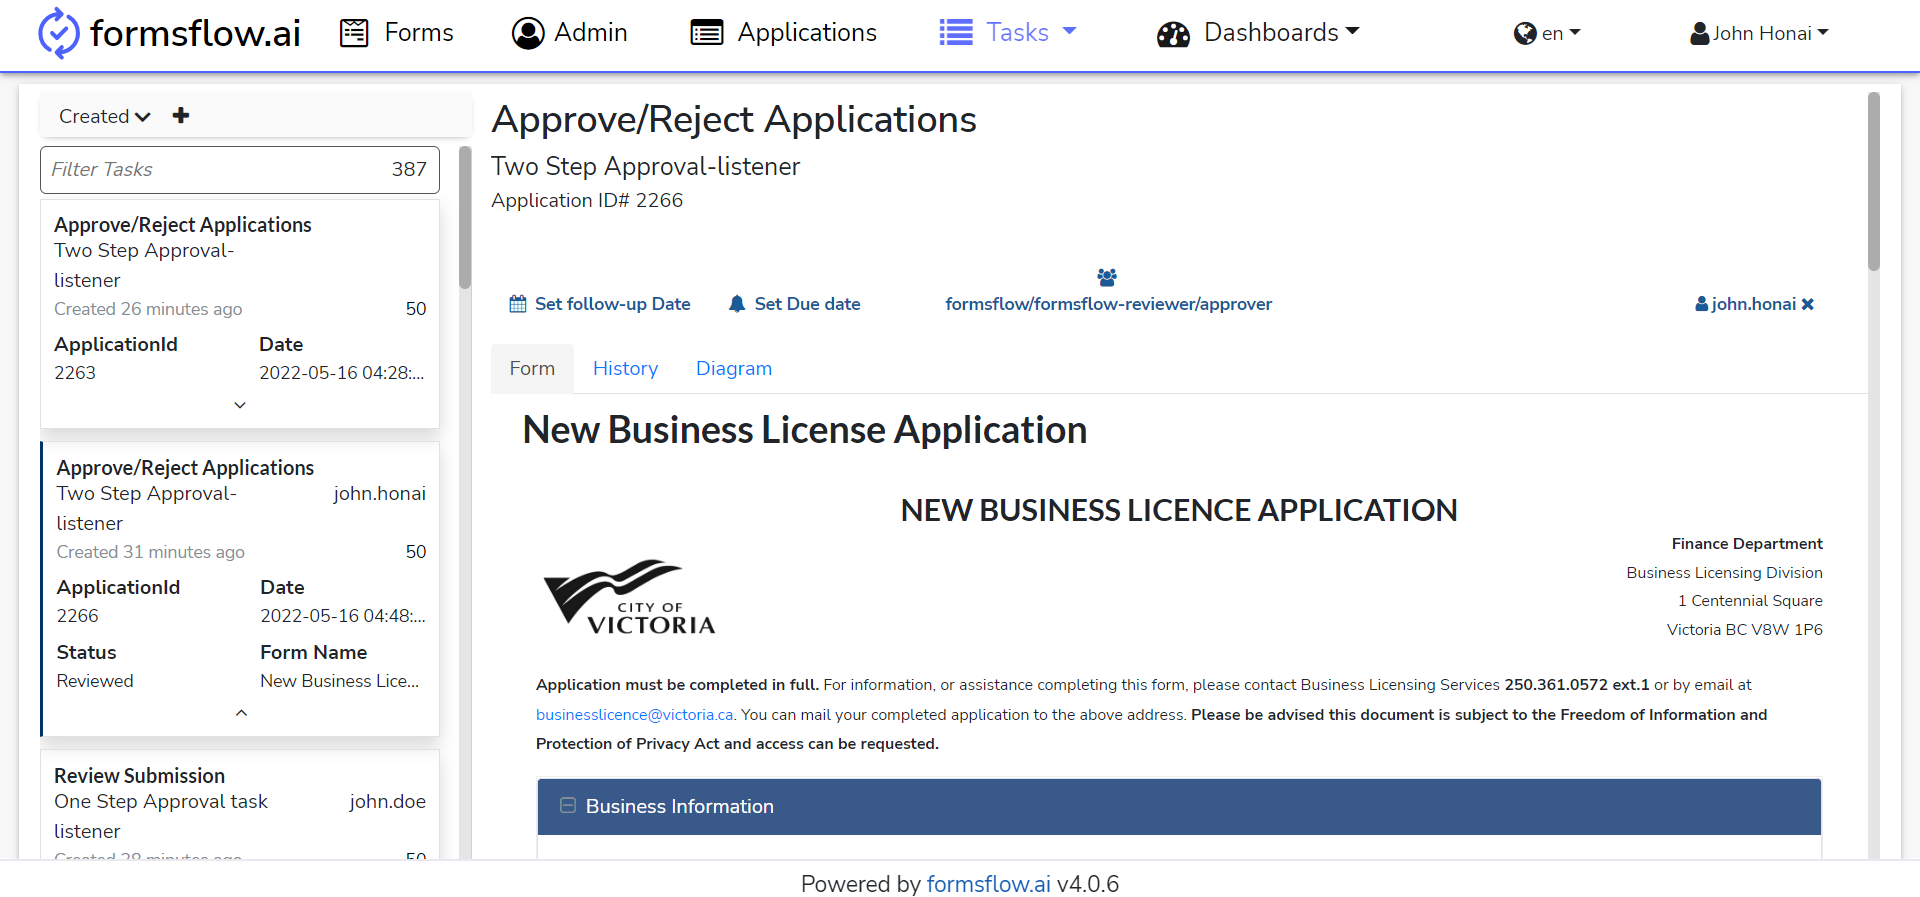
- On clicking the associated task which was recently created ie. New Business License Application with Two-Step Approval, the task detailed menu usually has three sections - Forms, History, Diagram
-
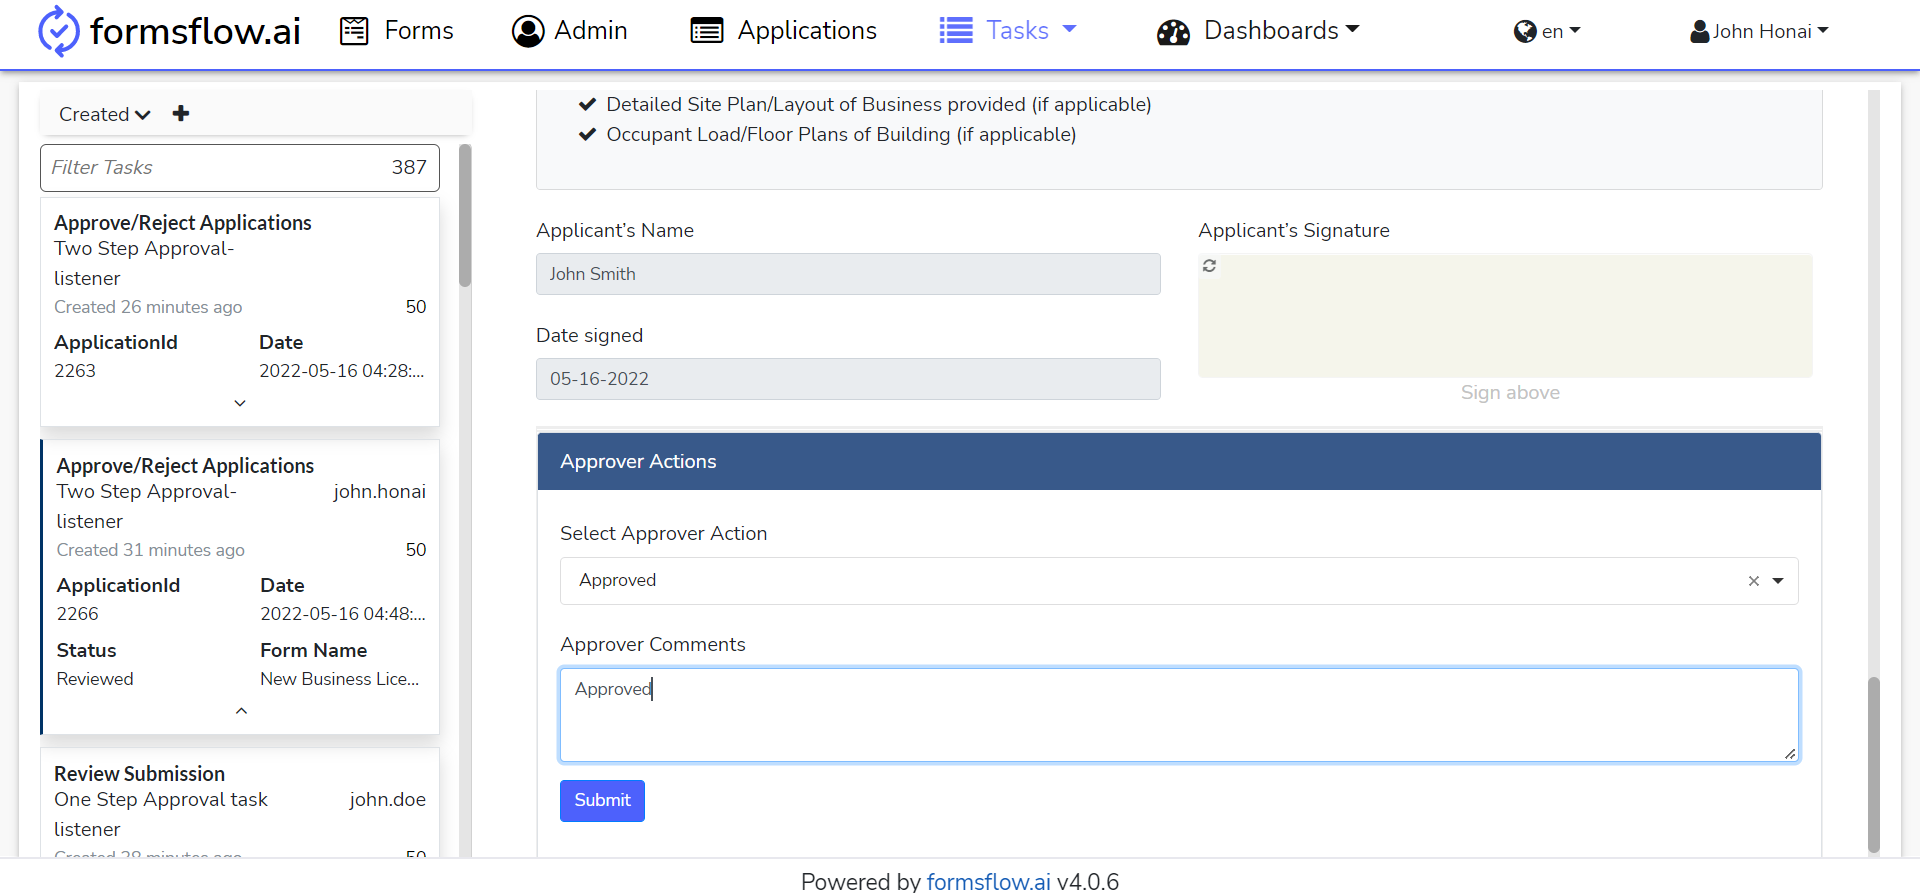
On claiming the task, the Approver can fill the form and submit his/her review(approved/rejected/returned) with feedback.
-
This action is completed, New Business License Application is completed its workflow.